
Flowers
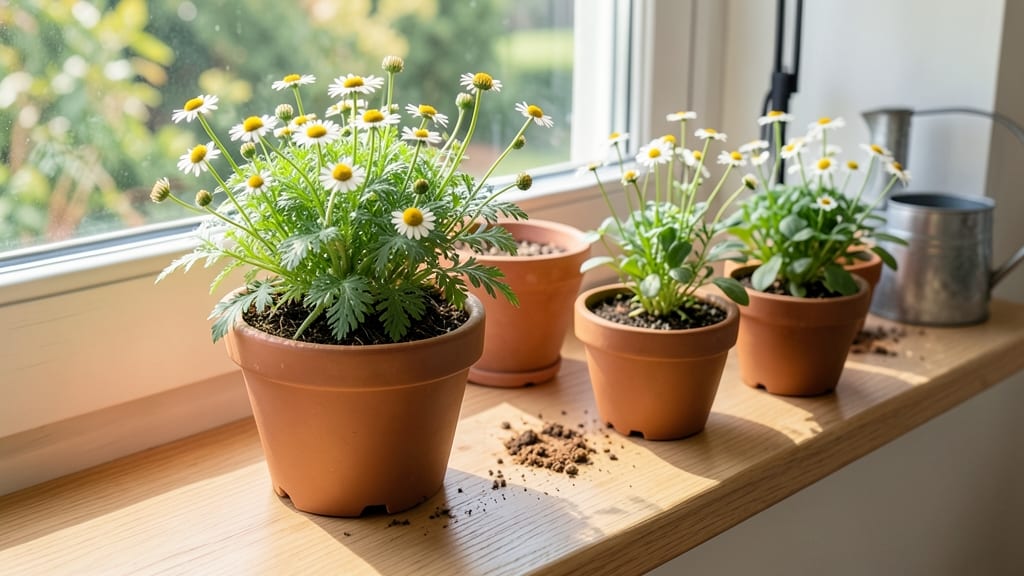
Growing chamomile indoors means fragrant blooms and soothing tea year-round without a single sunbeam. 🌿 I learned the hard way that chamomile thrives in indirect light—my first attempt in a south-facing window ended with leggy, sad stems.
The secret? Placing it near a bright, east-facing window or under a simple grow light transforms it into a lush, blooming plant.
You’ll need a 6-inch pot with drainage holes, well-draining potting mix, and a spot with 4-6 hours of indirect light daily. Chamomile’s delicate roots hate soggy soil, so let the top inch dry between waterings.
Overwatering is the fastest way to kill it—trust me, I’ve drowned more than I’d admit.
Within 6-8 weeks, you’ll see those signature daisy-like flowers appear, their apple-like scent filling your space. Snip the blooms for tea or let them dry for homemade remedies. The plants stay compact, making them perfect for shelves, windowsills, or even small balconies.
For experienced gardeners, try propagating from cuttings or experimenting with companion plants like mint (just keep them separate—mint’s aggressive!). Beginners, start with one plant and enjoy the calm, floral vibes it brings indoors.
📚 In This Guide
- What you need
- Instructions
- Tips and common mistakes
- Wrapping up and next steps
What you need
- ● Chamomile seeds: Choose German chamomile (Matricaria chamomilla) or Roman chamomile (Chamaemelum nobile). Buy 1–2 packets (50–100 seeds each) for a steady harvest.
- ● Containers: 6–8" pots with drainage holes (2–3 plants per pot) or a shallow tray for germination. Use terracotta or fabric pots for breathability.
- ● Potting mix: Lightweight, well-draining soil blend (e.g., cactus/succulent mix + perlite, 70/30 ratio). Avoid heavy garden soil.
- ● Grow lights: Full-spectrum LED (12–16W) or fluorescent bulb for 12–14 hours/day. Place 6–12" above plants.
- ● Watering can or spray bottle: Chamomile hates soggy roots—opt for gentle misting or bottom-watering.
- ○ Humidity dome or plastic wrap: Optional for seedling stage (remove after sprouts appear).
- ● Seedling heat mat: Speeds up germination (70–75°F ideal).
- ● Fertilizer: Diluted fish emulsion (10-10-10) or organic compost tea every 4–6 weeks.
- ● Pruning shears: For trimming spent blooms to encourage more flowers.
- ● Drying rack or screen: To preserve harvested flowers for tea or crafts.
Step-by-step instructions for growing chamomile indoors
Here's how to cultivate fragrant chamomile year-round without relying on direct sunlight.
🌱 Step 1: Select and Prepare Your Containers
Chamomile thrives in well-draining containers, so choose pots with drainage holes at least 6 inches deep. I prefer terracotta because it wicks away excess moisture—chamomile roots rot quickly in soggy conditions. For four plants, use 4-inch diameter pots to give each plant room to grow without crowding.
Fill each pot with a light, airy seed-starting mix blended with 20% perlite. The goal is a soil texture that crumbles easily when squeezed—chamomile hates compacted roots. Press the mix down gently to remove air pockets, then water until moisture reaches 2 inches deep. Let excess water drain completely before planting.
🌱 Step 2: Sow Seeds at the Right Depth
Chamomile seeds are tiny, so I use a toothpick to place 2-3 seeds per pot at a depth of ¼ inch. Sowing too deep delays germination because the seedling must push through more soil. Cover lightly with a thin layer of additional mix—just enough to obscure the seeds.
Mist the soil surface with a spray bottle until evenly damp but not wet. A heavy watering can will dislodge the seeds or bury them too deep. Place the pots in a warm spot (70-75°F) and cover with a clear plastic dome or wrap to retain humidity. Germination takes 14-21 days—patience is key here.
☀️ Step 3: Provide Indirect Light and Gradual Airflow
Once sprouts appear, remove the dome immediately to prevent damping-off. Chamomile needs bright, indirect light—think 6-8 hours daily of filtered sunlight or a grow light 12-18 inches above the plants. A south-facing window works, but east or west exposures also suffice.
Rotate pots a quarter turn every 3 days so plants grow upright instead of leaning. You'll notice stems elongating toward the light—this is a sign they need more intensity. If leaves look pale or leggy, move the plants closer to the light source or increase grow light hours.
💧 Step 4: Water and Fertilize for Healthy Growth
Water chamomile when the top inch of soil feels dry—overwatering is the fastest way to kill these delicate plants. I use a spray bottle for gentle moisture, avoiding the leaves to prevent fungal issues. Chamomile prefers slightly dry conditions, so err on the side of underwatering rather than overwatering.
After 4 weeks, when seedlings show their first true leaves, switch to a balanced liquid fertilizer diluted to half-strength. Feed every 4 weeks during the growing season. You'll see new leaves emerge within a week—that's your signal everything is working. Reduce fertilization in winter when growth slows.
✂️ Step 5: Prune and Harvest for Continuous Blooms
Pinch back the tips of stems when plants reach 6 inches tall to encourage bushier growth. This step is crucial—without pruning, chamomile grows tall and leggy with fewer flowers. Use clean scissors to snip just above a set of leaves, always cutting at a 45-degree angle to prevent water pooling.
Harvest flowers when fully open but before petals begin to brown. Gently twist the flower head to remove it—don't cut stems unless you're pruning for shape. Dry the flowers on a screen in a warm, dark place for 1-2 weeks until completely crisp. You'll have fragrant blooms ready for tea or potpourri within 8-10 weeks of planting.
Tips & tricks for perfect indoor chamomile cultivation
Here's what nobody tells you about growing chamomile indoors—these tricks make all the difference between wilting disappointment and fragrant success.
Container Selection Wisdom: Terracotta pots aren't just my preference—they're essential for chamomile's delicate roots. The porous material helps prevent moisture buildup that leads to root rot, especially important since we're growing without direct sunlight. If you must use plastic, add an extra 10% perlite to the mix to improve drainage. The 4-inch diameter pots specified give each plant enough room to develop strong root systems without competing for nutrients.
Germination Environment Secrets: That 70-75°F warmth requirement isn't just a number—it's the sweet spot for breaking chamomile's dormancy. I've found that placing pots on top of refrigerators (where it's naturally warm) works better than most indoor locations. The plastic dome isn't optional—it creates the 90% humidity chamomile seeds need to germinate. Remove it immediately after sprouts appear to prevent damping-off disease, which turns tender seedlings to mush overnight.
Lighting Strategy: Those 6-8 hours of indirect light should be bright enough to read by—chamomile won't tolerate dim conditions. I position my grow lights on a timer for consistency, but if using natural light, rotate your plants quarter-turn every 3 days to prevent them from leaning toward one light source. The pale, leggy growth you might see is your plant begging for more intensity—this is when you should move it closer to the light or increase grow light hours by 1-2 hours daily.
Pruning Technique: The 6-inch height for pinching isn't arbitrary—it's when chamomile develops enough leaf mass to support bushier growth. Always cut at a 45-degree angle just above a leaf node to prevent water from pooling on the stem, which can cause rot. I've learned the hard way that cutting too close to the stem leaves a wound that takes weeks to heal, making plants vulnerable to infections. Use clean scissors each time to prevent spreading disease between plants.
Pro Tips for Grow Chamomile Indoors
- Here's what nobody tells you about growing chamomile indoors—these tricks make all the difference between wilting dis...
- Container Selection Wisdom: Terracotta pots aren't just my preference—they're essential for chamomile's delicate root...
- Germination Environment Secrets: That 70-75°F warmth requirement isn't just a number—it's the sweet spot for breaking...
Frequently asked questions
Got questions about growing chamomile indoors? You’re not alone! Here are answers to the most common queries to help you cultivate this soothing herb with confidence.
Can I grow chamomile indoors without sunlight?
Yes! Chamomile thrives under grow lights (12–16 hours/day) or near a bright window. South-facing windows work best, but supplement with LED grow lights if natural light is weak. Just avoid direct afternoon sun, which can scorch delicate leaves.
How long does it take for indoor chamomile to bloom?
With consistent care, expect first blooms in 8–12 weeks from seed. Use a 14-hour light cycle daily to speed up flowering. Patience is key—chamomile rewards slow growers with fragrant, white-petaled blooms!
What if my chamomile leaves turn yellow?
Yellowing leaves often signal overwatering or nutrient deficiency. Let the top inch of soil dry between waterings, and fertilize lightly (every 4–6 weeks) with a balanced, diluted liquid fertilizer. Check for pests too—aphids love chamomile!
Can I use dried chamomile from my indoor plants for tea?
Once flowers open, harvest them by hand (pinch stems just above the bloom) and dry in a dark, airy space for 1–2 weeks. Store petals in an airtight jar for soothing herbal tea. Skip the center cones—they’re bitter!
What’s the easiest alternative if chamomile proves tricky?
Try calendula or lavender—both are low-light-tolerant, fragrant, and beginner-friendly. Calendula even has edible petals for salads! Just mimic chamomile’s care: bright indirect light, well-draining soil, and occasional pruning.
Wrapping up and next steps
Growing chamomile indoors is a rewarding way to enjoy its soothing scent and gentle beauty—without needing sunlight! With the right setup, you’ll have fragrant blooms year-round to sip as tea, craft into remedies, or simply admire. Start small, stay patient, and let your indoor garden thrive.
Ready to take the next step? Experiment with varieties—try Roman or German chamomile—or share your progress with fellow plant lovers! Your cozy, aromatic oasis awaits. 🌿✨