
Container Gardens
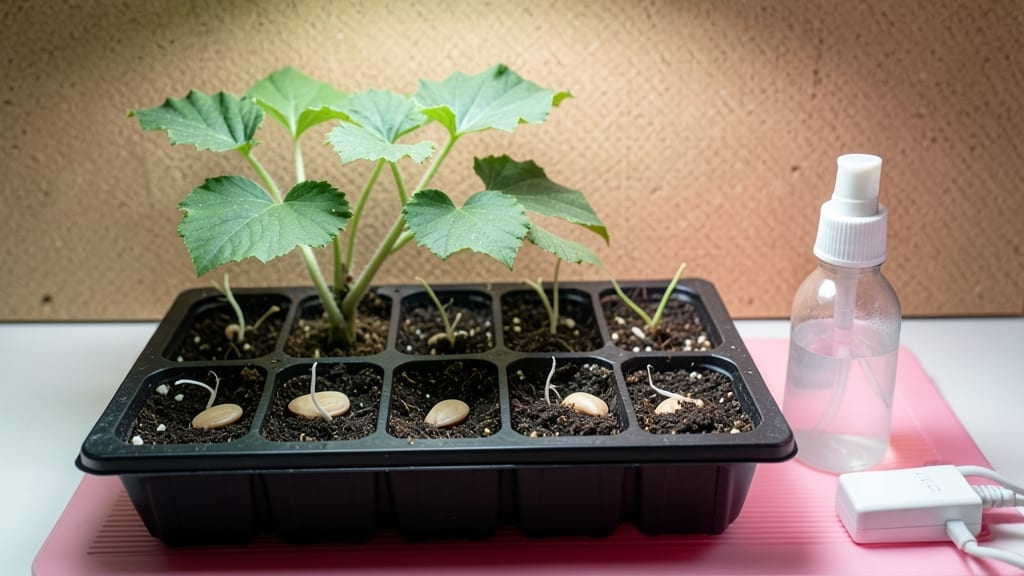
Growing pumpkin seeds indoors lets you enjoy vines and fruit year-round without relying on summer sunshine. 🌱 I’ve grown mini pumpkins in my living room—yes, really—and the secret isn’t fancy equipment but smart light, space, and variety choices.
Most people assume pumpkins need acres, but compact varieties thrive in containers with the right care.
The trick starts with 5-gallon pots and a sunny window (or grow light) for at least 6-8 hours daily. Use well-draining soil mixed with compost, and pick small varieties like ‘Jack Be Little’ or ‘Miniature Potato’.
You’ll need patience—indoor pumpkins grow slower than outdoors, but with consistent light and warmth, you’ll see tendrils climb within weeks.
By 8-10 weeks, you’ll have blooms (and maybe even tiny pumpkins if you hand-pollinate). The vines stay manageable indoors, and the harvest—while small—is a conversation starter. The real magic? No more waiting for summer to grow something fresh, and zero excuses for not gardening.
Works for apartments, offices, or greenhouses. Just watch for overwatering (let soil dry slightly between waterings) and adjust light as seasons change. Ready to grow pumpkins without the yard?
📚 In This Guide
- What you need
- Instructions
- Tips and common mistakes
- Wrapping up and next steps
What you need
- ● Pumpkin seeds: Choose heirloom or dwarf varieties (e.g., Jack Be Little or Baby Boo) for indoor success. Buy 3–5 seeds per container.
- ● Grow lights: A full-spectrum LED grow light (e.g., 12–16 hours/day) with adjustable height. Look for 10,000–20,000 lux brightness.
- ● Containers: Large pots (at least 5-gallon capacity) with drainage holes. Use 1–2 containers per seed for space.
- ● High-quality potting mix: A seed-starting mix with perlite or vermiculite for aeration. Avoid garden soil!
- ● Humidity dome or plastic wrap: To retain moisture while seeds germinate.
- ● Watering can or spray bottle: For gentle hydration—avoid oversaturating!
- ● Fertilizer: A balanced liquid fertilizer (e.g., 10-10-10) diluted to half-strength for seedlings.
- ○ Thermometer/hygrometer (optional but helpful): Ideal soil temp: 70–90°F; humidity: 70–80%.
- ● Seedling heat mat: Speeds up germination if your space is chilly.
- ● Trellis or stakes: For vining varieties to save space (e.g., 3–4 ft tall).
- ● Grow tent or reflective surfaces: Maximizes light efficiency if using artificial grow lights.
- ● pH test kit: Keep soil pH between 6.0–6.8 for optimal nutrient uptake.
- ● Pruning shears: For trimming excess vines or leaves to redirect energy.
Step-by-step instructions for growing pumpkin seeds indoors
Here's how to coax those giant vines and sweet fruit from tiny seeds—no greenhouse needed.
🌱 Step 1: Select and Prep Your Seeds
Choose heirloom or small-fruited varieties like 'Jack Be Little' or 'Sugar Pie'—they thrive indoors where space is limited. Avoid giant pumpkins; their vines need too much room. Soak seeds in warm water for 12 hours before planting to soften the tough outer shell and speed germination. I like to place them in a damp paper towel overnight—this ensures they'll sprout faster and more evenly.
After soaking, gently rub the seeds between your fingers to remove any remaining outer coating. This small step prevents mold and helps roots emerge cleanly. Plant 2-3 seeds per 5-gallon container (you'll thin later). The extra seeds account for germination failures—pumpkin seeds sometimes play hard to get.
🪴 Step 2: Prepare Containers and Soil
Use 5-gallon fabric grow bags or large plastic pots with drainage holes—pumpkin roots need deep soil and room to spread. Fill each container with sterile potting mix mixed with 20% perlite for drainage. Avoid garden soil; it compacts and suffocates roots. Moisten the mix until it feels like a damp sponge—not soggy, but holding moisture when squeezed.
Plant seeds 1 inch deep, pressing lightly but not compacting the soil. Space them 4-6 inches apart in the container. Label each pot with the variety and date—you'll forget which is which once those vines start climbing. Place the containers in a warm spot (75-85°F) like on top of the fridge or under a heat mat. Germination takes 7-14 days, so patience is key.
☀️ Step 3: Provide Light and Airflow
Pumpkin seedlings need 12-14 hours of bright light daily—a south-facing window won't cut it. Set up full-spectrum LED grow lights 6 inches above the seedlings and adjust as they grow. Without enough light, vines stretch weakly (called "leggy") and produce small, bitter fruit. You'll know the light is right when leaves are dark green and compact, not pale and stretched.
Once seedlings emerge, remove the humidity dome (if used) immediately to prevent damping-off disease, which causes stems to rot at the base. Place a small fan on low 3-4 inches away to encourage strong stems. Weak airflow leads to floppy, disease-prone plants. Rotate pots quarter-turn daily so vines grow straight toward the light.
💧 Step 4: Water and Fertilize for Growth
Water when the top inch of soil feels dry—pumpkins hate soggy roots but also need consistent moisture. Use a watering can with a narrow spout to direct water to the soil, not the leaves (this prevents fungal diseases). After watering, let excess drain completely—pumpkin roots suffocate in standing water. I fertilize with balanced liquid fertilizer (10-10-10) every 2 weeks, cutting back to half-strength once fruit forms to avoid bitter flavors.
When vines reach 12 inches long, start training them along a trellis or sturdy wire frame. Pumpkins are heavy, so secure the trellis to a wall or sturdy post. Prune side shoots to 2-3 main vines—this focuses the plant's energy on fewer, stronger stems. You'll see male and female flowers appear after 6-8 weeks; the female has a tiny pumpkin at its base.
⏰ Step 5: Pollinate and Harvest
If you're indoors, hand-pollinate flowers using a small paintbrush. Transfer pollen from male flowers (long stems, no fruit) to female flowers (swollen base) in the morning when they're open. Do this for 3 consecutive days to ensure fruit set. Once pollinated, female flowers will wilt, and a small pumpkin will form within 7-10 days. Thin to 1-2 pumpkins per plant—too many compete for nutrients.
Harvest when the stem nearest the fruit turns brown and papery, usually 80-100 days after planting. Cut the stem with 2 inches of vine attached to prevent rot. Cure pumpkins in a warm, dry (70-80°F) spot for 10 days to develop flavor and harden the skin. Store in a cool, dark place for 2-3 months—your indoor-grown pumpkins will outshine store-bought every time.
Tips & tricks for indoor pumpkin cultivation
Real talk: Growing pumpkins indoors isn't just possible—it's a game-changer for urban gardeners. Here's how to turn potential pitfalls into foolproof success.
Germination Hack: After soaking your seeds for the required 12 hours, place them between damp paper towels in a sealed plastic bag. Store them in a warm spot (like your fridge top) where they'll stay consistently 75-85°F. Check daily—you'll see tiny roots emerge within 2-3 days (this is normal and speeds up planting). The key is keeping that paper towel evenly moist without being soggy; I use a spray bottle for precision.
Lighting Strategy: Those 12-14 hours of bright light don't have to mean expensive grow lights forever. Start with LED bulbs 6 inches above seedlings, but once vines reach 12 inches, you can gradually increase the distance to 12 inches as plants grow. I've seen dramatic improvements when I adjust the light height weekly—plants grow stockier instead of leggy. Pro tip: Use a timer to automate your lights; pumpkins thrive on consistency.
Soil Science: The sterile potting mix with 20% perlite isn't just about drainage—it's about creating the perfect air-to-moisture ratio. I add a handful of worm castings to each container before planting; this gives seedlings a nutrient boost without overwhelming them. The castings also improve soil structure, which is especially important since pumpkin roots need room to expand. Just mix it in gently—don't disturb the seeds you've just planted.
Pruning Insight: When you see those male and female flowers appear after 6-8 weeks, here's what nobody tells you: The female flowers (with tiny pumpkins at their base) are the ones to keep. Remove any male flowers you see—this redirects the plant's energy toward fruit development. I use clean scissors to snip stems at the base, being careful not to damage the main vines you're training along your trellis.
Pro Tips for Growing Pumpkin Seeds Indoors
- Real talk: Growing pumpkins indoors isn't just possible—it's a game-changer for urban gardeners. Here's how to turn p...
- Germination Hack: After soaking your seeds for the required 12 hours, place them between damp paper towels in a seale...
- Lighting Strategy: Those 12-14 hours of bright light don't have to mean expensive grow lights forever. Start with LED...
Frequently asked questions
about growing pumpkin seeds indoors—because curiosity is the first step to a thriving harvest!Can I grow pumpkins indoors without sunlight?
Use a grow light (LED or fluorescent) for 12–16 hours daily. Place it 6–12 inches above seedlings to mimic sunlight. Skip the sun, and your pumpkins will still flourish—just keep the lights consistent.
How long does it take for pumpkin seeds to sprout indoors?
Pumpkin seeds typically sprout in 7–14 days indoors, depending on warmth (70–90°F) and moisture. Keep soil damp (not soggy) and use a seed heating mat if germination feels slow. Patience pays off—tiny sprouts will surprise you!
What’s the best indoor container size for pumpkins?
Start with 5-gallon pots for seedlings, then upgrade to 15–20 gallons as vines grow. Pumpkins need space—root-bound plants = stunted growth. Use fabric grow bags or large containers with drainage holes for happy roots.
Why are my indoor pumpkin leaves turning yellow?
Yellow leaves often signal overwatering or nutrient deficiencies. Let soil dry slightly between waterings, and fertilize with a balanced liquid fertilizer (10-10-10) every 2–3 weeks. Check for pests too—aphids or spider mites love indoor plants!
Can I grow pumpkins indoors without pollination?
Yes! If you want seedless pumpkins, hand-pollinate with a paintbrush. For seeds, let nature take its course (or attract indoor pollinators like bees if possible). Bonus: Indoor pumpkins are great for decorative varieties like Jack Be Little—no pollination needed!
Wrapping up and next steps
Growing pumpkin seeds indoors is a rewarding way to enjoy fresh, homegrown produce—even when sunlight is scarce! 🌱 With the right setup, patience, and care, you’ll soon be harvesting vibrant pumpkins or savoring crispy roasted seeds. Start small, experiment with varieties, and don’t hesitate to troubleshoot along the way.
Now that you’re ready to dive in, pick your favorite seeds and get growing! Share your progress with fellow gardeners or even gift your harvest to friends—your green thumb will shine brighter than ever. Happy planting! 🎉