
Container Gardens
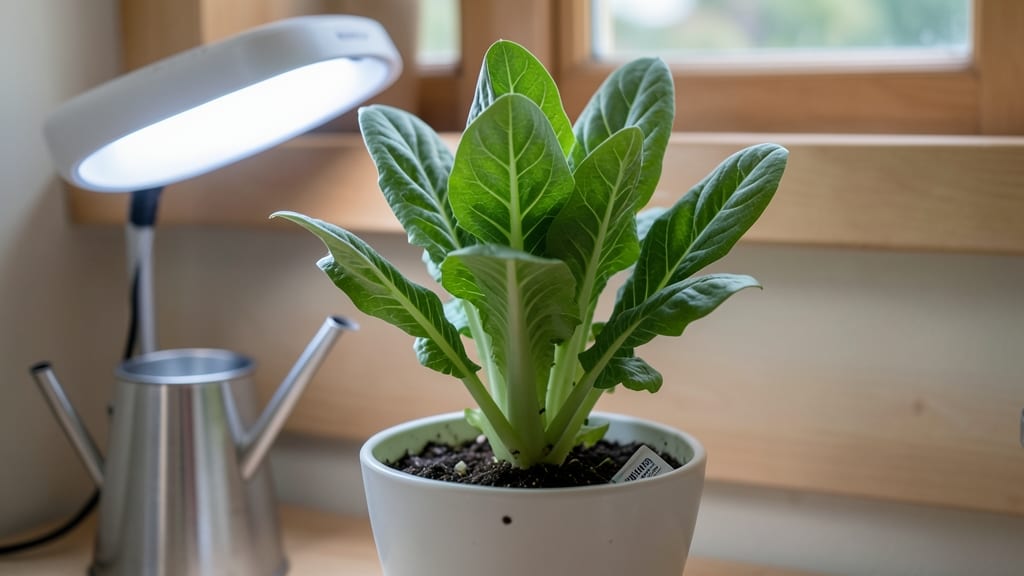
Growing romaine indoors means crisp salads year-round without a sun-drenched windowsill. 🌱 I’ve turned my kitchen counter into a mini lettuce farm, and the secret isn’t complicated—just the right light, soil, and a little patience.
My first batch took just 30 days to harvest, and the flavor rivals store-bought (without the wilted edges).
The key is a 6-inch-deep container with well-draining soil and a grow light (or a south-facing window). Romaine thrives in cool temps—60-65°F—and needs consistent moisture, but never soggy roots. Overwatering is the #1 killer, so I stick my finger in the soil before watering again.
Most people assume indoor greens are high-maintenance, but romaine is one of the easiest leafy greens to grow.
By week 4, you’ll be snipping outer leaves for sandwiches while the inner plant keeps growing—no replanting needed. The stems stay crisp, the flavor deepens, and you’ll finally understand why homegrown tastes better.
Plus, you’ll cut grocery costs by $10+ per month just by growing what you’d normally buy.
This method works for any indoor space, from bright kitchens to dim basements (with the right light). The only real mistake is skipping the grow light—romaine will stretch toward weak light, turning bitter. Let’s get those seeds started!
📚 In This Guide
- What you need
- Instructions
- Tips and common mistakes
- Wrapping up and next steps
What you need
- ● Romaine seeds – Choose a compact variety like Little Gem or Parris Island Cos (1 packet, ~50-100 seeds).
- ● Growing container – A 5-7 inch deep pot (or larger for multiple plants) with drainage holes (e.g., ceramic, fabric, or plastic).
- ● High-quality potting mix – A seed-starting or well-draining mix (avoid garden soil—it compacts!).
- ● Grow lights – A full-spectrum LED grow light (12-16 inches above plants) or a south-facing window (if sunny for 6+ hours/day).
- ● Watering can or spray bottle – For gentle, even moisture (avoid soggy soil!).
- ● Plant labels & pencil – To track planting dates and varieties.
- ● Self-watering planter – Reduces maintenance (great for busy gardeners!).
- ● Humidity dome or plastic wrap – Keeps seedlings cozy until germination.
- ● Fertilizer (balanced or hydroponic) – Diluted fish emulsion or liquid fertilizer (use every 2-3 weeks after sprouting).
- ● Trellis or stakes – Supports taller varieties if stems get leggy.
- ● Thermometer/hygrometer – Monitors ideal temps (65–75°F) and humidity (40–60%).
Step-by-step instructions for growing romaine indoors
Here's how to grow crisp, flavorful romaine indoors—no greenhouse needed.
🌱 Step 1: Select Containers and Prepare the Growing Medium
Choose a container at least 6 inches deep with drainage holes—romaine hates soggy roots. I use 8-inch pots for each plant since they'll grow 12-18 inches tall. Fill the bottom 2 inches with coarse perlite to improve drainage, then add 2 inches of high-quality potting mix (sterile and well-aerated). Press lightly to settle without compacting.
Romaine thrives in loose, fertile soil. If your mix lacks nutrients, blend in 1 tablespoon of balanced fertilizer (10-10-10) per pot. Moisten the soil until it feels like a slightly damp sponge—not dripping, just evenly damp. This prevents waterlogged roots while keeping moisture consistent.
🌱 Step 2: Plant Seeds at the Right Depth and Spacing
Sow 3-4 seeds per pot at a depth of ¼ inch—about the width of a dime. Planting too deep delays germination because the seedling must push through extra soil. Space seeds 1 inch apart in a small circle to ensure even growth. Cover lightly with additional soil, then mist gently with water until the surface looks uniformly damp.
Here's the thing—romaine seeds germinate best in warmth (70-75°F). Place the pot on a seedling heat mat or in a warm spot (like on top of the fridge) until sprouts appear in 5-10 days. If your home runs cooler, germination may take 14 days. Avoid cold drafts—they slow or stop germination entirely.
☀️ Step 3: Provide Consistent Light for Strong Growth
Once seedlings emerge, move them to a south-facing window or under a grow light for 12-14 hours daily. Romaine needs bright, indirect light—direct sun scorches tender leaves. If using a grow light, position it 4-6 inches above the plants and raise it as they grow to maintain that distance. You'll notice leggy, pale stems if the light is too weak or far away.
Rotate the pot a quarter turn every 2-3 days so the plant grows straight instead of leaning toward the light. Strong romaine has deep green leaves, thick stems, and compact spacing between leaves. If leaves yellow or stems stretch, your light isn't intense enough—supplement with a grow light immediately.
💧 Step 4: Water and Fertilize for Crisp Stems
Water when the top inch of soil feels dry—usually every 2-3 days, but adjust based on your home's humidity. Water deeply until it drains from the bottom, then empty the saucer to prevent root rot. Overwatering is the fastest way to kill romaine; wilting leaves mean you're watering too much or too little. Aim for consistent moisture, not soggy soil.
After 4 weeks, feed with a liquid fertilizer (like fish emulsion) diluted to half strength. This boosts flavor and crispness. I fertilize every 2 weeks during active growth. Stop fertilizing 2 weeks before harvest—excess nutrients make stems tough and bitter. You'll taste the difference in crispness and flavor when you follow this timing.
✂️ Step 5: Harvest for Peak Flavor and Regrowth
Harvest the outer leaves first when they reach 6-8 inches tall, leaving the inner leaves to grow. Use clean scissors to cut just above a leaf node—this encourages regrowth. You'll get multiple harvests from one plant if you're patient. For a full head, wait until the center leaves form a compact rosette, then cut the entire plant 1 inch above the soil line.
Real talk: Romaine grows fastest in cool weather (60-65°F). If your home runs warm, growth slows, and leaves may bolt (go to seed) prematurely. To delay bolting, keep temperatures below 70°F and provide bright light. With proper care, you'll harvest 4-6 weeks after planting, with regrowth possible for another 3-4 weeks if conditions stay ideal.
Tips & tricks for perfect indoor romaine growth
Here's what I learned after growing romaine indoors for years—these tricks make all the difference between wimpy leaves and restaurant-quality stems.
Germination Strategy: If your home runs cooler than 70°F, don't rush germination. Place the pot inside a clear plastic bag after planting to create a mini greenhouse effect. This traps warmth and humidity, helping seeds sprout in the 5-10 day window even in cooler conditions. Just remember to remove the bag once sprouts appear to prevent mold—you'll notice faster, more uniform germination this way.
Light Positioning: For that perfect 12-14 hours of daily light, position your grow light on a timer if you're not able to monitor it constantly. The light should be just 4-6 inches above the plants when they're small, but raise it as they grow to maintain that distance. I've seen leggy growth when people forget to adjust the light height—those stretched stems mean the plant is reaching for more light, resulting in weak, floppy leaves.
Watering Wisdom: The "top inch dry" rule works, but here's the thing—water quality matters too. Use room-temperature water (not cold straight from the tap) and avoid tap water with high chlorine content. If your water is hard, let it sit out overnight before using. You'll notice crispier stems and healthier plants when you pay attention to both quantity and quality of water.
Fertilizer Timing: That 4-week mark before fertilizing is crucial, but don't stop there. After your first feeding, I recommend switching to a liquid fertilizer with slightly higher nitrogen content (like 5-5-5) for the next 2 weeks to promote leafy growth. Then return to the balanced 10-10-10 formula. The key is stopping 2 weeks before harvest—this prevents that bitter, tough stem texture we all hate in store-bought romaine.
Pro Tips for Growing Romaine Indoors
- Here's what I learned after growing romaine indoors for years—these tricks make all the difference between wimpy leav...
- Germination Strategy: If your home runs cooler than 70°F, don't rush germination. Place the pot inside a clear plasti...
- Light Positioning: For that perfect 12-14 hours of daily light, position your grow light on a timer if you're not abl...
Frequently asked questions
Got questions about growing crisp romaine indoors? You’re not alone! Here are answers to the most common queries to help you succeed—even without a sunny windowsill.
How long does it take for romaine to grow indoors?
With the right setup, you can harvest baby leaves in 4–6 weeks and full-sized heads in 8–10 weeks. Speed up growth by using a grow light (12–16 hours/day) and keeping temps between 60–70°F. Patience pays off—romaine thrives with consistency!
Can I grow romaine indoors without a grow light?
Yes, but results vary! Place your container near the brightest window (south-facing is ideal). Expect slower growth and smaller leaves. If your space is dim, supplement with a basic LED bulb (10–12 hours/day) for better yields.
Why is my romaine turning bitter or yellow?
Bitter taste often means over-maturity or heat stress. Harvest early for tender leaves. Yellowing? Check for overwatering (root rot) or nutrient deficiency (switch to a balanced fertilizer). Too little light can also cause leggy, bitter stems—adjust your setup ASAP!
What’s the best alternative if romaine fails?
Try butter lettuce (faster-growing, forgiving) or arugula (hardier, peppery flavor). Both thrive indoors with similar care. For heartier greens, kale or swiss chard are great substitutes—they handle cooler temps and lower light better.
How often should I water indoor romaine?
Keep soil consistently moist but not soggy. Water when the top inch feels dry (usually every 2–3 days). Use room-temperature water and a tray with pebbles to prevent root rot. Mist leaves occasionally to boost humidity—romaine loves it!
Wrapping up and next steps
Growing romaine indoors is a rewarding way to enjoy fresh, crisp greens year-round—no sunny windowsill required! 🌱 With the right setup, you’ll savor homegrown flavor while saving money and reducing waste. Start small, experiment with your space, and soon you’ll be harvesting bold, leafy perfection in just a few weeks.
Ready to dive in? Pick your container, grab your seeds, and let the greens grow! 🌿 Whether you’re a beginner or a seasoned gardener, every bite of your homegrown romaine will taste like success.