
Container Gardens
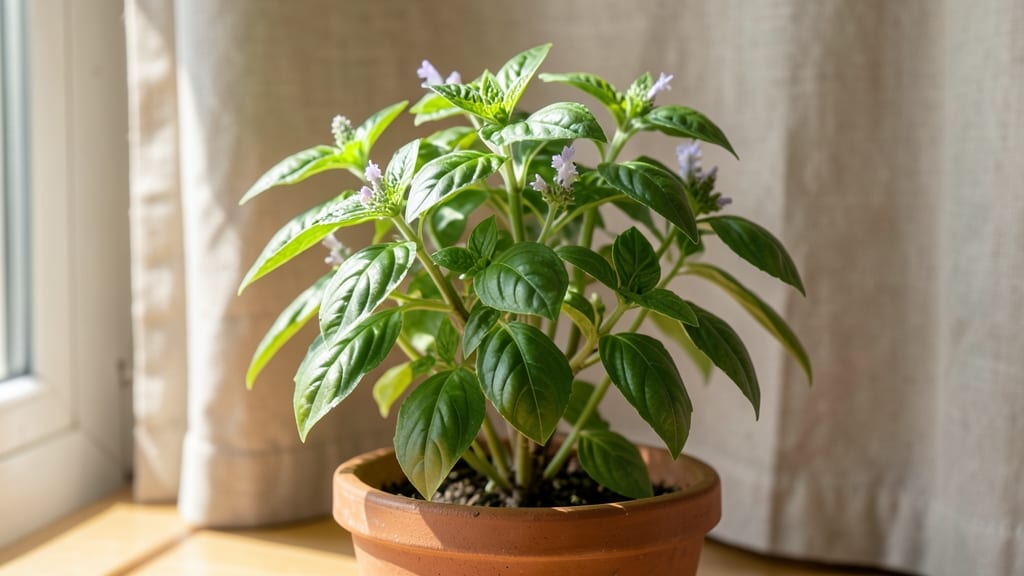
Growing Thai basil indoors means fresh, fragrant leaves any month of the year—no greenhouse needed. 🌱 The trick is mimicking its natural tropical habitat with the right light, soil, and care.
My first indoor batch took off when I swapped fluorescent bulbs for a full-spectrum grow light, and the difference was night-and-day flavor. You’ll need a 6-inch pot with drainage, well-draining potting mix, and a spot getting 6-8 hours of bright light daily.
Water when the top inch feels dry, but avoid soggy soil—Thai basil hates wet feet. The scent alone makes it worth the effort, but the real magic happens when you start harvesting stems just above leaf pairs.
By week 4, you’ll be snipping leaves for Thai dishes without ever leaving your kitchen. The plants stay productive for months if you prune regularly and rotate them toward the light. Leggy growth? It’s a light signal, not a failure—just move the plant closer or upgrade to stronger bulbs.
Works on windowsills, kitchen counters, or under grow lights. Here’s how to keep yours thriving all winter long.
📚 In This Guide
- What you need
- Instructions
- Tips and common mistakes
- Wrapping up and next steps
What you need
- ● Thai basil seeds or seedlings: 3–5 seeds (or 1–2 young plants) – Look for Cinnamon Basil (Ocimum basilicum 'Thai') for the best flavor.
- ● Container: 1–2 pots (6–8 inches in diameter) with drainage holes – Terracotta or fabric pots work best.
- ● High-quality potting mix: 2–3 gallons of well-draining, organic mix (avoid garden soil).
- ● Grow lights or sunny windowsill: 6–8 hours of bright, indirect light daily (south-facing window or LED grow lights).
- ● Watering can or spray bottle: For gentle hydration (avoid soggy soil!).
- ● Fertilizer: Balanced liquid fertilizer (e.g., 10-10-10) or organic options like fish emulsion.
- ● Humidity tray: A shallow tray with pebbles and water to boost moisture (Thai basil loves humidity!).
- ● Pruning shears: Small, sharp scissors for trimming (encourages bushier growth!).
- ● Support stake: 1–2 bamboo stakes if your basil grows tall (though it’s not always needed).
- ● Self-watering planter: For busy gardeners who want consistent moisture.
Step-by-Step instructions for growing Thai basil indoors
Here's how I grow Thai basil indoors—strong, fragrant, and ready to harvest in just a few weeks.
🪴 Step 1: Set Up Your Growing Containers
Thai basil thrives in 6-inch pots with drainage holes—no soggy roots here. I use terracotta because it breathes and helps prevent overwatering. Fill each pot with 2-3 inches of well-draining potting mix, leaving about 1 inch of space at the top for watering. Press the soil down gently so it's firm but not compacted.
Add a handful of perlite to the mix if you have it—this ensures excess water drains quickly. Thai basil hates wet feet, so good drainage is non-negotiable. I always check the bottom of the pot before planting to confirm those drainage holes are clear.
🌱 Step 2: Plant Your Thai Basil Seeds or Starts
If starting from seed, plant 2-3 seeds per pot, about ¼ inch deep. Cover lightly with soil and mist gently with water until the soil is damp but not soaked. For transplants, dig a hole twice as wide as the root ball and place the plant at the same depth it was growing before.
Thai basil seedlings emerge in 7-14 days at 70-75°F. Keep the soil consistently moist during germination—use a spray bottle to avoid disturbing the seeds. Once sprouts appear, thin to the strongest seedling per pot. I always wait until they have at least two true leaves before thinning.
☀️ Step 3: Position for Maximum Light
Thai basil needs 6-8 hours of bright, direct sunlight daily. A south-facing window is ideal, but if natural light is weak, supplement with a grow light placed 6 inches above the plants. I notice leggy growth when light is insufficient—thin, pale stems reaching toward the window.
Rotate the pot a quarter turn every few days so the plant grows evenly. If leaves start yellowing between the veins, it's a sign of too much direct sun—move it back slightly. The perfect spot delivers vibrant green leaves with that signature Thai basil aroma.
💧 Step 4: Water and Fertilize for Lush Growth
Water when the top inch of soil feels dry. I check this by sticking my finger in the soil—if it's dry at that depth, it's time to water. Water at the base to avoid wetting the leaves, which can cause fungal issues. Thai basil prefers slightly moist soil but never soggy.
Feed with a balanced liquid fertilizer (like 10-10-10) every 4-6 weeks during the growing season. I dilute it to half-strength to avoid burning the roots. Over-fertilizing leads to leafy growth at the expense of flavor—keep it moderate. Prune regularly to encourage bushiness.
✂️ Step 5: Harvest and Maintain for Continuous Growth
Harvest leaves when they reach 2-3 inches long by pinching off stems just above a pair of leaves. This encourages new growth and keeps the plant compact. I harvest every 2-3 weeks, which keeps my Thai basil producing flavorful leaves year-round.
Watch for pests like aphids or spider mites—wipe them off with soapy water if they appear. If the plant flowers, snip them off immediately. Thai basil flowers signal the end of the plant's productive life, and removing them keeps the energy focused on leaf growth.
Tips & tricks for growing fragrant Thai basil indoors
A few simple adjustments can transform your indoor Thai basil from struggling to thriving. These tricks have saved my plants from common pitfalls—and they'll do the same for yours.
Lighting Strategy: If your windowsill doesn't get the required 6-8 hours of bright light, supplement with a grow light on a timer for 12 hours daily. I use a simple LED bulb on a plug-in timer set to mimic natural daylight cycles. This prevents the leggy, weak stems that come from insufficient light. Position the light just 6 inches above the plants—closer than you might think!
Soil Science: The 2-3 inches of well-draining potting mix in Step 1 is crucial, but here's what I do differently: I mix in 20% coconut coir with my regular potting soil. This improves aeration and water retention without compacting. For extra insurance, I top the pot with a thin layer of perlite or orchid bark—this creates a natural mulch that helps retain moisture while preventing fungal issues at the soil surface.
Germination Hack: Those 7-14 days for seedling emergence can feel like forever! To speed things up, place your pots in a warm spot (like on top of the fridge) to maintain that 70-75°F ideal temperature. Cover the pots loosely with plastic wrap to create a mini greenhouse effect—just remember to remove it once sprouts appear to prevent mold. I've seen germination cut in half using this method, and the seedlings come up stronger too.
Harvest Timing: When harvesting those 2-3 inch leaves, here's my secret: I always harvest in the morning when the essential oils are at their peak concentration. Use clean, sharp scissors to avoid damaging the stems, and make your cuts just above a pair of leaves to encourage bushier growth. I've found that harvesting every 2 weeks (rather than waiting 3) actually stimulates more frequent regrowth—my plants stay compact and productive year-round.
Pro Tips for Growing Thai Basil Indoors
- A few simple adjustments can transform your indoor Thai basil from struggling to thriving. These tricks have saved my...
- Lighting Strategy: If your windowsill doesn't get the required 6-8 hours of bright light, supplement with a grow ligh...
- Soil Science: The 2-3 inches of well-draining potting mix in Step 1 is crucial, but here's what I do differently: I m...
Frequently asked questions
Got questions about growing Thai basil indoors? You’re not alone—this fragrant herb has a few quirks! Here are answers to the most common concerns to help you cultivate a thriving indoor garden.
How much sunlight does Thai basil need indoors?
Thai basil thrives with 6–8 hours of bright, indirect sunlight daily. A south- or west-facing window works best, but supplement with a grow light (12–16 hours/day) if natural light is limited. Without enough light, leaves turn pale or leggy—adjust placement or lighting to keep it happy!
How long does it take for Thai basil to grow indoors?
From seeds, expect 4–6 weeks for germination and another 6–8 weeks to harvest. If starting with cuttings, you’ll see new growth in 2–3 weeks. Patience pays off—harvest leaves sparingly at first to encourage bushier growth.
Why are my Thai basil leaves turning yellow or curling?
Yellowing leaves often signal overwatering (let soil dry slightly between waterings) or underwatering (check moisture 1 inch below soil). Curling can mean pests (like spider mites) or low humidity—mist leaves or use a pebble tray to boost moisture.
Can I grow Thai basil from store-bought stems?
Snip a 4–6 inch stem from a healthy plant, remove lower leaves, and place it in water or moist soil. Roots form in 1–2 weeks. Avoid using stems from sprayed herbs—rinse them first to remove pesticides.
How do I keep Thai basil from flowering indoors?
Flowering means bitter leaves! Pinch off buds early to redirect energy to foliage. Ensure bright light and regular pruning (trim stems by ⅓ when overgrown). If it bolts, harvest leaves quickly before flavor suffers.
Wrapping up and next steps
Growing Thai basil indoors is a rewarding way to enjoy its aromatic, flavorful leaves anytime—no matter the season! With the right light, container, and care, you’ll harvest fresh herbs for cooking, teas, or garnishes in just a few weeks. 🌱
Ready to take the next step? Start with a small pot and watch your plant thrive—soon, you’ll be sharing your green thumb success with friends (and your favorite recipes!). Try it today!