
Container Gardens
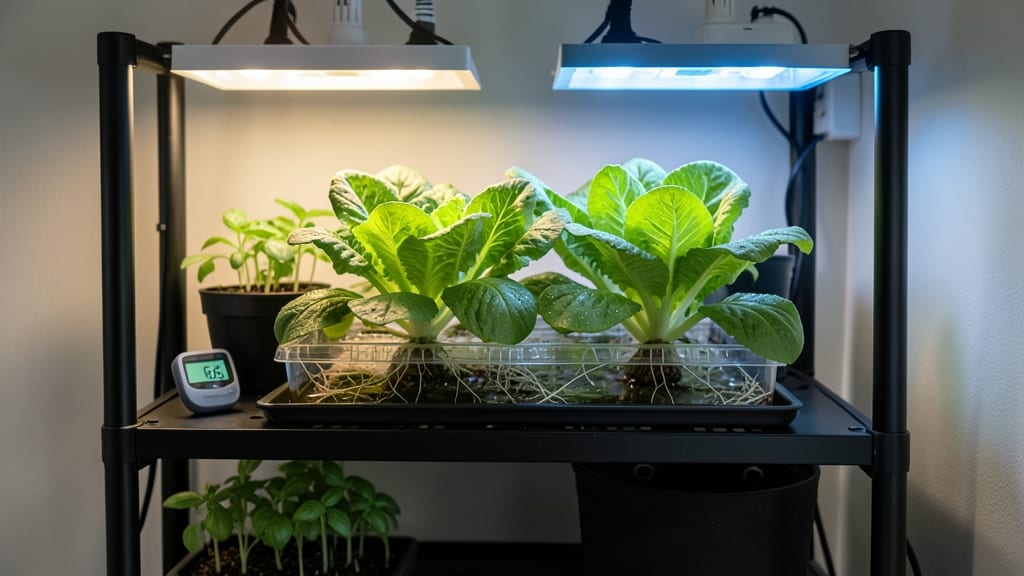
Growing vegetables indoors with LED lights changed how I eat—fresh herbs, juicy cherry tomatoes, and crisp lettuce year-round, no matter what the weather does outside. 🌱 The key isn’t expensive gear; it’s matching the right light spectrum to plant needs and keeping everything else simple.
My first indoor garden produced 3 pounds of basil in just 8 weeks, and that was with a $150 setup.
You’ll need a grow light with full-spectrum LEDs (blue for growth, red for flowering), containers with drainage, and a space that stays between 65-75°F. Compact varieties like dwarf tomatoes, leaf lettuce, and bush beans thrive indoors, while vining plants need trellises to save space.
The light should hang 6-12 inches above plants, depending on wattage—closer for low-wattage LEDs, higher for powerful ones.
By week 4, you’ll see rapid growth if you stick to a 14-16 hour light cycle and keep soil moist but not soggy. The smell of fresh cilantro or the sight of tiny tomato blossoms makes every hour of setup worth it.
Even in a tiny apartment, you can grow enough for salads, snacks, and sauces that taste like summer.
This works for any indoor space—sunny windowsills, basements with supplemental light, or even a closet with proper ventilation. The biggest mistake? Skipping the light spectrum details or overwatering. Let’s get your indoor garden growing like a pro.
📚 In This Guide
- What you need
- Instructions
- Tips and common mistakes
- Wrapping up and next steps
What you need
- ● LED Grow Lights: Full-spectrum LED lights (1500–3000 lumens, 12–18 inches above plants)
- ○ Adjustable height & timer function (optional but helpful)
- ● Growing Containers: 5–10 gallon pots (with drainage holes) or fabric grow bags
- ○ Self-watering planters (optional, for convenience)
- ● Growing Medium: High-quality potting mix (sterile, well-draining)
- ● Perlite or vermiculite (10–20% mix for aeration)
- ● Seeds or Seedlings: Fast-growing varieties (e.g., lettuce, herbs, microgreens, cherry tomatoes)
- ● Organic seeds (if avoiding pesticides)
- ● Basic Tools: Spray bottle (for humidity)
- ● Small hand trowel
- ○ pH testing kit (optional, for soil/nutrient balance)
- ● Nutrient-rich fertilizer (hydroponic or organic, follow label instructions)
- ● Humidity dome or plastic wrap (for seed germination)
- ● Thermometer/hygrometer (to monitor temperature/humidity)
- ● Reflective surfaces (aluminum foil or white paint for walls to boost light)
Step-by-Step instructions for growing vegetables indoors with LED lights
Here’s how I transform small spaces into productive veggie gardens using LED grow lights—no green thumb required.
🪴 Step 1: Set Up Your Growing Space and Light System
Choose a dedicated area with stable temperatures between 65-75°F and good airflow. I use a 4-foot tall bookshelf in my kitchen corner—it keeps lights away from walls and prevents overheating. Mount your LED grow lights 6-12 inches above the plants, depending on their height. Most full-spectrum LEDs recommend starting at 4-6 inches for seedlings and adjusting as plants grow.
Position lights so they cover the entire growing area evenly—uneven light causes leggy growth. I like to angle them slightly toward the center to eliminate shadows. Plug the lights into a timer set for 14-16 hours daily to mimic natural daylight cycles. This consistency is critical for healthy growth and prevents stretching.
🌱 Step 2: Select and Prepare Containers and Soil
Use 5-7 gallon containers for each plant to ensure root development—smaller pots lead to stunted growth. Drill drainage holes in the bottom if your containers don’t have them, and place a 1-inch layer of gravel or hydroponic stones at the base to improve drainage. Fill the rest with a lightweight, well-draining potting mix (never garden soil—it compacts and suffocates roots).
Moisten the soil until it’s damp but not soggy—think of a wrung-out sponge. I like to add a slow-release fertilizer at planting time to avoid overfeeding. Plant seeds ¼ inch deep (or follow packet instructions) and keep the soil surface lightly moist until germination. Most leafy greens and herbs sprout in 5-10 days, while tomatoes and peppers take 10-20 days—patience is key here.
☀️ Step 3: Adjust Light and Watering for Optimal Growth
Once seedlings emerge, move the lights to 6 inches above the plants and adjust as they grow—keep them 2-4 inches away from the tallest leaves. You’ll notice leggy growth if the lights are too far away, so check weekly and adjust. Most LED grow lights provide full-spectrum light, but supplement with a red/blue ratio of 8:1 for flowering plants like tomatoes and peppers.
Water when the top inch of soil feels dry—overwatering is the fastest way to kill indoor plants. I use a self-watering system with a moisture meter to avoid guesswork. Fertilize every 2-4 weeks with a balanced liquid fertilizer (10-10-10 or 20-20-20) to keep plants thriving. Watch for yellowing leaves—this usually means overwatering, while crispy edges signal underwatering.
✂️ Step 4: Prune and Maintain for Maximum Yield
Prune regularly to encourage bushier growth and better air circulation. Pinch off the tips of leafy greens like kale and Swiss chard to promote branching. For tomatoes and peppers, remove suckers (the small shoots that form in the leaf axils) to direct energy toward fruit production. I also trim any yellow or diseased leaves immediately to prevent spread.
Rotate plants a quarter turn every few days so they grow evenly toward the light. This prevents lopsided growth and ensures all sides receive equal exposure. Harvest leafy greens by cutting outer leaves—this encourages continuous regrowth. For fruiting plants, pick when ripe to stimulate more production. With proper care, you’ll get continuous harvests for months—no seasonal limitations here.
⏰ Step 5: Troubleshoot Common Issues
If leaves turn pale or yellow, your plants need more light—move them closer or increase the light duration. Brown tips usually mean low humidity; place a humidifier nearby or mist leaves occasionally. Leggy seedlings? You’re either overwatering or not providing enough light—check both immediately. I’ve also found that whiteflies love indoor gardens, so inspect leaves weekly and treat with neem oil if needed.
Overheating is another common issue—if your lights run hot, add a small fan to circulate air without blowing directly on plants. Keep an eye on the soil temperature; it should stay between 60-75°F. If your space gets too warm, move plants to a cooler area or reduce light hours slightly. With these adjustments, you’ll avoid the most common pitfalls and keep your indoor garden thriving year-round.
Tips & tricks for perfect indoor vegetable growth with LED lights
Transforming your indoor space into a thriving garden takes more than just lights—it's about precision and consistency. Here's what nobody tells you about maximizing those yields in tight quarters.
Light Positioning Precision: The 6-12 inch range for LED lights is your starting point, but pay attention to this: For seedlings, begin at the lower end (4-6 inches) and adjust weekly as they grow. I've found that maintaining 2-4 inches from the tallest leaves during Step 3 creates that perfect balance between light intensity and heat management. Too close? You'll scorch those delicate leaves. Too far? You'll get those sad, leggy seedlings we all hate. Use a ruler to measure—no guessing!
Temperature Management: That 65-75°F range in Step 1 isn't just a suggestion—it's critical. I learned this the hard way when my basil bolted overnight in a warm kitchen corner. Keep your growing area away from heat sources like vents or sunny windows. For extra insurance, use a small thermometer near your plants. If you notice condensation on the leaves during the 14-16 hour light cycle, you're likely dealing with too much humidity—open a window or run a small fan nearby to maintain airflow.
Soil Preparation Secret: The lightweight potting mix mentioned in Step 2 deserves special attention. I recommend mixing in 10% perlite or vermiculite to improve aeration—this prevents that dreaded compacted soil that suffocates roots. Also, consider pre-moistening your potting mix before planting to eliminate air pockets. When you're planting those seeds ¼ inch deep, press them gently but firmly into the soil. Too light? They won't make contact with moisture. Too deep? They'll struggle to emerge.
Growth Monitoring System: Here's what I do to avoid common mistakes: Create a simple growth chart tracking plant height, light distance, and watering schedule. I mark my calendar for the 2-4 week fertilization reminders and set phone alerts for the quarter-turn rotations every few days. This system helps me spot problems early—like when my peppers started stretching toward one side of the light, signaling uneven exposure. The key is consistency, especially during those critical 14-16 hour light periods.
Pro Tips for Growing Vegetables Indoors With Led Lights
- Transforming your indoor space into a thriving garden takes more than just lights—it's about precision and consistenc...
- Light Positioning Precision: The 6-12 inch range for LED lights is your starting point, but pay attention to this: Fo...
- Temperature Management: That 65-75°F range in Step 1 isn't just a suggestion—it's critical. I learned this the hard w...
Frequently asked questions
Got questions about growing veggies indoors with LED lights? You’re not alone! Here are some of the most common concerns—and their straightforward answers to help you get started (or troubleshoot) like a pro.
What’s the best type of LED light for indoor vegetable gardening?
Look for full-spectrum LEDs with a color temperature of 4000K–6500K (cool white to daylight). These mimic sunlight and support photosynthesis. Avoid cheap "grow lights" labeled for herbs only—they lack the red/blue spectrum veggies need for fruiting. Pro tip: Brands like Samsung LM301B or Osram FLAR diodes are top-tier for efficiency and longevity.
How long should I leave the LED lights on each day?
Most leafy greens (like lettuce or spinach) thrive with 12–16 hours of light daily, while fruiting plants (tomatoes, peppers) need 14–18 hours. Use a timer to automate this—consistency is key! Overlighting (20+ hours) can stress plants, while <10 hours may stunt growth. Adjust based on leaf color: yellowing = more light; pale = too much.
Can I use regular household LED bulbs instead of specialized grow lights?
Not ideal! Household LEDs (like those in your desk lamp) lack the red (620–750nm) and blue (400–500nm) wavelengths critical for photosynthesis. However, if you’re in a pinch, 6500K daylight LEDs (like those in smart bulbs) can work for herbs or microgreens—just supplement with a cheap red LED clip light ($10–$20) for fruiting plants.
Why are my indoor veggies growing tall and leggy under LED lights?
Leggy growth usually means too much distance (6+ inches away) or inconsistent light. Keep lights 2–6 inches above plants (adjust as they grow) and ensure they’re directly overhead. If using a timer, verify it’s running correctly—uneven light cycles (e.g., flickering) can trick plants into stretching. Rotate trays weekly for even exposure!
What’s the cheapest way to start growing veggies indoors with LED lights?
Start with:
- $10–$20 for a clip-on LED grow light (e.g., Mars Hydro TS 1000W)
- $5–$10 for a seedling tray or repurposed container (clean yogurt cups work!)
- $0 for free seeds (check Seed Savers Exchange)
- $1–$3 for coconut coir or peat pellets (skip soil if space is tight)
Prioritize fast-growing greens (like radishes or arugula) to test your setup before investing in pricier lights or plants.
Wrapping up and next steps
Growing vegetables indoors with LED lights isn’t just possible—it’s a game-changer for urban gardeners, small-space enthusiasts, and anyone craving fresh produce year-round! 🌱 With the right setup, you can enjoy homegrown greens, herbs, and even tomatoes without a backyard.
The key? Experiment, stay consistent, and let your creativity grow alongside your plants.
Ready to dive in? Start small—pick one or two easy veggies, like leafy greens or microgreens, and refine your system as you go. Soon, you’ll be harvesting like a pro, and who knows? You might even inspire others to join the indoor gardening revolution. Happy growing! 🌟