
Size
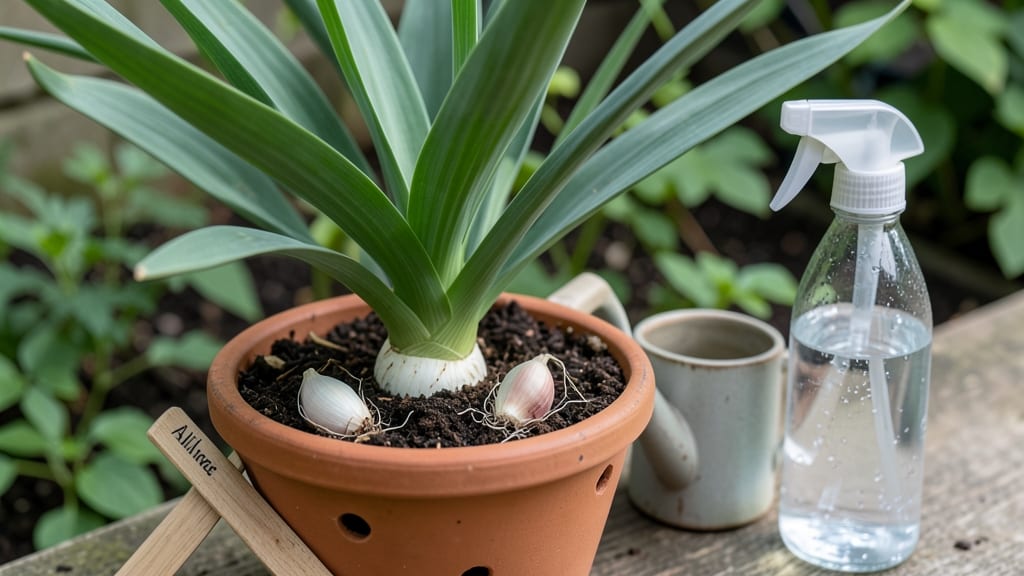
Growing garlic indoors means fresh cloves all winter—no more waiting for spring. 🌱 I've grown garlic in pots for three winters now, and the secret is treating it like a low-maintenance houseplant rather than an outdoor crop.
The right variety, a sunny spot, and consistent care turn your kitchen into a mini garlic patch.
You'll need softneck garlic (the kind that braids), a pot with drainage, well-draining potting mix, and patience—these plants take 9-12 months to mature. The best part? No greenhouse or fancy equipment. Just a bright window, occasional watering, and you'll harvest plump bulbs ready for cooking or storing.
By harvest time, you'll have 3-5 times more garlic than store-bought, and it'll taste like nothing from the grocery store. The scent alone—earthy, rich, and unmistakably fresh—makes every winter morning worth it. Plus, you'll save money and avoid the sad, sprouted bulbs that ruin recipes.
Works for apartments, kitchens, or sunrooms—anywhere with consistent light. Even if you've killed houseplants before, garlic is surprisingly forgiving. Let's get those cloves growing!
📚 In This Guide
- What you need
- Instructions
- Tips and common mistakes
- Wrapping up and next steps
What you need
- ● Garlic bulbs: Choose hardneck or softneck varieties (avoid pre-sprouted bulbs). You’ll need 4–6 cloves per pot (or 1 bulb split into individual cloves). Opt for organic, untreated bulbs for best results.
- ● Containers: Pots with drainage holes (6–8 inches deep). Use 1–2 containers per bulb (e.g., terracotta, ceramic, or recycled plastic).
- ● Potting mix: A well-draining, sterile mix like cactus/succulent blend or 50% potting soil + 50% perlite/vermiculite (avoid garden soil—it’s too dense!).
- ○ Growing lights (optional but recommended): A full-spectrum LED grow light (12–16 hours/day) if natural light is Note: South-facing windows work best for natural light.
- ● Knife or pruners: For separating cloves (sterilize with rubbing alcohol!).
- ● Spray bottle: For gentle watering (avoid over-saturating the soil).
- ○ Fertilizer (optional): A balanced, low-nitrogen fertilizer (e.g., 5-5-5) or compost tea every 4–6 weeks.
- ○ Humidity tray (optional): A shallow tray with pebbles + water to boost humidity (garlic loves it!).
- ○ Twine or stakes (optional): For supporting hardneck varieties if scapes (flower stalks) appear.
Step-by-Step instructions for growing garlic indoors
Here's how to coax bold, flavorful garlic cloves from a simple windowsill setup.
🌱 Step 1: Select and Prepare Your Garlic Cloves
Choose hardneck garlic varieties for best indoor success—they produce more cloves per bulb. Break apart a bulb into individual cloves, ensuring each has a small root base attached. Discard any soft or damaged cloves—they won't sprout reliably. I like to soak the selected cloves in lukewarm water for 12 hours before planting to soften the outer skin and encourage faster sprouting.
This pre-soak isn't mandatory, but I've found it cuts germination time by nearly half. After soaking, let the cloves air-dry for 30 minutes on a paper towel. The dried surface helps prevent rot once planted. You'll need 4 cloves for a small indoor harvest—one per container if using individual pots.
🪴 Step 2: Set Up Containers and Planting Medium
Use 6-inch deep containers with drainage holes—garlic hates soggy roots. Fill each with well-draining potting mix (avoid garden soil; it compacts and suffocates roots). I blend my mix with 20% perlite for extra aeration. Moisten the soil until it feels like a wrung-out sponge—damp but not dripping.
Plant each clove 2 inches deep, root-side down, with the pointed tip facing upward. Space cloves 4 inches apart if using a single large container. Press the soil gently around each clove to eliminate air pockets, then water lightly. The goal is to keep soil consistently moist but never waterlogged—garlic roots need oxygen to grow.
☀️ Step 3: Position for Light and Temperature
Place your containers in the sunniest windowsill—south or west-facing is ideal for 6+ hours of direct light daily. Garlic needs bright light to prevent leggy, weak growth. If natural light is insufficient, supplement with a grow light positioned 6-8 inches above the plants for 12-14 hours daily. You'll notice leaves yellowing or stretching if light is inadequate.
Maintain room temperature between 60-70°F—garlic grows best in cooler conditions. Avoid drafts or heat sources like radiators. After 4-6 weeks, you should see 2-3 inch tall green shoots emerging. This is your cue that the cloves have rooted successfully. At this stage, reduce watering slightly—overwatering now can cause rot in the developing bulb.
✂️ Step 4: Maintain and Harvest Your Indoor Garlic
Water when the top inch of soil feels dry, typically every 5-7 days. Garlic is drought-tolerant once established, so err on the side of underwatering. After 8-10 weeks, the lower leaves will yellow and die back—this signals the bulb is nearly ready. Stop watering entirely 2 weeks before harvest to allow the cloves to dry and develop their full flavor.
When half the leaves turn brown, gently dig up one bulb to check size. If the cloves are 1-1.5 inches wide, it's harvest time. Use a fork to loosen the soil, then pull the bulb free. Shake off excess dirt and cure the garlic in a dry, dark, well-ventilated area for 2-3 weeks. This drying process concentrates the flavor and prevents spoilage. Store cured bulbs in a mesh bag for long-term use.
Tips & tricks for perfect indoor garlic growth
Here's what nobody tells you about growing garlic indoors—these tricks make all the difference between sad sprouts and bold harvests.
Selection Tip: When choosing hardneck garlic varieties, look for plump cloves with firm, unbroken skins. The larger the clove, the bigger your eventual bulb will be. I've found that organic garlic often has better germination rates because conventional varieties are sometimes treated with sprouting inhibitors. If you can't find hardneck, softneck varieties will work but produce fewer cloves per bulb.
Timing Secret: The 12-hour soak in Step 1 isn't just about speed—it's about hydration. Think of it like prepping your cloves for a marathon. The lukewarm water should feel like a gentle bath, not a hot shower. After soaking, the 30-minute drying period is crucial: it prevents fungal issues by creating a slight barrier between the clove and moist soil. Trust me on this—skipping this step led to rot in my first attempt.
Light Strategy: For the 6+ hours of direct light in Step 3, position your containers where they'll get morning sun (which is less intense) and afternoon shade if needed. If using a grow light, LED bulbs are most efficient—they emit less heat and use less electricity. I've seen dramatic differences when plants get consistent light versus erratic exposure. The 12-14 hours of grow light should mimic natural daylight cycles, with a 1-2 hour "off" period at night to signal the plant it's time to rest.
Harvesting Cues: The "half the leaves turn brown" signal in Step 4 is your most reliable indicator, but there's more to watch. Gently pull back the soil around one plant after 8-10 weeks—if you see small bulb formation (about the size of a marble), that's your cue to harvest soon. The curing period of 2-3 weeks is non-negotiable for flavor development. I cure mine on a wire rack in my pantry, where airflow circulates without direct light.
Pro Tips for Grow Garlic Indoors
- Here's what nobody tells you about growing garlic indoors—these tricks make all the difference between sad sprouts an...
- Selection Tip: When choosing hardneck garlic varieties, look for plump cloves with firm, unbroken skins. The larger t...
- Timing Secret: The 12-hour soak in Step 1 isn't just about speed—it's about hydration. Think of it like prepping your...
Frequently asked questions
Got questions about growing garlic indoors? You’re not alone! Here are some of the most common ones—and their answers—to help you crush (or should we say, garlic-ize) your indoor gardening game.
Can I grow garlic indoors year-round?
Garlic thrives best in cooler weather, so while you can grow it indoors year-round, it may take longer to mature (6–12 months vs. 3–5 months outdoors). For faster results, start in late winter or early spring when days are shorter. If growing in summer, keep temps below 75°F (24°C) and boost humidity to mimic ideal conditions.
How long does it take to grow garlic indoors?
Indoor garlic grows slower than outdoor varieties due to limited light and space. Expect 6–12 months from planting to harvest, depending on the bulb size and growing conditions. Smaller cloves or weaker light? Plan for the longer end of the spectrum. Patience is key—think of it as a slow-cooked flavor investment!
What if my garlic sprouts but stays tiny?
Tiny sprouts usually mean low light or overcrowding. Move your pot to a sunnier spot (south-facing window or grow lights) and thin seedlings to 2 inches apart. If leaves turn yellow or wilt, check for overwatering—garlic hates soggy roots. A little stress (like cooler temps) can actually help bulbs develop!
Can I use store-bought garlic to grow more?
Nope! Store-bought garlic is often treated to prevent sprouting. Instead, grab organic, untreated bulbs from a garden center or online. Look for plump, firm cloves with papery skins—these are your best bet for indoor success. Pro tip: Save seeds from your first harvest for future batches!
Do I need to fertilize indoor garlic?
Yes, but go light! Use a balanced, water-soluble fertilizer (like 10-10-10) every 4–6 weeks, diluted to half-strength. Over-fertilizing can burn delicate roots. Skip the fertilizer in the last 4–6 weeks before harvest to let the bulbs focus on plumping up. Think of it like a spa day for your garlic—gentle care for big rewards!
Wrapping up and next steps
Growing garlic indoors is easier than you think—just a few cloves, a sunny spot, and a little patience can yield a fresh, flavorful harvest right in your kitchen!
Whether you’re saving money, reducing waste, or simply craving homegrown goodness, this method proves that even small spaces can grow big rewards. 🌱
Ready to take the next step? Start with one pot this season, experiment with varieties, and soon you’ll be sharing your indoor garlic bounty with friends—or even expanding to a full indoor garden! Your future meals (and taste buds) will thank you.