
Container Gardens
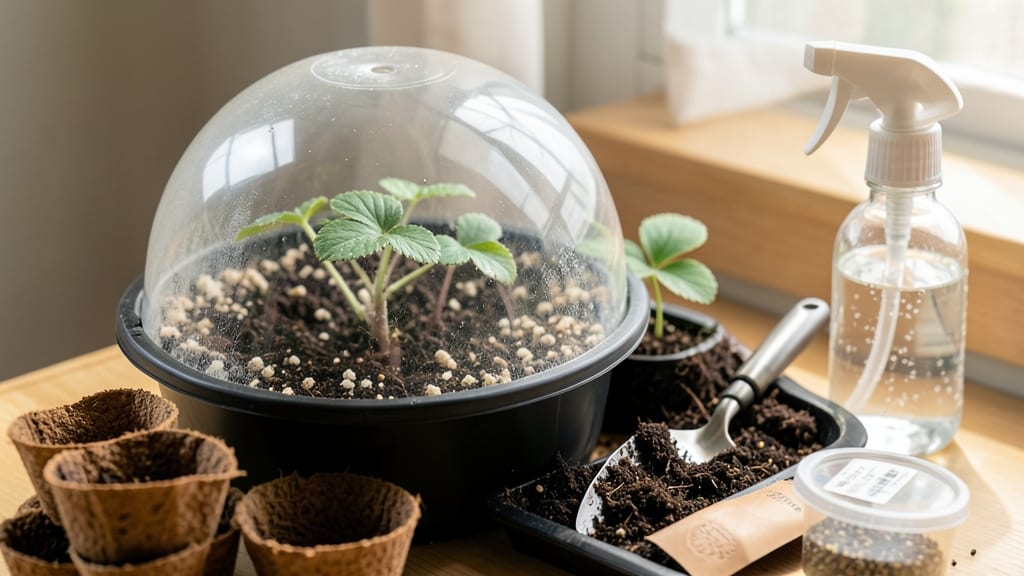
Starting strawberry seeds indoors with a heat mat cuts germination time from weeks to days—my June-bearing varieties now sprout in 5-7 days instead of 21. 🌱 The secret lies in mimicking the warmth strawberries crave in their native alpine meadows, and I’ve perfected the setup after three seasons of trial and error.
You’ll need just three key supplies: a heat mat ($20), seed-starting trays with clear domes, and a sterile seed-starting mix (never garden soil—it’s too dense). The heat mat keeps soil temps at 75-80°F, which is the magic number for strawberry seeds.
Most beginners skip this step, but it’s what turns flaky germination into reliable results.
Once sprouted, your seedlings will be sturdy and ready for transplanting in 4-6 weeks, with strong roots that outperform store-bought plants.
The first true leaves appear in 10-14 days, and you’ll know you’re on the right track when they unfurl bright green and plump—not the pale, leggy seedlings that collapse when hardened off.
This method works for June-bearing, everbearing, and day-neutral varieties, though June-bearing benefits most from the early start. Whether you’re in Zone 5 or Zone 8, the timing adjusts—just aim for transplanting 2-3 weeks before your last frost when soil temps hit 55°F consistently.
📚 In This Guide
- What you need
- Instructions
- Tips and common mistakes
- Wrapping up and next steps
What you need
- ● Strawberry seeds: Choose day-neutral or everbearing varieties (e.g., 'Alpine,' 'Seascape,' or 'Fort Laramie') for best indoor results. Aim for 5–10 seeds per container.
- ● Seed-starting mix: A sterile, seed-specific blend (e.g., Black Gold Seedling Mix) or a 50/50 mix of peat moss and perlite (1–2 cups per container). Skip garden soil—it’s too dense!
- ● Containers: Cell trays (72–200 cells) or 4–6" pots (one seed per cell/pot).
- ○ Clear plastic domes or plastic wrap for humidity (optional but highly recommended).
- ● Heat mat: A seedling heat mat (70–90°F) to speed germination (critical for strawberries!).
- ● Grow lights: Full-spectrum LED lights (12–16 hours/day) or a south-facing windowsill (if natural light is bright).
- ● Misting bottle or spray nozzle (for gentle hydration).
- ● Fertilizer: A balanced, water-soluble fertilizer (e.g., 10-10-10) at half-strength (after germination).
- ● Bottom watering tray (to keep moisture consistent).
- ● pH test kit (ideal range: 5.5–6.5 for strawberries).
- ● Humidity dome with ventilation holes (for controlled moisture).
- ● Grow tent (if space is limited or light is weak).
- ● Label markers (to track varieties and dates!).
Step-by-step instructions for starting strawberry seeds indoors
Here's how to coax those stubborn strawberry seeds to sprout fast—using heat and patience.
🌱 Step 1: Prepare Seeds and Containers for Germination
Strawberry seeds have a tough outer shell, so I soak them in warm water for 12-24 hours to soften the coating. Use a small bowl or jar with enough water to fully submerge them. This step is non-negotiable—dry seeds may take 3-4 weeks to germinate instead of the 7-14 days we're aiming for.
While the seeds soak, fill 2-inch deep seedling trays with a sterile seed-starting mix—never garden soil. Strawberries hate soggy roots, so mix in 20% perlite to improve drainage. Press the soil down lightly until it's firm but not compacted. The surface should feel like a damp sponge, not a mud puddle.
💧 Step 2: Sow Seeds and Create a Moisture Dome
Use a toothpick to gently separate the soaked seeds from their clump. Strawberry seeds are tiny, so I plant 2-3 seeds per cell at a depth of just ⅛ inch—any deeper and they’ll struggle to break through. Cover them with a thin layer of fine vermiculite (not soil) to help retain moisture while they germinate.
Place the tray under a clear plastic dome or plastic wrap to create a humid environment. Strawberry seeds need 80-85°F soil temperatures to germinate quickly, so I set the tray on a seedling heat mat (never exceed 90°F). Keep the dome in place until 50% of seeds sprout—usually 5-7 days. Watch for condensation on the inside of the dome; if it’s dry, mist the soil lightly.
☀️ Step 3: Provide Optimal Light and Temperature
The moment you see first true leaves (not the tiny seed leaves), remove the dome immediately. Strawberry seedlings are extremely sensitive to damping-off, a fungal disease that collapses stems overnight. Now, they need 14-16 hours of bright, indirect light daily—a south-facing window or grow light (LED or fluorescent) within 2-3 inches of the tray.
Keep soil temperatures at 65-70°F during the day and 55-60°F at night. If your home runs cooler, a small space heater (safely positioned) or heat cable wrapped around the tray helps. You’ll know the light is right when seedlings grow sturdy and dark green, not leggy and pale. If they stretch toward the light, raise the grow light or rotate the tray daily.
✂️ Step 4: Thin and Harden Off Seedlings
When seedlings reach 2-3 inches tall with 3-4 true leaves, thin to the strongest plant per cell. Use scissors to snip weak stems at soil level—never pull them, or you’ll disturb the roots of the remaining plants. This step reduces competition and gives your keepers room to grow.
Start hardening off 2 weeks before your last frost date. Move seedlings outside to a shaded, sheltered spot for 1 hour the first day, gradually increasing time to full sun exposure over 7-10 days. Watch for wilting or yellowing leaves—a sign they’re not ready. Once they tolerate 6+ hours of sun without stress, they’re ready for transplanting into the garden.
Tips & tricks for perfect strawberry seed germination
Speed up those stubborn seeds with these precision techniques that'll have you harvesting berries sooner than you'd expect.
Soaking Secret: For the 12-24 hour soak, use warm (not hot) water—around 85°F—to maximize seed softening. I place my bowl on a seedling heat mat during this time to maintain consistent warmth. If you're short on time, you can extend the soak to 48 hours (optional), but don't exceed 72 hours or the seeds may start to deteriorate. The water should cover seeds by about 1 inch—don't let them float on top.
Heat Mat Precision: That 80-85°F soil temperature range is critical for fast germination. I use a digital thermometer to monitor the heat mat's output—some run hotter than advertised. Place the tray on the heat mat before sowing seeds so the soil reaches optimal temperature by planting time. If your home is particularly cold, consider using a double-layered heat mat for extra warmth during those first 5-7 days under the dome.
Lighting Strategy: For the 14-16 hours of light, I recommend using a full-spectrum LED grow light on a timer rather than relying solely on windows. Position it 2-3 inches above the seedlings and adjust height as they grow—closer light = more intense growth but risk of burning. Rotate the tray quarter-turn daily to prevent uneven growth toward the light source. If using a south-facing window, place a reflective surface (like aluminum foil) behind the tray to bounce extra light onto the seedlings.
Dome Management: The humidity dome isn't just for moisture—it traps heat too. After planting, place the dome and heat mat in a warm corner of your kitchen (away from drafts) to maximize germination speed. Check for condensation daily: if it's dry, mist the inside of the dome with water (not the soil directly) to maintain humidity. Remove the dome immediately when you see first true leaves—this prevents damping-off disease that thrives in humid conditions once seedlings emerge.
Pro Tips for Starting Strawberry Seeds Indoors
- Speed up those stubborn seeds with these precision techniques that'll have you harvesting berries sooner than you'd e...
- Soaking Secret: For the 12-24 hour soak, use warm (not hot) water—around 85°F—to maximize seed softening. I place my ...
- Heat Mat Precision: That 80-85°F soil temperature range is critical for fast germination. I use a digital thermometer...
Frequently asked questions
Got questions about starting strawberry seeds indoors?
You’re not alone! Here are answers to the most common concerns to help you grow confidently.
How soon can I expect strawberry seeds to germinate?
With a heat mat (70–85°F), germination typically takes 7–14 days. Without one, it may stretch to 3–6 weeks. Patience is key—keep soil moist and warm for best results!
When is the best time to start seeds indoors?
Start 8–10 weeks before your last frost date for June-bearing varieties or 6–8 weeks for everbearing/day-neutral types. Check your local frost dates to time it right!
What if my seeds aren’t germinating?
Try these fixes:
- Check moisture—soil should stay damp (not soggy).
- Ensure warmth—heat mats or seedling trays help.
- Test seed viability—soak a few in water; if they sink, they’re good!
- Use a bottom-heating method (like a heated propagator).
Can I start strawberries from store-bought berries instead?
Yes! Save seeds from ripe strawberries, clean them, and dry them before planting. Note: Hybrid varieties may not produce true-to-type berries, but it’s a fun experiment!
How deep should I plant the seeds?
Strawberry seeds are tiny—press them just below the soil surface (no deeper than ¼ inch). Light exposure helps germination, so avoid burying them too deep!
Wrapping up and next steps
Starting strawberry seeds indoors with a heat mat is a rewarding way to jumpstart your garden—especially if you’re eager for an early harvest! 🌱 With the right setup, patience, and a little warmth, you’ll soon be watching those tiny seeds sprout into vibrant seedlings ready for transplanting.
The key is consistency: keep those seeds cozy, monitor moisture, and stay attentive to their needs.
Now that you’re armed with the know-how, take the next step—grab your supplies and give it a try! Even if your first batch isn’t perfect, every gardener learns by doing. Happy growing, and may your strawberry patch be bountiful! 🍓✨