
Size
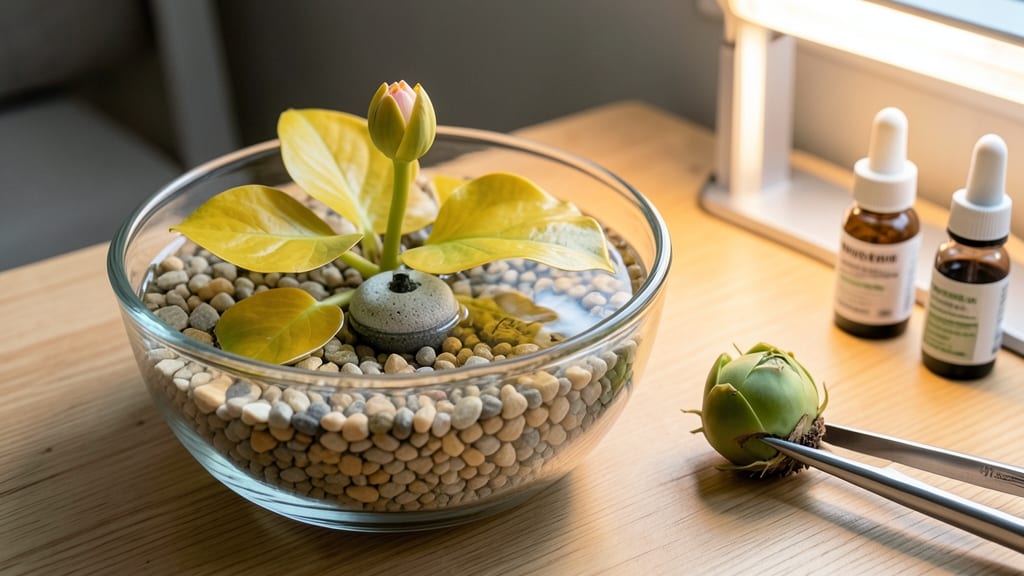
Growing water lilies in a bowl indoors means floating blooms on your coffee table by summer. 🌸 The secret lies in dwarf varieties like 'Tiny Star' or 'Mini Starburst'—they thrive in just 6-8 inches of water, perfect for wide bowls or shallow containers.
Most people overlook the water quality, but stagnant water leads to algae and weak roots, not blooms.
Start with a bowl at least 12 inches wide and 6 inches deep, filled with dechlorinated water—tap water left out for 48 hours or treated with a water conditioner. Place your lily pad (with roots attached) in the center, ensuring the roots dangle freely.
A small LED grow light 12 inches above the bowl mimics sunlight, and you'll see new leaves within 2-3 weeks.
Keep the water 65-75°F and change 20% weekly to prevent stagnation. A pinch of aquatic plant fertilizer every 4 weeks keeps blooms vibrant, and a small air stone (optional) prevents root rot. Within 6-8 weeks, you'll have delicate blooms floating in your living space—no greenhouse needed.
Watch for yellow leaves (too much light) or brown roots (stagnant water)—both fixable with adjustments. This setup works year-round, even in apartments. The key? Patience and consistent care—your indoor pond will become the envy of every guest.
📚 In This Guide
- What you need
- Instructions
- Tips and common mistakes
- Wrapping up and next steps
What you need
- ● Glass bowl or container: At least 8–12 inches wide and 6–8 inches deep (deeper for hardy lilies). Choose food-safe glass (like Pyrex or tempered glass) to avoid leaching.
- ● Water lily rhizome or tuber: 1–2 healthy, dormant rhizomes (size of a golf ball or larger). Look for hardy varieties like Nymphaea 'Alba' or 'Helvola' for indoor success.
- ● Dechlorinated water: Use reverse osmosis (RO) water or tap water left in an open container for 24–48 hours to remove chlorine.
- ● Gravel or aquarium substrate: 1–2 inches of small pebbles or aquarium sand (1–2mm size) for root anchoring.
- ● Water conditioner: A liquid or tablet-based dechlorinator (e.g., Seachem Prime) to keep water safe.
- ● LED grow light: A full-spectrum LED bulb (10W–20W) with 12–14 hours of light/day. Place it 6–12 inches above the bowl.
- ○ Small aquarium air pump (optional but helpful): A low-flow air stone to gently oxygenate water and prevent stagnation.
- ● Floating plant companions: Add water hyacinth or duckweed to absorb excess nutrients and reduce algae.
- ● Liquid fertilizer: A diluted aquatic plant fertilizer (e.g., Dyna-Gro Grow) every 2–4 weeks for extra nutrients.
- ● Thermometer: To monitor water temp (ideal: 65–80°F). Lilies hate cold drafts!
- ● Decorative stones or driftwood: For a natural, Instagram-worthy touch (just ensure they’re non-toxic).
- ● Spare bowl or backup container: In case of accidental spills or algae outbreaks.
Step-by-step instructions for growing water lilies in a bowl indoors
Here's how to create a stunning indoor water garden with water lilies—no direct sunlight required.
🪴 Step 1: Select the Right Container and Water Source
Choose a bowl at least 12 inches in diameter with a depth of 8+ inches—this gives roots space to spread while keeping the plant stable. I prefer glazed ceramic because it retains moisture and temperature better than plastic. Avoid metal containers, which can leach chemicals into the water.
Fill the bowl with dechlorinated water (use a water conditioner to remove chlorine) and let it sit for 24 hours before planting. This allows any residual chemicals to dissipate. Maintain the water level at 6-8 inches deep—too shallow and roots dry out; too deep and the plant may rot.
🌱 Step 2: Plant the Water Lily Tubers Correctly
Water lilies grow from tubers, which are thick, potato-like rhizomes. Place the tuber 1 inch below the water surface—this ensures the top stays exposed for air while roots can access moisture. Use a small weight or pebble to anchor it gently if needed, but avoid burying it in soil.
I like to position the tuber near the edge of the bowl so the leaves can spread outward as they grow. This creates a more natural, cascading effect. Watch for first signs of green shoots within 2-3 weeks—this confirms the tuber is viable and ready to grow.
☀️ Step 3: Provide Indirect Light and Maintain Temperature
Water lilies thrive under bright, indirect light—think east or north-facing windows where sunlight filters through sheer curtains. Direct sunlight will scorch leaves, while too little light stunts growth. If natural light is insufficient, supplement with a grow light 12-18 inches above the bowl for 10-12 hours daily.
Keep the water temperature between 65-75°F. Use a small aquarium heater if your room runs cooler, especially in winter. Cold water slows growth and can cause the tuber to go dormant prematurely. You’ll notice new leaves unfurling within 4-6 weeks—this is your cue that the plant is happy and established.
💧 Step 4: Feed and Maintain Water Quality
Add a liquid aquatic fertilizer every 4-6 weeks to provide essential nutrients. I use a diluted dose—half the recommended strength—to avoid overfeeding, which can cloud the water. Stir gently to distribute the fertilizer evenly without disturbing the roots.
Change 20% of the water weekly to prevent buildup of algae or debris. Use a clean cup to scoop out old water and replace it with dechlorinated water at room temperature. This keeps the environment clean while minimizing stress on the plant. You’ll see vibrant, healthy leaves and buds forming as the water stays fresh.
✂️ Step 5: Encourage Blooms and Prune as Needed
Once the plant produces buds, ensure it gets maximum indirect light—this triggers blooming. Remove any yellow or damaged leaves with clean scissors to redirect the plant’s energy toward new growth. I pinch off spent blooms right after they fade to encourage more flowers.
If the bowl becomes crowded, divide the tubers every 2-3 years by gently separating them and replanting in fresh water. This rejuvenates the plant and prevents overgrowth. With proper care, your indoor water lily will reward you with continuous blooms for months, even in low-light spaces.
Tips & tricks for perfect indoor water lily growth
Transforming your living space into a serene aquatic haven starts with these essential insights—guaranteed to help your water lilies thrive without the sunlight struggles.
Container Selection Matters: While glazed ceramic bowls work beautifully, consider adding a layer of small pebbles at the bottom (about 1 inch deep) to create a natural base for the tuber. This mimics the plant's natural habitat and provides stability, especially for larger tubers. The 12-inch diameter minimum is non-negotiable—smaller bowls restrict root growth and lead to stunted plants.
Water Chemistry Is Critical: The 24-hour dechlorination period isn't just about removing chlorine—it's about letting the water reach room temperature and stabilize. I've found that adding a pinch of aquarium salt (about 1 teaspoon per gallon) during this time can further enhance tuber health by mimicking natural water conditions. This small addition makes a noticeable difference in early growth stages.
Lighting Strategy: For the 10-12 hours of grow light, position it so it covers the entire bowl surface evenly. I recommend using a full-spectrum LED grow light rather than a standard bulb—they produce the blue and red wavelengths water lilies need for photosynthesis. If you notice leaves turning pale yellow, you're likely not providing enough light intensity, not duration.
Temperature Consistency: Maintaining that 65-75°F range is more important than you might think. I've seen tubers fail to sprout when kept below 68°F, even with perfect light conditions. If your home runs cooler, consider placing the bowl on a small heating pad set to low—just enough to keep the water warm without overheating. The subtle warmth encourages root development that you can't see but absolutely need for blooms.
Pro Tips for Grow Water Lilies In A Bowl Indoors
- Transforming your living space into a serene aquatic haven starts with these essential insights—guaranteed to help yo...
- Container Selection Matters: While glazed ceramic bowls work beautifully, consider adding a layer of small pebbles at...
- Water Chemistry Is Critical: The 24-hour dechlorination period isn't just about removing chlorine—it's about letting ...
Frequently asked questions
about growing water lilies in a bowl indoors—because even the greenest thumbs need a little clarity!Can I grow water lilies in a bowl without sunlight?
Water lilies thrive indoors with artificial grow lights (like full-spectrum LEDs) for 10–12 hours daily. Place the bowl near a sunny window for supplemental light, but avoid direct afternoon sun to prevent overheating. Just mimic their natural habitat with bright, indirect light.
How long does it take for water lilies to bloom in a bowl?
Patience is key! With proper care, you’ll see new leaves in 4–6 weeks, and blooms may appear in 8–12 weeks. Temperature (70–85°F) and light consistency speed up the process. Prune yellow leaves to redirect energy toward flowers—think of it like a spa day for your lilies!
Why are my water lily leaves turning yellow or brown?
Yellow/brown leaves usually signal overcrowding, nutrient deficiency, or poor water quality. Try these fixes:
- Refresh the water weekly (use dechlorinated water).
- Thin the roots if the bowl feels cramped.
- Boost nutrients with liquid fertilizer (diluted to ¼ strength).
- Check water temp—keep it between 68–78°F.
What’s the best bowl size for water lilies?
Aim for a minimum 12-inch diameter bowl (deeper is better!). Smaller bowls limit root growth and nutrient absorption. For tropical varieties, a 16–20 inch bowl gives them room to stretch their legs (or roots!). Use a heavy base to prevent tipping—think stability over style.
Can I grow water lilies from store-bought blooms?
Yes, but it’s tricky! If you spot new buds forming on a store-bought lily, try propagating it:
- Snip a stem with a leaf node and root it in water.
- Change the water every 2–3 days.
- Wait 4–6 weeks for roots to grow (2+ inches).
- Plant in your bowl with substrate.
What if my water lily smells bad?
Foul odors mean decaying roots or stagnant water. Act fast:
- Drain and rinse the bowl thoroughly.
- Clean with hydrogen peroxide (1 tsp per gallon) to kill bacteria.
- Trim dead roots and replant in fresh substrate.
- Add an air stone to improve oxygen flow.
Wrapping up and next steps
Growing water lilies in a bowl indoors is a rewarding way to bring nature’s beauty into your space—no sunlight struggles required! 🌿 With the right setup, patience, and care, you’ll enjoy vibrant blooms year-round.
Start small, monitor your plant’s needs, and soon, you’ll have a stunning aquatic centerpiece that feels like a mini pond.
Ready to dive deeper? Experiment with different varieties or try expanding to a larger container once you’ve mastered the basics. Happy growing—your indoor oasis awaits! 🌸