
Propagation
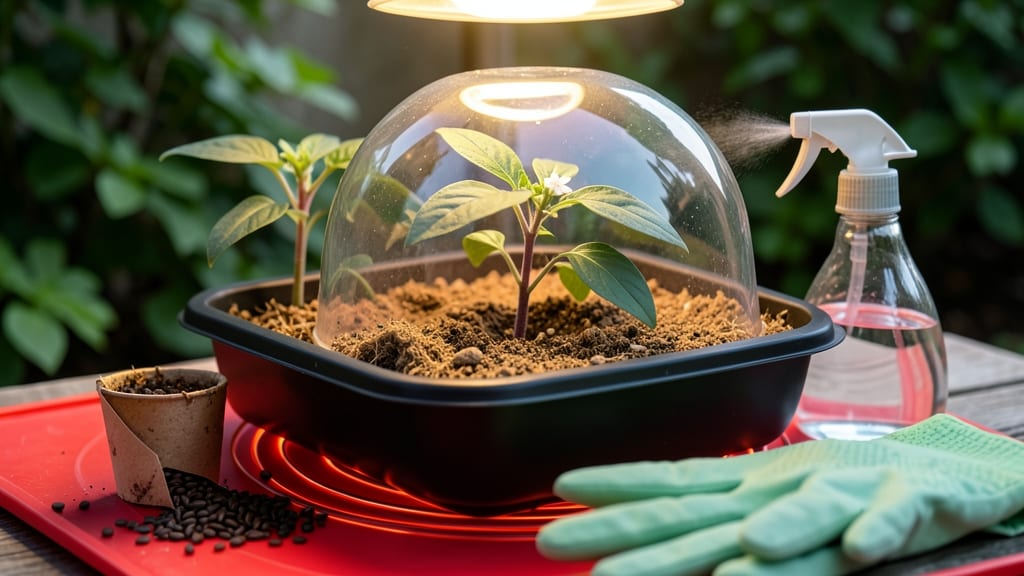
Starting pepper seeds indoors with a heat mat cuts 3-4 weeks off your growing season—my first batch germinated in just 5 days instead of the usual two weeks. 🌱 The secret?
Mimicking tropical conditions where peppers naturally thrive, and a simple setup that avoids the most common failures (like damp-off or leggy seedlings). You’ll need 4-6 week old seedlings ready for transplant, and the process starts with sterile seed-starting mix, small containers, and a heat mat set to 80-85°F.
Most beginners overwater or underlight, but peppers are forgiving once you nail these basics. The payoff? Early harvests of sweet bell peppers, jalapeños, or habaneros that outpace store-bought plants by 6-8 weeks.
Here’s where it gets interesting: peppers need 12-14 hours of bright light (grow lights work best) and bottom watering to prevent mold. I use clear plastic domes to trap humidity until germination, then remove them to avoid damping-off.
The first true leaves appear in 7-10 days, and that’s when you start hardening off seedlings for outdoor life. This method works for any pepper variety—from mild to hot—and adapts to small spaces.
Whether you’re growing on a kitchen counter or in a basement, the key is consistency in heat, light, and moisture. Ready to get those seeds sprouting?
📚 In This Guide
- What you need
- Instructions
- Tips and common mistakes
- Wrapping up and next steps
What you need
- ● Pepper Seeds: 5–10 seeds per variety (organic, non-GMO preferred for best results).
- ● Seed Starting Trays or Pots: Cell packs (2–4" deep) or biodegradable pots (2–3" diameter).
- ● Quantity: 1 tray (50+ cells) or 10–20 individual pots.
- ● Seed Starting Mix: Lightweight, sterile mix (50% peat/coir + 50% perlite/vermiculite). Avoid garden soil—it’s too dense!
- ● Heat Mat (Critical for Germination!): Electric seedling heat mat (70–80°F range).
- ● Size: Large enough to cover your entire tray (e.g., 10"x20" for standard trays).
- ● Plastic Dome or Clear Lid: To retain humidity (or a spray bottle for manual misting).
- ● Grow Lights: LED or fluorescent lights (12–16 hours/day, 6" above seedlings).
- ○ Optional but highly recommended for weak winter sunlight.
- ● Spray Bottle: For gentle watering (avoid drowning seeds!).
- ● Thermometer: To monitor soil temp (aim for 75–85°F for optimal germination).
- ● Bottom Watering Tray: Keeps roots consistently moist without overwatering.
- ● Fertilizer: Diluted fish emulsion or seedling-specific formula (after germination).
- ● Humidity Tent: DIY with a plastic bag and rubber bands for extra coziness.
- ● Seedling Label Sticks: To track varieties (peppers like ‘Jalapeño’ vs. ‘Bell’ can look alike!).
- ● Fan (Small Clip-On): For gentle airflow to strengthen seedlings (after germination).
Step-by-step instructions for starting pepper seeds indoors
Here's how I guarantee fast germination with a heat mat—no more waiting weeks for stubborn pepper seeds.
🌱 Step 1: Prepare Containers and Seed Starting Mix
Use 4-inch deep seed trays or individual pots with drainage holes—pepper seeds hate soggy roots. I fill them with a sterile seed-starting mix (never garden soil) because it's light and won't compact. Moisten the mix until it feels like a damp sponge when squeezed—if water drips out, it's too wet.
Press the soil down gently with your fingers to create a firm surface. This prevents seeds from sinking too deep during watering. I like to make small furrows ¼ inch deep with my finger—just enough to nestle the tiny seeds without burying them. Pepper seeds need light to germinate, so planting too deep delays sprouting.
🌱 Step 2: Plant Seeds and Apply Heat for Fast Germination
Drop 2-3 seeds per cell (you'll thin later) into the furrows, spacing them ½ inch apart. Cover lightly with a sprinkle of mix—just enough to hide them from view. Pepper seeds are finicky about moisture, so I mist the surface with a spray bottle until the soil looks evenly damp but not wet.
Here's the secret to fast germination: Place the tray on a seedling heat mat set to 80-85°F. The warmth mimics tropical conditions where peppers originate. You'll see sprouts in 7-14 days—half the time of seeds germinated at room temperature. Keep the mat plugged in 24/7 until germination completes.
☀️ Step 3: Provide Optimal Light Immediately After Sprouting
The moment you see first true leaves (not the initial seed leaves), move seedlings under grow lights for 14-16 hours daily. I use a full-spectrum LED bulb 2-3 inches above the plants. Without enough light, seedlings stretch toward the window and become weak—you'll see them develop long, pale stems with leaves far apart.
Rotate the tray a quarter turn daily so all seedlings grow straight. Watch for dark green leaves and sturdy stems—these are signs your light and heat are perfect. If leaves yellow, you're overwatering; if they curl, the air is too dry. Pepper seedlings need 60-70% humidity to thrive.
💧 Step 4: Water and Thin for Strong Seedlings
Water only when the top inch of soil feels dry. I use a spray bottle to avoid disturbing seedlings—pepper roots are delicate. After watering, check for crowded seedlings. Once they have 2-3 true leaves, thin to the strongest plant per cell. Snip the weakest at soil level with clean scissors—don't pull, or you'll disturb the roots of the remaining plants.
This is the moment that matters: After thinning, fertilize lightly with a half-strength balanced fertilizer (10-10-10). Pepper seedlings need nutrients to develop strong roots before transplanting. I wait 2 weeks after thinning before fertilizing again—too much too soon burns tender roots.
⏰ Step 5: Harden Off Before Transplanting
Two weeks before your last frost date, start hardening off seedlings. Place them outside in a shaded, sheltered spot for 1-2 hours the first day. Gradually increase time by 1 hour daily until they can handle a full day outside. This prepares them for outdoor conditions and prevents shock.
Watch for wilting or leaf drop—signs they're not ready. Once seedlings tolerate full sun and wind without stress, they're ready for the garden. Transplant on an overcast afternoon to reduce transplant shock. Water deeply at the base to settle soil around roots—this encourages strong establishment.
Tips & tricks for perfect indoor pepper seed starting
Fast germination isn't luck—it's science. Here's how to turn those stubborn pepper seeds into thriving seedlings with fewer headaches.
Heat Mat Precision: That 80-85°F range on your heat mat isn't arbitrary—it's mimicking tropical conditions where peppers evolved. If your home stays cooler than 70°F, keep the mat running 24/7 until sprouts appear. I've seen germination times cut from 21 days to just 7 with consistent warmth.
Lighting Strategy: The 14-16 hours of grow light isn't just about duration—it's about intensity. Position your LED bulb 2-3 inches above seedlings and adjust height as they grow. Too far? They'll stretch. Too close? They'll scorch. I test by holding my hand above the light—if it feels warm, it's too close.
Thinning Technique: When you're thinning to 2-3 true leaves, use clean scissors to snip at soil level rather than pulling. This prevents disturbing the roots of your remaining seedlings. I always sterilize my scissors with rubbing alcohol between batches to avoid cross-contamination.
Humidity Control: Pepper seedlings need 60-70% humidity to thrive, but most homes hover around 30-40%. Place a humidity dome over your trays or set them on a tray of pebbles with water underneath. The evaporation creates the perfect microclimate without overwatering.
Pro Tips for Start Pepper Seeds Indoors
- Fast germination isn't luck—it's science. Here's how to turn those stubborn pepper seeds into thriving seedlings with...
- Heat Mat Precision: That 80-85°F range on your heat mat isn't arbitrary—it's mimicking tropical conditions where pepp...
- Lighting Strategy: The 14-16 hours of grow light isn't just about duration—it's about intensity. Position your LED bu...
Frequently asked questions
Got questions about starting pepper seeds indoors?
You’re not alone—germination, timing, and troubleshooting can be tricky! Here are answers to the most common queries to help you grow strong, healthy peppers from seed.
When is the best time to start pepper seeds indoors?
Peppers need 8–12 weeks indoors before transplanting outside, so start them 6–8 weeks before your last frost date. For example, if your frost date is April 15, begin seeds by February 15–March 1. Hot peppers can handle a slightly shorter window (6–8 weeks), while bell peppers may need the full 10–12 weeks.
Why are my pepper seeds taking so long to germinate?
Pepper seeds are slow starters—germination can take 10–21 days (or longer in cool soil). Use a heat mat (75–85°F) and keep soil consistently moist (not soggy). Avoid cold drafts or fluctuating temps, which can stall germination. If seeds still don’t sprout after 3 weeks, they may be old or damaged—try fresh seeds!
Can I use regular potting soil for pepper seeds?
While you can use potting soil, pepper seeds thrive in light, sterile seed-starting mix with perfect drainage. Regular soil may compact, leading to rot or damping-off. Mix in perlite or vermiculite (20%) to improve airflow. Avoid garden soil—it’s too dense and may harbor pests or diseases.
What’s the best way to harden off pepper seedlings?
Start hardening off 1–2 weeks before transplanting by gradually exposing seedlings to outdoor conditions. Begin with 1–2 hours of shade on day 1, increasing time and sun exposure daily. By day 7, they should handle full sun (6+ hours). Avoid windy days, and keep them in a sheltered spot to prevent stress.
Can I reuse seed trays or containers for pepper seeds?
Yes! Clean and sterilize containers with a 10% bleach solution (1 part bleach to 9 parts water) to kill fungi or bacteria. Rinse well and let dry before reuse. Avoid plastic containers that trap moisture—opt for biodegradable pots or peat pellets for better transplant success. Just ensure they’re drainage-friendly to prevent root rot.Wrapping up and next steps
Starting pepper seeds indoors with a heat mat is a rewarding way to jumpstart your growing season—patience and precision pay off! 🌱 By following these steps, you’ll give your seedlings the warmth and care they need to thrive before transplanting.
Now that you’re armed with the right tools and techniques, it’s time to roll up your sleeves and watch those tiny seeds transform into robust plants.
Your next step? Set up your seed-starting station and keep an eye on those sprouts—soon, you’ll be harvesting peppers like a pro! 🌶️