
Planting
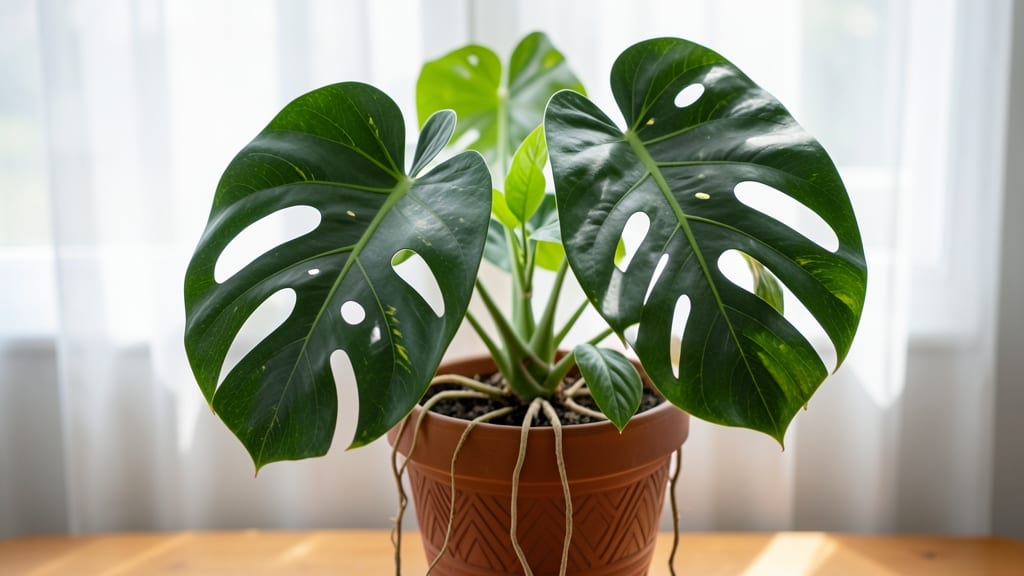
Growing indoor pot plants year-round just needs the right plants and a few simple tricks. 🌱 I've turned my dim living room into a lush jungle by choosing shade-tolerant varieties and adjusting care routines—no fancy grow lights required.
The secret lies in matching plants to your space's natural light and watering patterns that prevent root rot.
Start with easygoing plants like snake plants, pothos, or ZZ plants—they thrive on neglect and survive in corners where most plants would give up. You'll need well-draining soil and pots with drainage holes to prevent soggy roots, plus a spray bottle for humidity-loving varieties.
Most indoor plants need water only when the top inch of soil feels dry.
Within weeks, you'll see new growth that proves you've cracked the code. The air stays fresher, your space feels more alive, and you avoid the heartbreak of wilted leaves from overwatering. These plants even help purify indoor air while looking stunning in any decor.
Works for apartments, offices, or sun-starved rooms. The same principles apply whether you're growing herbs on a windowsill or tropical plants in a bright hallway. Let's get those pots thriving!
📚 In This Guide
- What you need
- Instructions
- Tips and common mistakes
- Wrapping up and next steps
What you need
- ● Pot: 1-2 containers with drainage holes (size depends on plant type—small for succulents, medium for herbs/leafy greens). Pro tip: 💡 Use terracotta for breathability or plastic for moisture retention!
- ● Potting mix: 1 bag of lightweight, well-draining soil (e.g., cactus/succulent mix or a blend of peat, perlite, and vermiculite). Avoid heavy garden soil!
- ● Indoor plant: 1 low-light tolerant variety (e.g., snake plant, pothos, or ZZ plant). Check for healthy roots and vibrant leaves!
- ● Watering can: 1 with a narrow spout to avoid overwatering.
- ○ Optional but helpful: 1 small hand trowel for soil adjustments.
- ● 1 spray bottle for misting (great for humidity-loving plants!).
- ● 1 grow light (LED or fluorescent) if natural light is <2-3 hours/day.
- ● 1 saucer or tray to catch excess water.
- ● Prerequisites: A spot with some indirect light (e.g., near a window or under artificial lighting).
- ● Patience! Low-light plants grow slower but thrive with consistency.
Step-by-Step instructions for growing thriving indoor pot plants
Here's how to keep your leafy friends happy with simple light tricks and care routines.
🪴 Step 1: Choose the Right Containers and Soil Mix
Select pots with drainage holes—no exceptions. I use 6-inch diameter containers for most plants, but larger pots mean less frequent watering. Fill each with a well-draining potting mix (never garden soil—it compacts and suffocates roots). Add a handful of perlite or orchid bark to improve aeration if your mix feels heavy.
Tap the pot gently after filling to settle the soil without compacting it. The surface should look fluffy, like crumbled cookie dough. This prevents water from pooling at the bottom, which leads to root rot. If your mix is pre-moistened, give it a quick shake to distribute any clumps before planting.
🌱 Step 2: Select and Plant Light-Adapted Varieties
Pick plants labeled "low to medium light"—snake plants, ZZ plants, or pothos thrive where others fail. Avoid fussy tropicals like calatheas unless you have bright indirect light. Gently remove your plant from its nursery pot and loosen the root ball with your fingers before placing it in the new container.
Position the plant so the soil line sits ½ inch below the pot's rim. This prevents soil from spilling when you water. Press lightly around the edges to secure the plant, but don't pack the soil—roots need air to breathe. Water immediately after planting to help settle everything in place.
☀️ Step 3: Optimize Light with Simple Hacks
Rotate your pots quarter-turn weekly so all sides get even light exposure. If leaves stretch toward the window (a sign of legginess), move the plant 4-6 inches closer to the light source. For north-facing windows, supplement with a 12-inch LED grow light for 6 hours daily—even artificial light prevents sad, sparse growth.
Watch for yellowing leaves—this usually means too much direct sun. Move the plant 1-2 feet back from the window immediately. Conversely, if leaves look dull and small, it's time to relocate closer to the brightest spot in the room. Most indoor plants tolerate bright indirect light best—think "reading light" intensity.
💧 Step 4: Master the Watering Routine
Stick your finger 1 inch into the soil—if it feels dry, water until liquid runs through the drainage hole. Let excess drain completely; soggy soil kills plants faster than drought. I water my pots every 7-10 days, but adjust based on your home's humidity. Dry air means more frequent watering, while humid bathrooms may stretch it to 2 weeks.
Use room-temperature water—cold water shocks roots. Always water at the soil line, never from above, to avoid fungal spores landing on leaves. After watering, wipe leaves with a damp cloth to remove dust, which blocks light absorption. This simple habit keeps plants looking fresh and healthy.
✂️ Step 5: Prune and Maintain for Long-Term Health
Trim yellow or brown leaves with clean scissors at the base, not mid-stem. This encourages new growth and prevents disease. Pinch back leggy stems just above a leaf node to promote bushier growth. Most indoor plants appreciate a springtime prune—it's their natural reset button after winter's slower growth.
Fertilize every 6-8 weeks during spring and summer with a balanced liquid fertilizer (half-strength). Skip fertilizing in fall and winter when growth slows. Over-fertilizing burns roots—always follow package instructions. A little goes a long way with container plants.
Tips & tricks for thriving indoor pot plants
A few subtle adjustments can transform your struggling plants into lush, happy companions. Here's what I've learned after years of trial and error.
Soil Air Matters: After filling your 6-inch pot with well-draining mix, don't just dump in the plant. Gently press around the edges to secure it while leaving the soil loose—roots need to breathe! I like to think of it like fluffing a pillow: firm enough to hold shape, but still soft underneath. This prevents that dreaded compacted soil layer that suffocates roots and leads to rot. Pro tip: If your mix feels dense, add an extra handful of perlite before planting.
Light Rotation Payoff: That quarter-turn weekly rotation in Step 3 isn't just busywork—it's how you prevent lopsided growth. I've seen plants grow toward the window like sunflowers when I forget this step. The goal is even exposure, so all sides get that "reading light" intensity we want. For extra lazy gardeners, set a phone reminder every Sunday morning—your plants will thank you with symmetrical growth.
Watering Secret: The 1-inch finger test in Step 4 is your best friend, but here's the part nobody tells you: water quality matters too. If your tap water is hard or chlorinated, let it sit out overnight before using. I also recommend using a clean watering can—tap water left sitting in dirty containers grows algae, which can harm your plants. And yes, that includes the one collecting dust in your cabinet. A simple wipe-down makes all the difference.
Fertilizer Timing: Those 6-8 week intervals for spring/summer feeding are perfect, but timing is everything. I fertilize right after watering so the nutrients get absorbed immediately rather than sitting on dry soil. Also, if you notice brown leaf tips after fertilizing, you're overdoing it—flush the soil with water to remove excess salts. Think of it like giving your plants a detox after a heavy meal.
Pro Tips for Indoor Pot Plant
- A few subtle adjustments can transform your struggling plants into lush, happy companions. Here's what I've learned a...
- Soil Air Matters: After filling your 6-inch pot with well-draining mix, don't just dump in the plant. Gently press ar...
- Light Rotation Payoff: That quarter-turn weekly rotation in Step 3 isn't just busywork—it's how you prevent lopsided ...
Frequently asked questions
Got questions about keeping your indoor pot plants happy and healthy? You’re not alone! Here are answers to the most common queries—because even green thumbs need a little help sometimes.
How often should I water my indoor pot plant?
Watering depends on the plant and pot size, but a good rule is to check the top inch of soil—if it’s dry, it’s time! Overwatering is the #1 killer, so let excess water drain, and avoid soggy soil. Pro tip: Use a moisture meter or stick your finger in for a quick test!
What’s the best low-light indoor pot plant for beginners?
Start with hardy picks like snake plants, ZZ plants, or pothos—they thrive in dim corners and need minimal care. Avoid fussy plants like ferns or calatheas unless you can provide bright, indirect light. Bonus: These plants purify air too!
Why are my pot plant’s leaves turning yellow?
Yellow leaves usually mean overwatering, but check for other clues: brown tips = dry air; soft, mushy leaves = root rot. Adjust watering, ensure proper drainage, and trim damaged leaves to help the plant focus on new growth. Quick fix: Move to better light if possible!
Can I reuse old pots for indoor plants?
Yes! Clean and sanitize old pots with soap and water to kill bacteria or fungi. Just ensure they have drainage holes—no holes? Drill them or use a cache pot with pebbles. Warning: Avoid plastic pots from pesticides or chemicals (like old herb pots).
How do I keep my indoor pot plant from getting too hot or cold?
Most plants prefer temps between 65–75°F (18–24°C). Avoid drafts (like AC vents or heaters) and keep them away from windows in extreme heat. Grouping plants together creates a microclimate, but don’t overcrowd—each needs airflow!
Wrapping up and next steps
Growing indoor pot plants with minimal light is totally doable—you just need the right plants, a little creativity, and consistent care! 🌱 From snake plants that thrive in low light to strategic placement tricks, these hacks will keep your green friends happy year-round.
Remember, even small adjustments like rotating pots or dusting leaves can make a big difference.
Ready to level up your indoor jungle? Start with one low-light plant, experiment with placement, and watch your space transform. Your green thumb is closer than you think—just take that first step! 🌿