
Planting
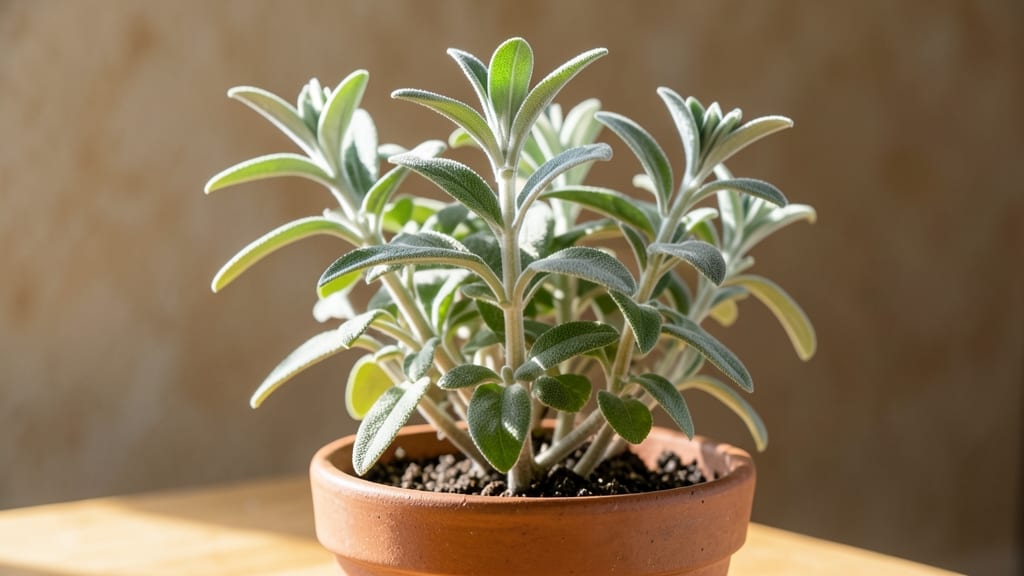
Growing an indoor sage plant means fresh, piney fragrance all year—no kitchen window required. 🌿 I’ve kept mine thriving for three winters now, and the secret isn’t complicated: it’s about light, water, and a little patience.
Unlike outdoor sage, which can sprawl into a bush, indoor varieties stay compact and aromatic with minimal fuss.
The right setup makes all the difference. You’ll need a pot with drainage, well-draining soil (think cactus mix with perlite), and a sunny spot—at least 6 hours of bright light daily. Overwatering is the #1 killer, so let the top inch of soil dry out between waterings.
Prune sparingly in spring to encourage bushiness, and you’ll have a fragrant, low-maintenance plant that doubles as a kitchen herb.
By summer, your sage will reward you with lush, silvery-green leaves that smell like a forest after rain. The best part? It’s pest-resistant and rarely needs fertilizer. Just avoid soggy soil, and you’ll enjoy fresh sage for cooking or sachets year-round—no outdoor garden required.
Outdoor sage can handle drought and poor soil, but indoors, consistency is key. Rotate the pot occasionally for even growth, and watch it thrive in spaces where other herbs would struggle. Ready to grow yours?
📚 In This Guide
- What you need
- Instructions
- Tips and common mistakes
- Wrapping up and next steps
What you need
- ● Sage plant: 1 healthy Salvia officinalis (common sage) or Salvia rosmarinus (rosemary sage) from a nursery or garden center.
- ● Pot: 1 container with drainage holes (6–8 inches in diameter for a small plant, 10+ inches for mature growth).
- ● Potting soil: 1 bag of well-draining cactus/succulent mix or a blend of 50% potting soil + 50% perlite/sand (5–10 lbs, depending on pot size).
- ● Watering can: 1 with a narrow spout for precise hydration.
- ● Pruning shears: 1 pair of sterilized, sharp scissors (or clean kitchen shears in a pinch).
- ● Gravel or pebbles: Small stones for the pot’s drainage layer (1–2 cups).
- ● Slow-release fertilizer: 1 packet of balanced 10-10-10 or organic plant food (for occasional feeding).
- ● Humidity tray: A pebble tray or humidifier to mimic sage’s Mediterranean climate.
- ○ Sunlight meter: Optional tool to track light exposure (if unsure about your space).
Step-by-step instructions for growing an indoor sage plant
Here's how to cultivate a thriving, aromatic sage plant indoors with minimal fuss.
🪴 Step 1: Select the Right Container and Soil
Choose a 6-8 inch diameter pot with drainage holes—sage roots despise soggy conditions. I use terracotta because it breathes and helps prevent root rot. Fill the container with well-draining potting mix blended with 20% perlite to improve aeration. Sage thrives in slightly alkaline soil, so add a handful of crushed eggshells or lime if your mix is acidic.
Press the soil down gently but firmly—just enough to eliminate air pockets without compacting. The surface should feel firm when touched but still crumble easily. This balance ensures roots establish quickly without suffocating. If your mix feels too dense, mix in an extra 10% perlite or coarse sand.
☀️ Step 2: Position for Optimal Light Exposure
Sage demands 6-8 hours of direct sunlight daily—a south-facing window is ideal. If natural light is insufficient, supplement with a full-spectrum LED grow light positioned 12-18 inches above the plant. You'll notice leaves yellowing or stretching toward light if it's not getting enough—this is sage's way of begging for more photons.
Rotate the pot quarter-turn weekly to prevent lopsided growth. Watch for leaves turning pale or growing leggy; these are clear signals to move the plant closer to the light source. In winter, when daylight shortens, extend light exposure to 10-12 hours using a timer-controlled grow light to maintain vigor.
💧 Step 3: Master Watering for Healthy Growth
Water sage only when the top 2 inches of soil feel completely dry to the touch. Stick your finger in—if it comes out clean, it's time to water. Overwatering is sage's #1 killer, so I use the "soak-and-dry" method: pour water until it drains freely from the bottom, then empty the saucer immediately. This prevents root suffocation while keeping the plant hydrated.
Reduce watering in winter when growth slows—sage goes semi-dormant and needs far less moisture. Yellowing leaves often signal overwatering, while crispy edges mean it's thirsty. Adjust your schedule based on these visual cues rather than sticking to a rigid timeline.
✂️ Step 4: Prune Strategically for Bushier Growth
Prune sage after flowering or in early spring to encourage dense, bushy growth. Use clean, sharp scissors to snip back one-third of the plant's height, cutting just above a set of leaves where new growth will emerge. Avoid cutting into old wood—the plant won't regenerate from there. This pruning triggers branching and keeps your sage compact and fragrant.
Harvest leaves regularly by pinching off sprigs from the tips. Don't take more than one-third of the plant at once—sage recovers better when you let it retain its structure. The best time to harvest is morning, when essential oils are most concentrated. Store cuttings in a paper bag in the fridge for up to a week to preserve their aroma.
🌿 Step 5: Maintain Year-Round Health
Fertilize sage sparingly—just once in early spring with a balanced, water-soluble fertilizer diluted to half strength. Too much nitrogen promotes leafy growth at the expense of flavor. I skip fertilizer entirely in winter when the plant is dormant. Sage is a tough plant, but it rewards minimal care with intense fragrance and resilience.
Watch for pests like spider mites, which thrive in dry conditions. If you spot webbing or tiny moving dots on the undersides of leaves, spray the plant with neem oil and increase humidity slightly. Sage rarely gets sick, but brown leaf tips often signal low humidity—group it with other plants or use a pebble tray to boost moisture in the air.
Tips & tricks for perfect indoor sage plant care
Here's what I've learned after growing sage indoors for years—these tricks will keep your plant thriving with minimal effort.
Container Selection: Terracotta pots are ideal because they wick away moisture, but if you prefer plastic, make sure it has drainage holes and use a cache pot underneath to catch excess water. The key is preventing soggy soil—sage roots rot quickly when they sit in moisture. I've seen beginners use decorative pots without drainage, and within weeks, their plants turn mushy. If you must use a decorative pot, place it inside a saucer with pebbles and water, then nestle your plant pot on top.
Light Exposure Strategy: That 6-8 hours of direct sunlight is non-negotiable—sage is a sun-worshipper! If your windowsill isn't bright enough, invest in a quality LED grow light. Position it 12-18 inches above the plant and set a timer for 10-12 hours daily during winter. I've noticed that plants near west-facing windows get the most vibrant color, thanks to the afternoon sun. For maximum fragrance, rotate your plant quarter-turn weekly to ensure even growth.
Soil Preparation: The 20% perlite blend is crucial for aeration, but don't stop there—sage loves slightly alkaline soil. If your potting mix is neutral or acidic, add crushed eggshells or a pinch of lime. I've had success using a mix of 60% potting soil, 20% perlite, and 20% coarse sand. Press the soil firmly but gently when planting—this eliminates air pockets while preventing compaction. The surface should hold its shape when pressed but still crumble easily.
Harvesting Technique: When harvesting in the morning, look for the freshest leaves—they'll have the most intense aroma. Pinch off sprigs from the tips rather than stripping entire branches. I've found that harvesting regularly actually encourages bushier growth. Store your cuttings in a paper bag (not plastic) in the fridge—the paper allows for slight air circulation while preserving that fresh-from-the-garden fragrance for up to a week.
Pro Tips for Indoor Sage Plant
- Here's what I've learned after growing sage indoors for years—these tricks will keep your plant thriving with minimal...
- Container Selection: Terracotta pots are ideal because they wick away moisture, but if you prefer plastic, make sure ...
- Light Exposure Strategy: That 6-8 hours of direct sunlight is non-negotiable—sage is a sun-worshipper! If your window...
Frequently asked questions
How often should I water my indoor sage plant?
Water your sage only when the top 1-2 inches of soil feel dry. Overwatering is the #1 killer—sage prefers dry conditions! Water deeply but infrequently (about once every 1-2 weeks, depending on humidity). If the soil stays soggy, reduce watering to prevent root rot.
Do I need to prune my sage plant, and how?
Pruning keeps sage bushy and encourages growth. Trim back by 1/3 in early spring to shape it, and snip any woody or leggy stems year-round. Use clean scissors and avoid cutting into old, bare wood—sage won’t regrow from there! Pro tip: Harvest leaves regularly for cooking to encourage new growth.
How much sunlight does an indoor sage plant need?
Sage craves sunlight—place it in a south- or west-facing window for 6+ hours of direct light daily. If natural light is limited, supplement with a grow light 12 inches away for 14-16 hours/day. Yellowing leaves? It’s likely hungry for more sun!
Can I grow sage indoors year-round, or does it need a dormant period?
Yes! Unlike outdoor sage, indoor varieties thrive year-round with consistent care. Skip the "dormant" phase—keep watering and fertilizing lightly (every 2-3 months with diluted houseplant fertilizer) to maintain growth. Just watch for pests like spider mites if the air gets too dry.
What if my sage leaves turn yellow or crispy?
- Yellow leaves: Usually overwatering or poor drainage. Let the soil dry out completely between waterings.
- Crispy edges: Low humidity or underwatering. Mist leaves occasionally or place a tray of pebbles + water nearby to boost moisture.
- Leggy growth: Not enough light. Move it closer to a brighter window or add a grow light.
Can I use indoor-grown sage for cooking?
Harvest young, tender leaves (avoid woody stems) and use them fresh in dishes like pasta, soups, or roasted meats. For best flavor, pick leaves in the morning after the dew has dried. Store unused leaves in the fridge for up to 2 weeks or freeze them for later.
Wrapping up and next steps
Growing an indoor sage plant is a rewarding way to enjoy its fragrant leaves and culinary benefits year-round—without the fuss!
With just a few basics like bright light, well-draining soil, and occasional pruning, you’ll have a thriving, aromatic addition to your home. Now’s your chance to turn that sunny windowsill into a mini herb garden!
Ready to dive in? Start by gathering your supplies, then follow the simple steps to nurture your sage. Happy planting—and may your kitchen always smell like a cozy herb garden! 🌿✨