
Container Gardens
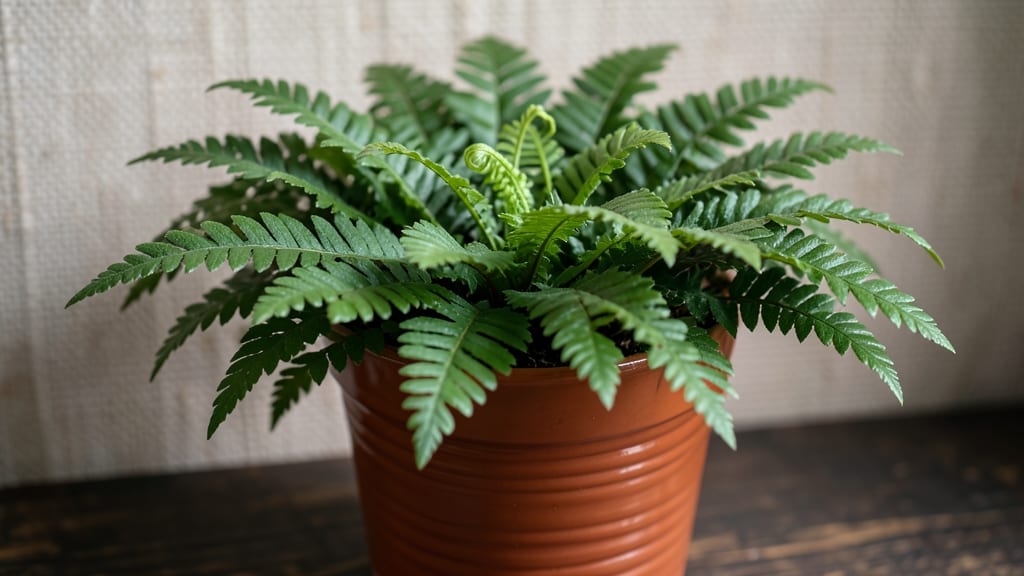
Growing a Kimberly Queen fern indoors means lush, feathery fronds all year—even in dim corners where other plants struggle. 🌿 I’ve kept mine thriving for years by treating it like a low-maintenance green thumb’s secret weapon. The key? Mimicking its natural understory habitat with just a few simple tweaks.
This fern tolerates low to bright indirect light, making it perfect for north-facing windows or rooms far from natural sunlight. Water when the top inch of soil feels dry, and keep humidity high—think misting or a pebble tray.
Overwatering causes brown fronds, but underwatering shows up as crispy tips. The right balance keeps those fronds vibrant year-round.
With the right care, your Kimberly Queen will reward you with arching fronds that grow 2-3 feet long, creating a tropical vibe anywhere. It’s surprisingly forgiving—even my first attempt survived despite my forgetful watering. The secret is patience and consistency, not perfection.
Once established, it’s nearly indestructible. Propagate by dividing the root ball in spring, and you’ll have free plants to share. No fancy fertilizers needed—just a little balanced houseplant food twice a year. Your indoor jungle just got easier.
📚 In This Guide
- What you need
- Instructions
- Tips and common mistakes
- Wrapping up and next steps
What you need
- ● Kimberly Queen Fern: 1 healthy plant (check for vibrant fronds and no brown tips)
- ● Pot: 1 container with drainage holes (6–8 inches in diameter for a mature plant)
- ● Well-draining potting mix: 1 bag (3–5 quarts) of a blend designed for ferns or houseplants (e.g., 50% peat moss, 30% perlite, 20% compost)
- ● Watering can: 1 with a narrow spout for gentle watering
- ○ Humidity tray or pebble tray: 1 (optional but highly recommended for indoor environments)
- ● Spray bottle: 1 (for misting fronds, 8–16 oz)
- ● Trowel: 1 small garden trowel for repotting (if needed)
- ● Pruning shears: 1 pair (sterilized) for trimming dead fronds
- ● Fertilizer: 1 balanced liquid fertilizer (e.g., 10-10-10 or 20-20-20, diluted to half-strength)
- ○ Grow lights (optional): 1–2 LED grow bulbs (if natural light is very limited)
- ● Decorative moss or pebbles: 1 small bag (for aesthetics in humidity trays)
Step-by-Step instructions for cultivating a thriving Kimberly Queen fern indoors
Here’s how to coax that signature lushness from your Kimberly Queen fern—even in low-light spaces.
🪴 Step 1: Select the Right Container and Soil Mix
The Kimberly Queen fern thrives in a container that allows its rhizomes to spread comfortably. Choose a 6-8 inch wide pot with drainage holes—terracotta works best because it breathes and prevents root rot. I like to use a well-draining potting mix blended with orchid bark and perlite (about 20% each) to mimic its natural, airy habitat. This prevents compaction and keeps roots oxygenated.
Fill the pot 2/3 full with the mix, then tap gently to settle. The goal is a loose, fluffy medium that won’t suffocate delicate roots. Avoid garden soil—it’s too dense and can harbor pathogens. If you’re repotting an established plant, remove the old soil carefully to inspect for pests or rot before replanting.
🌱 Step 2: Plant and Position for Optimal Growth
Place the fern’s root ball in the center of the pot, then fill the remaining space with your prepared mix, pressing lightly to eliminate air pockets. The rhizome should sit just below the soil surface—burying it too deep encourages rot, while leaving it exposed dries it out. Water thoroughly until moisture drains from the bottom holes, then let it sit for 10 minutes to ensure excess water escapes.
Position your Kimberly Queen in bright, indirect light—think east or north-facing windows. Direct sun will scorch its fronds, while too little light causes sparse, weak growth. If your space is dim, supplement with a grow light (12-14 hours daily) positioned 12-18 inches away. You’ll know the light is right when fronds unfurl fully and maintain a vibrant green hue without yellowing.
💧 Step 3: Master the Watering Routine
Kimberly Queens hate soggy roots but also despise dryness. Water when the top 1-2 inches of soil feel dry to the touch—usually every 5-7 days, depending on humidity and temperature. I like to water deeply until water runs from the drainage holes, then empty the saucer to prevent root suffocation. Overwatering is the fastest way to kill this fern, so always check moisture before adding more.
Mist the fronds 2-3 times weekly to replicate humidity levels of its tropical origins. A pebble tray filled with water (and topped with gravel) beneath the pot also helps maintain moisture without drowning roots. If fronds start curling or browning at the tips, that’s your cue to increase humidity or reduce watering slightly.
✂️ Step 4: Prune and Fertilize for Year-Round Lushness
Trim dead or yellowed fronds at the base with clean, sharp scissors to encourage new growth. I do this every 2-3 months, focusing on fronds that are brown, brittle, or over 50% damaged. Avoid cutting healthy fronds—this stresses the plant and disrupts its natural cycle. After pruning, wipe the fronds with a damp cloth to remove dust, which helps them absorb light more efficiently.
Feed your Kimberly Queen with a balanced liquid fertilizer (10-10-10) diluted to half-strength every 4-6 weeks during spring and summer. In fall and winter, cut back to once every 8 weeks—the plant grows slower in cooler months. Always water before fertilizing to prevent root burn. You’ll notice new fronds emerging within 2-3 weeks of feeding, signaling healthy growth.
☀️ Step 5: Monitor and Adjust for Seasonal Changes
As seasons shift, your Kimberly Queen’s needs change. In winter, reduce watering slightly—cooler air means slower evaporation, so the soil stays moist longer. If you notice fronds drooping in winter, it’s often due to dry indoor air from heating systems. A small humidifier nearby works wonders for maintaining that tropical feel.
Every 6-12 months, repot if roots are circling the container or poking through drainage holes. Choose a pot only 1-2 inches wider than the current one—too much space encourages root rot. Spring is the best time to repot, as the plant enters its active growth phase. Watch for new fronds unfurling in early spring—that’s your sign the plant is happy and ready to thrive.
Tips & tricks for cultivating a thriving Kimberly Queen fern indoors
Between us, these small details make all the difference when nurturing your Kimberly Queen fern—especially in less-than-ideal lighting.
Soil Composition: That 20% orchid bark and perlite mix in Step 1 isn't just arbitrary—it creates the perfect air-to-moisture balance. I've found that adding a handful of sphagnum moss (about 10%) to the mix helps retain humidity without compacting the soil. This is particularly helpful if your home tends to be dry, as the moss will slowly release moisture to the roots over time. The key is to keep the mix fluffy enough that you can easily run your finger through it without resistance.
Light Positioning: When placing your fern in Step 2, pay close attention to the quality of light rather than just the quantity. I notice the most vibrant growth when the fern receives morning sunlight (before 11 AM) followed by indirect light the rest of the day. If you're using a grow light, position it slightly higher than the recommended 12-18 inches during winter months when natural light is scarce. The light should be bright enough to cast a gentle shadow on your hand when held below it—this ensures optimal intensity without burning the fronds.
Watering Technique: The 10-minute drainage period in Step 2 is crucial for preventing root suffocation. I've learned that using room-temperature water (not cold from the tap) helps prevent shock to the roots. After watering, I like to gently lift the pot to check its weight—it should feel noticeably lighter when it's time to water again. This tactile check helps me avoid both overwatering and underwatering, especially during the 5-7 day watering cycle mentioned in Step 3.
Humidity Boost: For the misting routine in Step 3, I've found that using a spray bottle with a fine mist setting works best—coarse droplets can damage the delicate fronds. Place the pot on a tray of pebbles with just enough water to touch the bottom (not submerge it), then cover the setup with plastic wrap for 24 hours after repotting. This creates a mini greenhouse effect that helps the plant establish itself more quickly in its new environment. Remove the wrap once new growth appears.
Pro Tips for Kimberly Queen Fern Indoors
- Between us, these small details make all the difference when nurturing your Kimberly Queen fern—especially in less-th...
- Soil Composition: That 20% orchid bark and perlite mix in Step 1 isn't just arbitrary—it creates the perfect air-to-m...
- Light Positioning: When placing your fern in Step 2, pay close attention to the quality of light rather than just the...
Frequently asked questions
How much light does a Kimberly Queen Fern really need?
The Kimberly Queen Fern is a champ in low to bright indirect light—think under a desk lamp or near a north-facing window. Avoid harsh direct sun (it’ll scorch those fronds!) or pitch-black corners (it’ll get leggy). Pro tip: If fronds yellow, it’s likely too much light; if they brown, it’s too dry.
Why are my Kimberly Queen Fern fronds turning brown at the tips?
Brown tips usually mean low humidity or underwatering. Mist the fronds lightly 2–3x a week or place the pot on a tray with pebbles and water (just don’t let roots sit in it!). Bonus: Grouping plants together creates a mini humid microclimate—your fern will thank you!
How often should I water my indoor Kimberly Queen Fern?
Water when the top 1–2 inches of soil feel dry—about once a week (adjust for humidity/drafts). Overwatering is the #1 killer, so ensure the pot has drainage holes. Yellow fronds? Likely overwatered; crispy edges? Probably underwatered. Strike that balance!
Can I propagate my Kimberly Queen Fern from cuttings?
Yes! Snip a healthy frond into 3–4 inch sections (keep the pinnae attached), dip in rooting hormone, and place in moist perlite or water. Keep in warm, humid conditions (like a plastic bag with holes) and roots should sprout in 4–6 weeks. Patience pays off—new plants are free!
What’s the best alternative if my Kimberly Queen Fern struggles indoors?
Try these low-maintenance ferns for similar vibes:
- Boston Fern (Nephrolepis exaltata) – More forgiving, loves humidity
- Mauritius Fern (Davallia fejeensis) – Hardy, great for beginners
- Staghorn Fern (Platycerium) – Epiphytic (no soil!) and dramatic
Wrapping up and next steps
Growing a Kimberly Queen Fern indoors is a rewarding way to bring lush, tropical beauty into your home—even with minimal light! 🌿 With the right care (like bright, indirect light, consistent moisture, and occasional misting), this hardy plant thrives year-round, purifying your air and boosting your space with vibrant green fronds.
Whether you’re a beginner or a plant enthusiast, this fern is your perfect low-maintenance companion.
Ready to transform your space? Start with one Kimberly Queen Fern today—pick up a healthy plant, follow the care tips, and watch it flourish! 💚 Your green thumb is just a few steps away.