
Container Gardens
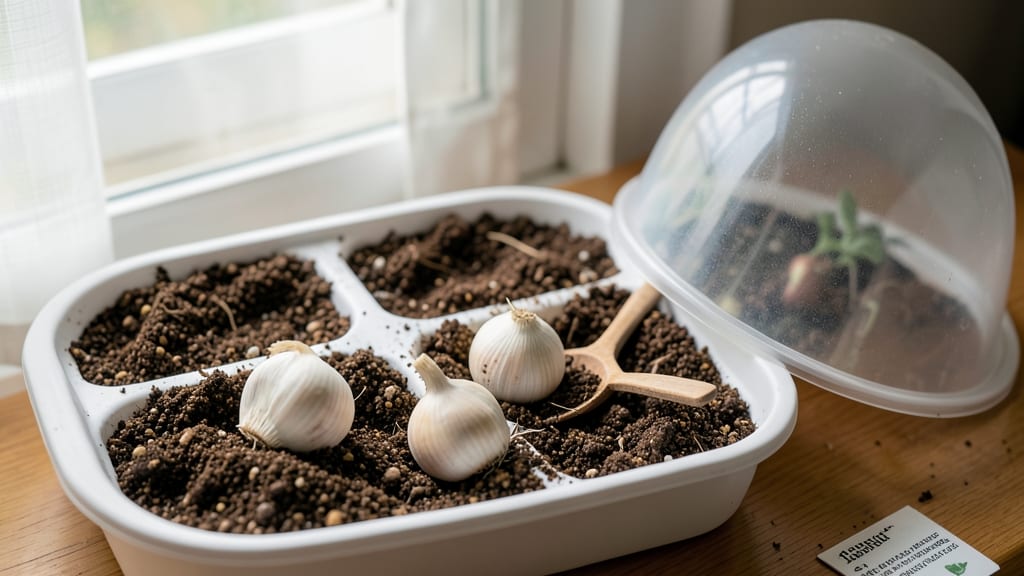
Planting garlic cloves indoors gives you fresh bulbs without a garden—just a sunny windowsill and 12 weeks of patience. I’ve grown edible garlic this way three winters in a row, and the results are just as flavorful as outdoor harvests, though slightly smaller.
The key is mimicking the cold stratification garlic needs to break dormancy, even inside. You’ll need a shallow container, well-draining potting mix, and cloves from organic garlic (the bigger, the better). Plant them 2 inches deep, pointed end up, in late fall or early winter.
A bright, cool spot—like a north-facing window—keeps mold at bay while encouraging strong root growth. Water lightly to avoid soggy soil, and you’ll see green shoots in 2-3 weeks. By spring, you’ll have lush, grass-like foliage and plump bulbs forming underground.
The flavor develops fully, though the bulbs may not reach the size of outdoor-grown garlic. Harvest when the lower leaves turn brown, braid the stalks to dry, and store in a cool, dark place for months.
This method works year-round in apartments or greenhouses, but outdoor planting still yields larger harvests. Perfect for small spaces or late-winter growing. Let’s get those cloves in the soil!
📚 In This Guide
- What you need
- Instructions
- Tips and common mistakes
- Wrapping up and next steps
What you need
- ● Garlic cloves: 6–12 hardneck or softneck garlic cloves (separated from a whole bulb, peeled or unpeeled). Pro tip: 💡 Choose large, firm cloves—they’ll grow bigger bulbs!
- ● Containers: 6–12-inch deep pots (one per clove or shared in a container with drainage). Use terracotta, fabric, or plastic with drainage holes.
- ● Potting mix: 2–3 gallons of well-draining soil blend (e.g., 60% potting soil + 40% perlite/sand or coco coir). Skip garden soil—it’s too dense!
- ● Drainage layer: 1–2 inches of gravel, pebbles, or broken pottery (placed at the bottom of containers).
- ● Watering can or spray bottle: With a gentle mist setting to avoid displacing soil.
- ○ Grow lights (optional but recommended): LED full-spectrum grow lights (12–16 watts per square foot).
- ● Or a south-facing window with 6+ hours of sunlight daily.
- ○ Thermometer (optional): To monitor soil temps (ideal: 40–50°F (4–10°C) for 4–6 weeks post-planting).
- ● Epsom salt: 1 tsp per gallon of water (monthly for extra sulfur/magnesium).
- ● Compost or worm castings: 1 tbsp per pot for nutrient boosts.
- ● Humidity tray: A shallow tray with pebbles + water to increase moisture (great for dry climates!).
- ● Plant labels: To track varieties and planting dates.
- ● Pruning shears: For trimming flower scapes (if growing hardneck garlic).
Step-by-Step instructions for planting garlic cloves indoors
Here's how to grow plump, flavorful garlic bulbs right on your windowsill—no greenhouse needed.
🌱 Step 1: Select and Prepare Your Garlic Cloves
Choose hardneck garlic varieties for best indoor results—they produce larger cloves and sturdy stems. Break apart a bulb into individual cloves, leaving the papery skin intact. Discard any soft or shriveled cloves—you want plump, firm ones with no signs of sprouting yet. I like to soak the cloves in lukewarm water for 10 minutes before planting to soften the skin slightly and encourage faster rooting.
Here's the thing—don't use store-bought garlic from the grocery store. Those bulbs are often treated to prevent sprouting and won't grow well. Instead, grab organic garlic from a garden center or online supplier. You'll need 4 cloves for a standard indoor harvest, so plan accordingly. The larger the clove, the bigger your bulb will grow.
🪴 Step 2: Choose Containers and Fill With Soil
Use 4-inch deep pots with drainage holes—garlic hates soggy roots. I prefer terracotta because it breathes and helps prevent rot, especially in cooler indoor spaces. Fill each pot with well-draining potting mix (avoid garden soil—it compacts too much). Leave about 1 inch of space between the soil surface and the pot rim for watering.
Tap the pot gently on the table to settle the soil, then make a small hole with your finger—about 2 inches deep. This is where the clove will nestle. Don't press the soil too firmly; garlic roots need loose soil to spread comfortably. If your cloves are extra large, you can plant them slightly deeper, up to 2.5 inches, but never more than that.
💧 Step 3: Plant the Cloves and Water Gently
Place one clove in each hole with the pointy end facing upward—this is the shoot that will emerge. Cover it with soil so only the very tip is visible. Press lightly around the clove to secure it without compacting the soil. I like to plant one clove per pot to avoid crowding, which leads to small, weak bulbs.
Water immediately after planting until the soil feels evenly moist but not waterlogged. You'll know it's right when water drips out the drainage hole but doesn't pool at the bottom. Place the pots in a cool, bright spot (around 60-65°F) for the first 2 weeks. This mimics the cold stratification garlic needs to break dormancy and encourages strong root growth.
☀️ Step 4: Provide Light and Monitor Growth
After 2 weeks, move the pots to a sunny windowsill with at least 6 hours of direct light daily. South-facing windows work best, but a grow light on a 14-hour timer will do in a pinch. You'll see green shoots in about 3-4 weeks, but don't rush to fertilize—garlic grows slowly and doesn't need extra nutrients until the stems reach 6 inches tall.
Water when the top inch of soil feels dry to the touch. Overwatering is the biggest mistake—garlic roots rot easily in damp soil. If the leaves start to yellow, it's usually a sign of too much water or not enough light. At this stage, you'll also notice small green shoots emerging from the base of the clove—these are the future bulb layers forming.
✂️ Step 5: Harvest and Cure Your Indoor Garlic
When the lower 6 leaves turn brown and crispy (around 12 weeks total), it's time to harvest. Gently dig up the bulbs with a fork or your hands, shaking off excess soil. Leave the roots attached—they help the bulbs dry properly. Don't wash them; moisture speeds up rot during curing.
Hang the bulbs in a dry, well-ventilated spot (like a pantry or garage) for 2-3 weeks. You'll know they're ready when the skins turn papery and the stems are completely dry. Store in a cool, dark place for up to 6 months—your homegrown garlic will taste sweeter and more robust than anything from the store.
Tips & tricks for perfect indoor garlic planting
These simple strategies will help you grow bigger, healthier garlic bulbs right on your windowsill.
Clove Selection Matters: In Step 1, when choosing your cloves, look for ones that are plump and firm with no signs of sprouting. The size of your clove directly impacts your bulb size—larger cloves yield bigger harvests. I've found that organic garlic cloves from garden centers perform best because they haven't been treated to prevent sprouting like grocery store varieties. For best results, soak your selected cloves in lukewarm water for exactly the 10 minutes mentioned—this softens the skin just enough to encourage faster rooting without overhydrating.
Container Depth and Drainage: When preparing your 4-inch deep pots in Step 2, pay special attention to drainage. Garlic roots are particularly sensitive to soggy conditions, which can lead to rot. I've had the most success with terracotta pots because they breathe better than plastic, especially in cooler indoor spaces. Make sure each pot has drainage holes, and leave that 1-inch space at the top for watering. If you're using extra-large cloves, you can plant them up to 2.5 inches deep, but never deeper—this ensures proper root development without crowding.
Lighting Strategy for Growth: In Step 4, after the initial 2-week cool period, your garlic needs consistent light. While south-facing windows provide the best natural light, I've found that a simple grow light on a 14-hour timer works wonders if you don't have ideal window placement. The key is maintaining at least 6 hours of direct light daily. You'll notice green shoots appearing around 3-4 weeks, but be patient—garlic grows slowly and shouldn't be fertilized until stems reach 6 inches tall. This gradual growth leads to stronger bulb development.
Harvesting and Curing Tips: When harvesting in Step 5, wait until those lower 6 leaves turn brown and crispy—this usually happens around the 12-week mark. The most important part of curing is keeping the bulbs dry. I've learned the hard way that washing them before curing speeds up rot, so simply shake off excess soil. Hang them in a dry, well-ventilated spot for 2-3 weeks until the skins become papery and stems are completely dry. This proper curing process preserves flavor and extends storage life to up to 6 months.
Pro Tips for Planting Garlic Cloves Indoors
- These simple strategies will help you grow bigger, healthier garlic bulbs right on your windowsill.
- Clove Selection Matters: In Step 1, when choosing your cloves, look for ones that are plump and firm with no signs of...
- Container Depth and Drainage: When preparing your 4-inch deep pots in Step 2, pay special attention to drainage. Garl...
Frequently asked questions
Got questions about growing garlic indoors? You’re not alone—this method is still new to many gardeners! Here are answers to the most common concerns to help you succeed.
How cold does it need to get for indoor garlic planting?
Garlic needs a cold period (40–50°F or 4–10°C) for 6–8 weeks to form bulbs. If your home stays too warm, place pots in a cool basement, garage, or unheated room during the day. A cooling mat under containers can help mimic outdoor conditions.
Can I plant garlic indoors year-round?
Technically yes, but timing matters! Start cloves in late fall or early winter (October–December) for best results. If planted later, bulbs may be smaller or less flavorful. For tropical climates, use hardneck varieties (like ‘Silverskin’) and extend the cold period with a fridge trick (wrap cloves in damp paper towels and refrigerate for 6–8 weeks before planting).
What if my garlic sprouts but stays small?
Small sprouts usually mean insufficient light or cold. Move pots to the brightest window (south-facing) or under grow lights (12–14 hours/day). Ensure temps stay below 65°F (18°C) during growth. Overcrowding? Thin seedlings to 2 inches apart for better airflow and bulb development.
Do I need special soil for indoor garlic?
Nope! Use a well-draining potting mix (like a 50/50 blend of compost and perlite/sand). Avoid heavy garden soil—it compacts and traps moisture, leading to rot. Add a slow-release fertilizer (like 5-10-5) at planting for steady nutrients. A 5-inch-deep container with drainage holes is ideal.
Can I reuse last year’s garlic container?
Yes, but sterilize it first! Scrub with soapy water, rinse, and sanitize with a 10% bleach solution (1 part bleach to 9 parts water) to kill fungi/bacteria. Let dry completely. If the container is cracked or warped, replace it—garlic hates soggy roots. Pro tip: Label your container to track planting dates and varieties!
Why did my garlic cloves rot instead of sprout?
Rot usually stems from overwatering or poor drainage. Let soil dry slightly between waterings—top 1–2 inches should be dry before adding more. Ensure containers have drainage holes and use a mix that won’t stay soggy. If cloves are mushy when planted, they’re too old—save fresh, firm cloves for next year!
Wrapping up and next steps
Growing garlic indoors is a rewarding journey that yields fresh, flavorful bulbs in just 12 weeks—no green thumb required! With the right chill-resistant cloves, a sunny windowsill, and a little patience, you’ll enjoy the satisfaction of harvesting your own homegrown garlic.
Plus, it’s a fantastic way to bring a touch of nature indoors while saving money on store-bought bulbs.
Ready to take the next step? Start small with a few cloves and experiment with varieties. Once you’ve mastered indoor growing, you can expand to outdoor beds or even share your success with friends! 🌱✨