
Tools
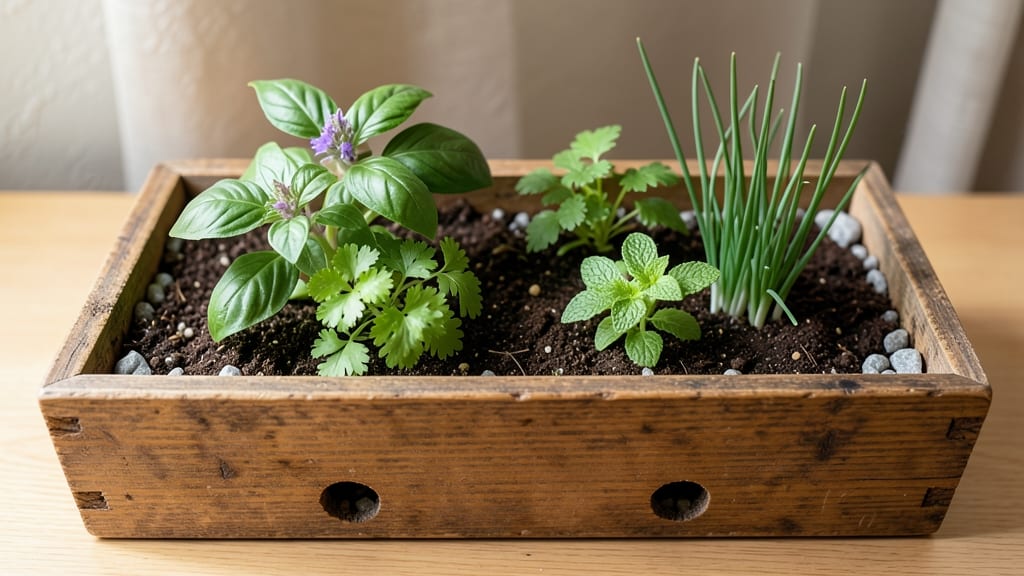
Rectangular indoor planters turned my cramped apartment into a lush, stylish green oasis—without sacrificing a single square foot. 🌿 The secret lies in their clean lines and modular nature, which let you stack, layer, or line them up like modern art while maximizing vertical space.
I went from bare windowsills to thriving foliage by simply rearranging what I already owned.
These planters shine in small spaces because they fit seamlessly under shelves, against walls, or even on narrow balconies. Wooden ones add warmth, metal ones bring industrial edge, and woven options soften corners—pick based on your vibe.
The key is grouping plants with similar light and water needs: trailing pothos beside a compact snake plant creates instant visual interest while keeping care simple.
You'll end up with a system that's both functional and stunning—think lush green walls, cascading textures, and air-purifying foliage that actually thrives. The best part? Maintenance stays minimal when you pair the right plants with the right materials (terracotta for moisture control, fabric for humidity-loving varieties).
Perfect for apartments, offices, or sunrooms where space is tight but style matters. Here's how to style them like a pro—no green thumb required.
📚 In This Guide
- What you need
- Instructions
- Tips and common mistakes
- Wrapping up and next steps
What you need
- ● Main Materials: Rectangular planter box (pre-made or DIY)—choose dimensions based on space (e.g., 12"x18"x6" for small plants, 24"x12"x8" for larger setups)
- ● High-quality potting mix—2-3 cubic feet per planter (e.g., 2 bags for a 12"x18" box)
- ○ Drainage material—1-2 inches of pebbles, gravel, or foam sheets (optional but recommended)
- ● Drill (if modifying planters) + 1/4" bit for drainage holes
- ○ Optional Upgrades: Self-watering system (e.g., wicking fabric or reservoir tray)
- ● Decorative liner (e.g., faux grass or fabric for a polished look)
- ● Plant stands or risers (to elevate planters and save floor space)
- ● LED grow lights (for low-light areas—full-spectrum bulbs work best)
- ● Basic DIY skills (if custom-building planters)
- ● Access to a power drill (or a friend who has one!)
- ● Indoor space with adequate light (or a plan for supplemental lighting)
- ● Your chosen plant(s)—ensure they thrive in indoor conditions (e.g., snake plants, pothos, or herbs)
Step-by-step guide to stylish indoor greenery with rectangular planters
Transform your space with these easy steps—perfect for small apartments or cozy corners.
🪴 Step 1: Choose the Right Planter and Location
Pick a rectangular planter that fits your space—12-18 inches wide works well for most small rooms. I like shallow, elongated designs for trailing plants like pothos or snake plants, which add visual interest without taking up much floor space. Place it near a window with 4-6 hours of indirect light daily—east or north-facing windows are ideal for delicate plants.
Check the planter’s drainage holes first. If they’re missing, drill a few small holes in the bottom to prevent root rot. I always place a saucer underneath to catch excess water and keep surfaces clean. Avoid placing planters in drafty areas or near heating vents, as temperature swings stress plants.
🌿 Step 2: Prepare Soil and Plant Selection
Use a well-draining potting mix—regular garden soil compacts in containers and suffocates roots. For rectangular planters, I mix one part perlite or pumice with three parts premium potting mix to improve aeration. Fill the planter about 2/3 full before adding plants, leaving room for roots to grow.
Select plants that thrive in the same light conditions. For low-light spaces, try ZZ plants, cast iron plants, or peace lilies. If your planter gets bright indirect light, snake plants, pothos, or spider plants will flourish. Avoid overcrowding—2-3 plants per 12-inch planter gives them room to breathe and grow.
☀️ Step 3: Arrange Plants for Visual Balance
Place taller plants at the back and trailing varieties at the front to create depth. I like to position the tallest plant slightly off-center for a more natural look—it prevents the arrangement from feeling stiff. For rectangular planters, 3 plants in a triangular formation works best: one tall centerpiece, one mid-height filler, and one trailing plant to spill over the edges.
Gently press the soil around the base of each plant to remove air pockets, but don’t pack it down too firmly. Water lightly after planting to help the soil settle. If you’re using trailing plants, tuck the vines along the sides of the planter so they grow outward evenly. This creates that lush, cascading effect without looking messy.
💧 Step 4: Water and Maintain for Long-Lasting Beauty
Water thoroughly until it drains from the bottom, but avoid soggy soil—let the top inch dry out between waterings. Rectangular planters dry out faster than round ones because they have more surface area exposed to air. I check moisture by sticking my finger into the soil; if it feels dry, it’s time to water.
Dust the leaves weekly with a damp cloth to help them absorb light better. Rotate the planter a quarter turn every few weeks so all sides get even sunlight. This prevents plants from leaning toward the window and keeps your arrangement looking balanced. Fertilize lightly every 4-6 weeks with a balanced liquid fertilizer during the growing season (spring and summer).
✂️ Step 5: Prune and Refresh Seasonally
Trim leggy stems or yellowing leaves to encourage bushier growth. For trailing plants, pinch back the tips to promote fuller foliage. I do this every 2-3 months to keep the planter looking fresh. If plants outgrow the container, repot them into slightly larger rectangular planters—increase the size by only 1-2 inches to avoid shocking the roots.
In fall, reduce watering slightly as plants enter dormancy. Wipe down the planter with mild soap and water to remove grime, and store it in a cool, dry place if you’re overwintering tender plants. With this care routine, your rectangular planter will stay vibrant and stylish for years, making even small spaces feel lush and inviting.
Tips & tricks for sleek indoor planter design
Here's what nobody tells you about making rectangular planters look effortlessly stylish while keeping your plants thriving.
Planter Size Matters: The 12-18 inch width recommendation isn't arbitrary—it creates the perfect balance between visual impact and plant health. For wider planters (18+ inches), you can comfortably fit 3-4 plants in that triangular formation, but reduce to 2 plants if you're using larger, bushier varieties like fiddle leaf figs. The key is maintaining that 2-3 plants per 12-inch rule, scaling proportionally.
Light Location Secrets: When placing your rectangular planter near windows, remember that east-facing windows provide gentle morning light perfect for most tropical plants, while north-facing windows offer consistent but cooler light that works well for low-light varieties. If you only have south-facing windows with intense light, position the planter at least 3 feet back to prevent leaf scorch. I've learned this the hard way with my poor snake plant!
Soil Mix Upgrade: While the 1:3 perlite-to-soil ratio works well, I've found adding a handful of worm castings to that mix gives plants an extra nutrient boost without risking over-fertilization. For succulents or cacti in rectangular planters, increase the perlite ratio to 1:2 to prevent root rot in those shallow containers. Always pre-moisten your soil mix slightly before adding plants—this helps eliminate air pockets during planting.
Watering Wisdom: The "top inch dry" rule is perfect, but here's the trick: use a moisture meter or your finger to check moisture in the middle of the soil, not just the surface. Rectangular planters dry out unevenly—corners often stay damp longer while edges dry out faster. I've started using self-watering planters with a reservoir for my rectangular containers, which has cut my watering time in half while preventing underwatering.
Pro Tips for Rectangular Planters Indoor
- Here's what nobody tells you about making rectangular planters look effortlessly stylish while keeping your plants th...
- Planter Size Matters: The 12-18 inch width recommendation isn't arbitrary—it creates the perfect balance between visu...
- Light Location Secrets: When placing your rectangular planter near windows, remember that east-facing windows provide...
Frequently asked questions
What’s the best material for rectangular indoor planters?
Plastic, ceramic, and fabric planters are all great options! Plastic is lightweight and budget-friendly, ceramic adds a stylish, durable touch, and fabric (like grow bags) improves drainage. Choose based on your plant’s needs—succulents love fabric, while ferns thrive in moisture-retentive ceramic.
How do I pick the right size for my space?
Measure your shelf or table first! A good rule of thumb: 10–12 inches wide fits most countertops, while 16+ inches works for floor-standing planters. For small spaces, opt for wall-mounted rectangular planters to save floor room. Pro tip: Taller planters (like vertical gardens) maximize greenery without taking up space!
Do rectangular planters drain better than round ones?
Not necessarily—it depends on the design! Look for planters with drainage holes (even in rectangular shapes) and use a cache pot (a hidden tray) to catch excess water. If your planter lacks holes, add a layer of gravel or perlite at the bottom to prevent root rot.
Can I use rectangular planters for herbs or just decorative plants?
Rectangular planters are perfect for herbs (like basil or thyme) because they offer long, narrow growing space. Just ensure they’re 6+ inches deep for root growth. For decorative plants (e.g., snake plants or pothos), shallow planters work too—just match the shape to your plant’s spread.
How do I clean and maintain rectangular planters?
Wipe plastic/ceramic planters with soapy water and a soft brush. For fabric grow bags, hand-wash gently. Prevent algae by keeping them in bright, indirect light. Every few months, rinse drainage holes with vinegar to avoid clogs. Bonus: Line ceramic planters with plastic for easier cleaning!
Wrapping up and next steps
Transforming your indoor space with rectangular planters is easier—and more rewarding—than you think! Whether you’re a seasoned plant parent or just starting, these sleek designs bring nature’s charm to even the coziest corners. 🌿 The key? Start small, choose the right materials, and let your creativity grow alongside your greenery.
Ready to take the next step? Pick your favorite planter style, grab your supplies, and begin crafting your dream indoor garden today! Your space—and plants—will thank you. 🌱