
Container Gardens
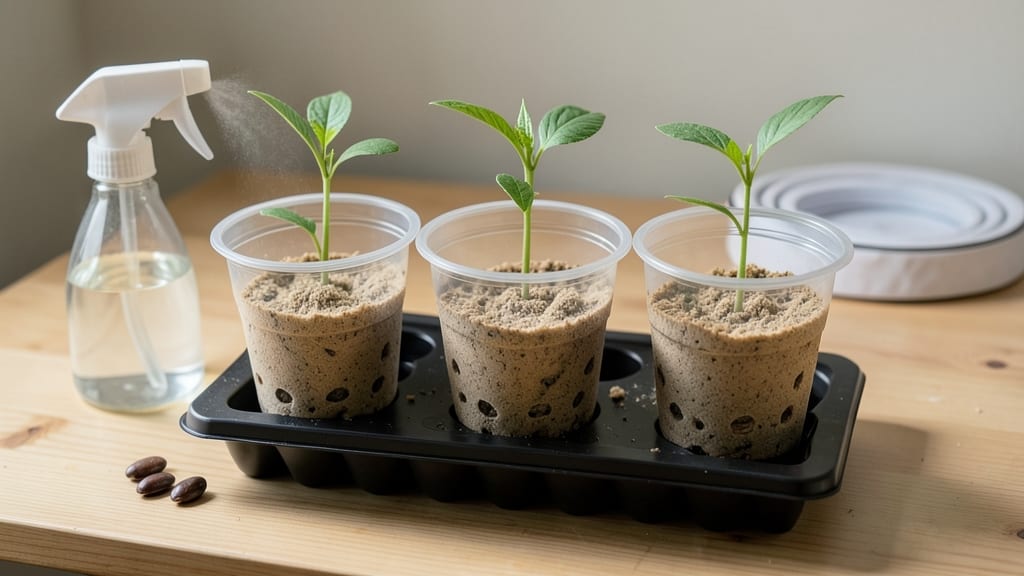
Starting corn indoors gives you a 6-week head start on the growing season—those stalks will be towering over your neighbors by summer. 🌱 I learned the hard way that corn needs warmth and patience to germinate, and skipping this step means waiting until soil temperatures hit 60°F before planting, which can be weeks too late in cooler climates.
The secret lies in the setup: biodegradable pots (so you don’t disturb roots later) filled with damp, sterile seed-starting mix, kept cozy under a heat mat. Corn seeds won’t sprout until they’re warm enough—75-85°F—and even then, they take 7-14 days to break through the soil.
No peeking at them; moisture loss is the fastest way to kill tiny seedlings. Once those first leaves unfurl, you’ll need bright light—a south-facing window or grow lights within 2 inches of the seedlings. Weak, leggy corn means you’re not providing enough light, and those plants won’t recover.
By the time they’re 8-10 inches tall, they’ll be ready for transplanting, provided nighttime temperatures stay above 50°F. This method works best for early varieties like ‘Golden Bantam’ or ‘Country Gentleman,’ but avoid dwarf corn—it needs space to stretch.
The payoff? Earlier harvests, taller stalks, and fewer pests because your plants outpace common corn borers. Let’s get those seeds going!
📚 In This Guide
- What you need
- Instructions
- Tips and common mistakes
- Wrapping up and next steps
What you need
- ● Seed-starting trays or biodegradable pots: 2–4" deep, with drainage holes (6–12 trays or pots, depending on quantity).
- ● High-quality seed-starting mix: Lightweight, sterile, and well-draining (1–2 bags, ~10–20 lbs total).
- ● Corn seeds: Early-maturing varieties like Bodacious or Silver Queen (10–20 seeds, depending on space).
- ● Grow lights or sunny windowsill: 12–16 hours of light daily (LED or fluorescent grow lights work best).
- ○ Heat mat (optional but helpful): 70–85°F range to speed germination.
- ● Watering can or spray bottle: Gentle watering to avoid disturbing seeds.
- ● Fertilizer: Balanced liquid fertilizer (5-10-5 or 10-10-10, diluted to half-strength).
- ● Small hand trowel or spoon: For planting seeds.
- ● Humidity dome or plastic wrap: To retain moisture during germination.
- ● Thermometer: Monitor soil and air temperature (ideal: 75–85°F for germination).
- ● Transplanting tool or spoon: For moving seedlings later.
- ● Garden markers: Label trays with seed variety and planting date.
- ○ Fan (optional): For gentle airflow to strengthen seedlings.
Step-by-step instructions for starting corn indoors
Here’s how to get a head start on your corn—strong, healthy seedlings ready for transplanting.
🌱 Step 1: Prepare Containers and Warmth for Germination
Corn seeds need warmth to germinate, so start with biodegradable peat pots (4 per serving) filled with moistened seed-starting mix. I like to pre-warm the mix in the microwave for 1-2 minutes—this jumpstarts germination and gives you a 3-5 day edge over cold-start methods. Press the soil gently but firmly to eliminate air pockets, then make a small hole 1 inch deep with your finger.
Place the pots on a seedling heat mat set to 80-85°F—this mimics the soil warmth corn craves in nature. Without this, germination slows dramatically, and seeds may rot before sprouting. I always test the heat mat’s temperature with my wrist first; it should feel warm but not hot to the touch.
🌱 Step 2: Sow Seeds and Maintain Ideal Conditions
Drop 2-3 seeds into each hole—corn’s germination rate isn’t perfect, and thinning later can stress delicate seedlings. Cover lightly with additional mix, then mist the surface with water until it’s damp but not soggy. The key here is consistency: keep the soil evenly moist (not waterlogged) and the heat mat running until you see sprouts.
Once the first green shoots appear (usually 7-10 days), remove the weakest seedling, leaving the strongest one per pot. You’ll know it’s the right one—it’ll have the thickest stem and most vibrant leaves. This is also when I turn off the heat mat; corn seedlings can handle room temperature once they’ve broken through the soil.
☀️ Step 3: Provide Strong Light for Stalk Development
Corn seedlings need 12-14 hours of bright light daily to prevent leggy, weak stalks. A south-facing window won’t cut it—you’ll need a grow light (LED or fluorescent) positioned 6 inches above the plants. Raise it as they grow to maintain that distance; if the light’s too close, leaves will scorch, and if it’s too far, stems will stretch toward it.
Watch for first true leaves (the second set after the initial cotyledons)—this is your cue to start rotating the pots a quarter turn daily. This ensures even growth and prevents seedlings from leaning toward the light. Leggy seedlings are a red flag; if you see them, lower the light immediately and consider supplementing with a phosphorus-rich fertilizer to boost root and stalk strength.
🪴 Step 4: Harden Off and Prepare for Transplanting
Two weeks before your last frost date, begin hardening off the seedlings by placing them outside in a sheltered, shaded spot for 1-2 hours the first day. Gradually increase their outdoor time by 1 hour daily, moving them to morning sun first to avoid scorching. Corn is sensitive to sudden temperature swings, so if nights dip below 50°F, bring them back indoors.
By the time you transplant, seedlings should be 6-8 inches tall with 5-6 leaves. Choose an overcast afternoon for the move—this reduces transplant shock. Dig holes twice as wide as the root ball and plant deeply, burying the lower leaves to encourage stronger stalks. Water deeply at the base to settle the soil and help roots establish quickly.
Tips & tricks for early season corn stalk success
Common pitfalls can derail even the most eager gardener—here's how to sidestep them while maximizing your corn's potential.
Heat Mat Precision: That 80-85°F range on your seedling heat mat isn't just arbitrary—it's the sweet spot where corn seeds activate their germination enzymes. I've seen seeds fail to sprout when the mat was only at 75°F, even though it felt warm. Use an infrared thermometer for accuracy, especially if your kitchen runs cool. The moment you see sprouts (usually within 7-10 days), turn off the heat mat immediately—corn seedlings can handle room temperature once they've broken through the soil.
Lighting Strategy: The 12-14 hours of bright light requirement is non-negotiable for corn, but here's the secret: position your grow light so it's just 6 inches above the tallest seedling, not the pots. As your plants grow, raise the light incrementally—every time you see new growth, adjust it up 1/2 inch. This prevents the "light burn" you'll notice as brown spots on leaves when it's too close, while avoiding leggy growth when it's too far.
Thinning Technique: When you're thinning those first sprouts to leave just one strong seedling per pot, don't pull—snip with clean scissors. This prevents disturbing the root system of your chosen seedling. Look for the one with the thickest stem and most vibrant leaves; these are your indicators of a healthy plant. I've found that seedlings with slightly darker green leaves often develop stronger stalks later on.
Harden Off Gradually: The 1-2 hour outdoor introduction might seem short, but it's critical to prevent transplant shock. Start in a sheltered spot where your seedlings can acclimate to outdoor conditions without direct sun. If you notice leaves curling or wilting during this process, they're telling you to bring them back indoors immediately. The key is gradual exposure—each day, increase their outdoor time by just 1 hour while moving them to slightly sunnier locations.
Pro Tips for Starting Corn Indoors
- Common pitfalls can derail even the most eager gardener—here's how to sidestep them while maximizing your corn's pote...
- Heat Mat Precision: That 80-85°F range on your seedling heat mat isn't just arbitrary—it's the sweet spot where corn ...
- Lighting Strategy: The 12-14 hours of bright light requirement is non-negotiable for corn, but here's the secret: pos...
Frequently asked questions
Got questions about starting corn indoors? You’re not alone—growing corn from seed can feel tricky, especially when you’re working with limited space or early-season conditions. Here are some of the most common concerns (and answers!) to help you get those stalks off to a strong start.
When is the best time to start corn indoors?
Corn is a warm-season crop, so wait until 2–3 weeks before your last frost date to sow seeds indoors. For most regions, this means mid-to-late March or early April. Starting too early can lead to leggy, weak seedlings that struggle when transplanted. Use a heat mat if your home stays below 65°F (18°C) to speed up germination.
Can I start corn indoors if I don’t have a greenhouse?
Use grow lights or a sunny windowsill (south-facing is ideal) to provide 12–16 hours of light daily. Place seeds in small pots (2–3 inches deep) with well-draining soil, and keep them in a warm spot. Just be ready to harden off seedlings for 7–10 days before transplanting outdoors—corn hates cold shock!
How deep should I plant corn seeds indoors?
Corn seeds need 1–1.5 inches of depth for proper germination. Press them gently into moist soil, then lightly cover with a thin layer of compost or vermiculite. Avoid burying them too deep, or they may take longer to sprout. Keep the soil consistently moist (not soggy) until you see sprouts in 7–14 days.
What if my indoor corn seedlings look weak or yellow?
Weak or yellowing seedlings often signal overcrowding, poor light, or nutrient deficiency. Thin seedlings to 1 per pot if they’re too close, and move them under brighter light immediately. Check for pests (like fungus gnats) and adjust watering—corn roots need air, so avoid soggy soil. A balanced, water-soluble fertilizer (diluted to half-strength) can help if growth stalls.
How long can I keep corn indoors before transplanting?
Corn doesn’t like being indoors for too long—transplant seedlings outdoors when they’re 6–8 inches tall and have 2–3 true leaves (usually 4–6 weeks after sowing). Delaying too long can cause them to become root-bound or leggy. If frost is still a risk, use row covers or a temporary cloche to protect tender plants.
Wrapping up and next steps
Starting corn indoors is a game-changer for gardeners eager to jumpstart their harvest—especially in cooler climates! 🌱 With the right setup, patience, and a few extra weeks of care, you’ll be transplanting sturdy seedlings ready to thrive in your garden.
The key? Stay consistent with warmth, light, and moisture while keeping an eye on those critical milestones like germination and true leaf growth.
Now that you’re armed with the know-how, take the leap! Grab those supplies, set up your seed-starting station, and watch your corn sprout with confidence. Next up: Transplant your seedlings outdoors when soil temps hit 60°F+ and give them room to stretch those roots—your future corn crib awaits! 🌽✨