
Container Gardens
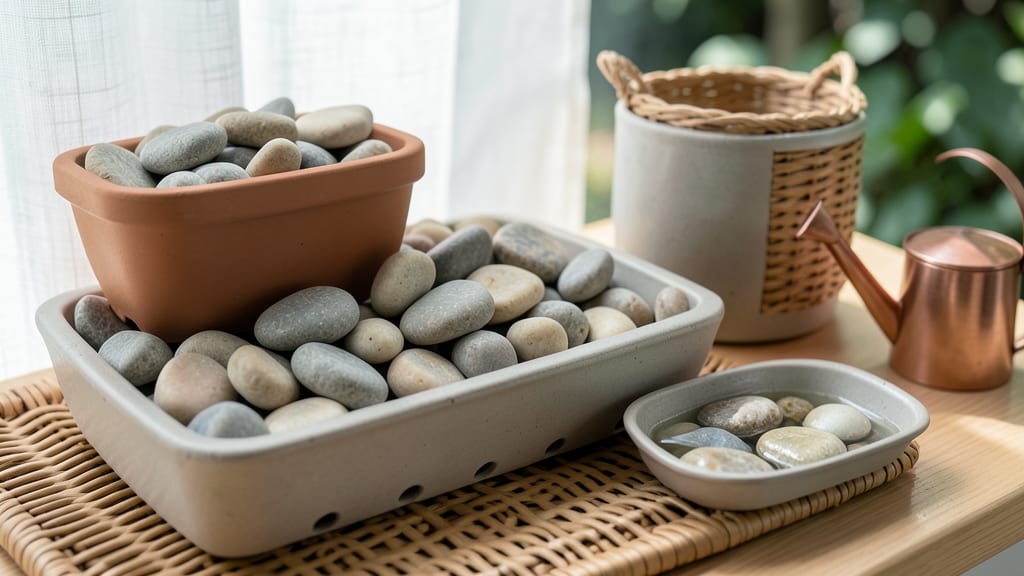
Decorative pebbles transform your indoor plants from simple greenery to stunning centerpieces. ✨ They’re not just pretty—they prevent root rot by keeping soil moist without drowning roots, while adding a polished, spa-like look to any tray or pot.
My snake plants and ferns now sit in trays of smooth river rocks, and the difference in drainage (and aesthetics) is night and day.
The right pebbles make all the difference: river rocks stay clean and look elegant, while lava rock offers better drainage for moisture-loving plants like pothos. Avoid sharp-edged gravel that can damage delicate roots—smooth, rounded stones are the way to go.
A 1-inch layer in the bottom of a tray or pot creates the perfect drainage layer without taking up too much space.
This simple upgrade instantly elevates your plant display while making care easier. The pebbles wick away excess water, keeping roots happy and preventing that dreaded soggy soil smell.
Plus, the contrast of green leaves against neutral stones creates a high-end, curated look that feels like a designer’s touch—without the price tag.
Works for everything from single pots to large plant collections, and the same principles apply whether you’re styling a windowsill or a whole shelf. The best part? Once set up, it’s completely low-maintenance—just top off the pebbles occasionally if they shift. Ready to give your plants the spa treatment?
📚 In This Guide
- What you need
- Instructions
- Tips and common mistakes
- Wrapping up and next steps
What you need
- ● Decorative pebbles: 1–2 lbs (varies by pot size; 1–2 inches in diameter for medium pots, smaller (0.5–1 inch) for terrariums). Choose smooth, non-toxic, and lightweight options like: Marble chips (elegant, neutral tones)
- ● River rocks (natural, rustic look)
- ● Colored glass pebbles (vibrant, playful)
- ● Indoor plants: 1–2 plants per container (ensure they fit your pot’s size). Succulents, ferns, or air plants work beautifully!
- ● Pot or container: A cache pot or decorative planter with drainage holes (or a tray underneath if none exist). Size matters—pebbles should fill 1–2 inches at the bottom.
- ○ Drainage layer (optional but recommended): A thin layer of perlite, pumice, or activated charcoal (½ inch) to prevent clogging.
- ● Moss or sphagnum: A small handful to cover pebbles for a natural, moisture-retentive look (great for terrariums!).
- ● Decorative tray or saucer: To catch excess water and add style (choose one with elevated edges for better drainage).
- ● Tweezers or gloves: For handling tiny pebbles or delicate plants without mess.
- ● Watering can with a fine rose: To gently hydrate plants without disturbing the pebble layer.
How to use decorative pebbles for indoor plants
This simple technique transforms your plant pots while keeping roots healthy and happy.
🪴 Step 1: Select the Right Pebbles and Pots
Choose smooth, rounded decorative pebbles in a color that complements your decor—white, gray, or terracotta work beautifully. Avoid sharp-edged stones that could damage roots. I like to use ½-inch to ¾-inch pebbles for a balanced look and drainage.
Pick pots with drainage holes—pebbles work best in containers where excess water can escape. If your pot has no holes, drill a few near the bottom first. This prevents soggy soil, which is deadly for most indoor plants. A 6-inch pot holds about 2 cups of pebbles in the base.
💧 Step 2: Layer Pebbles for Drainage
Add a 2-inch layer of pebbles to the bottom of each pot before adding soil. This creates a reservoir for excess water while keeping roots above it. Tap the pot gently to settle the pebbles evenly—you want them snug but not packed down.
Here's the thing—don't skip this step. Without pebbles, water pools at the bottom, suffocating roots. You'll see this work best when water drips through the pebbles instead of sitting in the soil. This method also keeps the soil level above the pebbles, preventing root rot.
✂️ Step 3: Add Soil and Plant
Fill the pot with your well-draining potting mix until it reaches about 1 inch below the rim. Press down lightly to remove air pockets but don't compact it too tightly. The pebbles already handle drainage, so the soil just needs to stay loose.
Plant your chosen indoor plant, making sure the roots sit just above the pebbles. Gently pat the soil around the base to secure the plant. Water lightly after planting—just enough to moisten the soil without soaking the pebbles completely. You'll notice the soil stays evenly moist longer because excess water drains through the pebbles.
☀️ Step 4: Water and Maintain
Water your plant when the top inch of soil feels dry. With pebbles, you'll water less often because they prevent soil from becoming waterlogged. Pour water slowly until it begins to drain through the pebbles—this ensures roots get moisture without sitting in wetness.
Every few weeks, check the pebbles for mineral buildup. If they look coated with white residue, rinse them with water and let them dry completely before returning them to the pot. This keeps your setup looking fresh and functional. Your plants will thrive with this simple but effective drainage boost.
🌿 Step 5: Style for Aesthetic Appeal
Once your plant is settled, arrange the pebbles around the base for a polished look. I like to create a 1-inch border of pebbles around the soil's edge—this adds visual interest while keeping moisture away from the pot's sides.
For a cohesive display, use the same pebble color in multiple pots or mix textures for contrast. The pebbles will also highlight the plant's natural beauty, making it the star of your indoor garden. This method works for everything from ferns to succulents, so experiment with different plants and styles.
Tips & tricks for perfect indoor plant decor with pebbles
Here's what nobody tells you about making this method work beautifully for your plants.
Pebble Size Matters: The ½-inch to ¾-inch pebbles recommended aren't just arbitrary—they strike the perfect balance between drainage and visual appeal. Larger pebbles (1-inch+) drain too quickly and look chunky, while smaller ones (¼-inch) can clog drainage and look messy. For terrariums, I sometimes use even smaller pebbles (1/8-inch), but for standard pots, stick to the recommended size for optimal airflow at the soil base.
Drainage Hole Hack: If your pot doesn't have drainage holes, don't just skip the pebbles—repurpose an old pot! Place your non-draining pot inside a larger one with drainage, then add pebbles to the outer pot's base. This creates a double-drainage system that works beautifully. You can also use a saucer filled with pebbles under the pot to catch excess water while keeping roots dry.
Soil Level Precision: That 1-inch gap between soil and pot rim in Step 3 isn't just for looks—it's crucial for watering control. When you water, the pebbles will catch excess moisture, but you want that final inch to absorb water for the plant. If you fill to the very top, water will pool on the pebbles instead of soaking into the soil where roots need it.
Mineral Buildup Rescue: When you notice that white residue on your pebbles every few weeks, don't just wipe it off—rinse them thoroughly! Soak the pebbles in a bowl of water for 10 minutes to dissolve mineral deposits, then scrub gently with a soft brush if needed. This prevents salt buildup that can harm roots over time. I keep a separate bucket just for rinsing pebbles to make this maintenance easy.
Pro Tips for Decorative Pebbles For Indoor Plants
- Here's what nobody tells you about making this method work beautifully for your plants.
- Pebble Size Matters: The ½-inch to ¾-inch pebbles recommended aren't just arbitrary—they strike the perfect balance b...
- Drainage Hole Hack: If your pot doesn't have drainage holes, don't just skip the pebbles—repurpose an old pot! Place ...
Frequently asked questions
Got questions about using decorative pebbles with your indoor plants? You’re not alone! Here are some common concerns—and straightforward answers to help you get the most out of this stylish (and functional) addition to your plant care routine.
Can decorative pebbles replace soil entirely for my indoor plants?
Nope! While pebbles excel at drainage and aesthetics, they lack nutrients and moisture retention. Use them as a top layer (2–3 inches) over well-draining soil to mimic a natural bog or terrarium effect. For plants like ferns or fittonias, this works beautifully—but succulents and cacti still need soil for roots.
Will pebbles dry out my plant too quickly?
Pebbles can speed up evaporation, so monitor soil moisture closely. For thirsty plants (e.g., snake plants), use a thin layer of pebbles. For moisture-loving plants (e.g., pothos), pair pebbles with a self-watering cache pot or mist regularly. Pro tip: Group plants with similar water needs together!
What’s the best type of decorative pebbles to use?
Opt for smooth, rounded pebbles (like lava rock or slate chips) to avoid root damage. Avoid sharp or porous stones (e.g., some river rocks) that can harbor bacteria. For a cohesive look, stick to one color or texture—neutral tones (beige, gray) blend seamlessly, while bold colors (red, black) add drama.
How do I clean or replace pebbles if they get dirty or moldy?
Rinse pebbles with water and mild soap, then dry thoroughly in sunlight (UV kills mold spores!). Replace them every 6–12 months if they look dingy or smell musty. Bonus: Sterilize with a 10% hydrogen peroxide solution (1 part peroxide to 9 parts water) for stubborn grime.
Are there alternatives to pebbles for drainage?
Yes! Try:
- Orchid bark: Chunky and great for air circulation.
- Perlite: Lightweight and absorbs excess moisture.
- Coconut coir chips: Eco-friendly and retains slight humidity.
- Charcoal granules: Natural odor absorber (perfect for terrariums!).
Wrapping up and next steps
Decorative pebbles aren’t just a stylish upgrade—they’re a game-changer for your indoor plants! 🌿 From improving drainage to adding a touch of natural elegance, they’re a simple yet powerful way to enhance both function and beauty.
Whether you’re a seasoned plant parent or just starting your green journey, these pebbles make caring for your plants easier and more rewarding.
Ready to transform your plant pots? Start small—pick a few pebbles for your next watering session and watch your plants thrive in their new, stylish home. Happy planting! 🌱✨