
Container Gardens
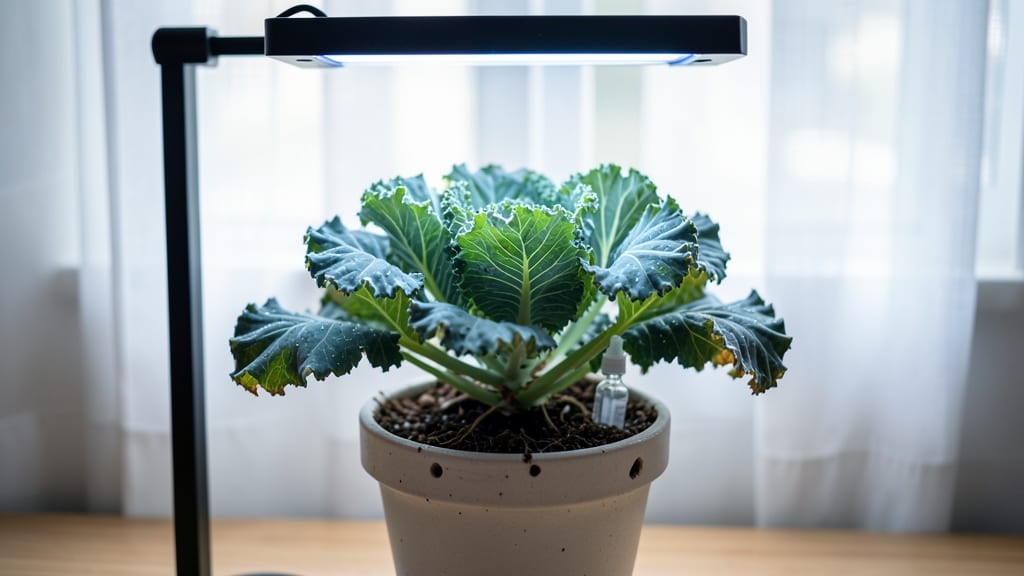
Growing kale indoors gives you crisp, nutrient-packed leaves even when snow piles up outside. 🌱 I’ve grown kale year-round in my 10x10-foot apartment, and the secret isn’t just patience—it’s the right light setup.
Most people overlook how much kale hates weak light, which leads to bitter, stunted plants. But with a few simple tweaks, you’ll harvest tender greens every 3-4 weeks, no greenhouse needed.
The key is mimicking spring conditions: 12-14 hours of bright light daily, soil that stays slightly damp (not soggy), and a container with drainage. I use a 5-gallon fabric pot for my main plant and repurpose a shallow tray for cuttings—both fit easily on my kitchen counter.
The soil mix should be 50% potting soil, 30% compost, and 20% perlite to prevent compaction. Overwatering is the #1 killer, so I stick my finger in the soil first—if it’s dry 1 inch down, it’s time to water.
By week 6, you’ll see puffy, vibrant leaves ready for harvest, and the flavor? Far superior to store-bought. The real magic happens when you prune the outer leaves—this encourages bushier growth and extends your harvest for months.
Even in tight spaces, kale thrives in 6-inch-deep containers, so balconies, windowsills, and sunrooms all work. The only downside? You’ll need to supplement light if your windows face north.
Here’s the game-changer: LED grow lights on a timer solve the light problem permanently. A basic 15-watt clip light (like the ones for seedlings) costs under $20 and fits in any space. Run it for 12 hours/day, and your kale will grow just as fast as outdoor plants.
Troubleshoot leggy growth by moving plants closer to light, and watch for aphids—spray with soapy water if you spot them. Trust me, your first homegrown kale will change how you think about winter greens.
📚 In This Guide
- What you need
- Instructions
- Tips and common mistakes
- Wrapping up and next steps
What you need
- ● Kale Seeds or Seedlings: Choose cold-hardy varieties like Winterbor or Curly Kale. Start with 3–5 seeds per pot (or 1–2 seedlings) for a bountiful harvest.
- ● Containers: Use pots with drainage holes (5–7 inches deep) and at least 6–8 inches in diameter per plant. Fabric grow bags or ceramic planters work well.
- ● High-Quality Potting Mix: A well-draining, organic mix (e.g., Miracle-Gro Organic Potting Soil or FoxFarm Ocean Forest)—avoid garden soil!
- ● LED Grow Lights: A full-spectrum LED bulb (e.g., Samsung LM300 Series) or a dedicated grow light system (like SPIDER FARM) for 12–16 hours/day.
- ● Watering Can or Spray Bottle: Keep soil consistently moist but not soggy—kale hates "wet feet."
- ● Grow Light Timer: Automates lighting for consistency (e.g., Leviton Decora Timer).
- ● Humidity Dome or Plastic Wrap: Creates a mini greenhouse for seedlings until they sprout.
- ● pH Test Kit: Kale thrives in 6.0–7.0 pH—adjust with lime or vinegar if needed.
- ● Fertilizer: A balanced liquid fertilizer (e.g., Fish Emulsion) every 4–6 weeks.
- ● Pruning Shears: Snip outer leaves to encourage bushier growth.
- ● Temperature: Keep between 50–70°F (kale loves cool climates!).
- ○ Ventilation: A small fan (optional) prevents mold and strengthens stems.
- ● Space: Place pots near a sunny window (if supplementing with LED lights) or under lights 6–12 inches away.
Step-by-Step instructions for growing kale indoors
Here’s how I’ve mastered growing kale indoors—no greenhouse needed, just smart light tricks and consistent care.
🌱 Step 1: Select Containers and Prepare Soil
Choose 4-inch deep pots with drainage holes—kale roots need room to spread but hate soggy feet. I use coconut fiber pots because they’re biodegradable and let me transplant without disturbing roots. Fill each pot with 2 cups of sterile potting mix (never garden soil—it compacts and suffocates roots). Mix in a handful of compost for nutrients, but skip heavy amendments like manure that can burn tender seedlings.
Press the mix down gently until it’s firm but not packed. The surface should feel like a damp sponge—if it crumbles, add a mist of water. Kale thrives in well-draining, loose soil, so avoid anything labeled "garden soil" or "topsoil." Tap the pot on the table once to settle the mix evenly. This prevents air pockets that slow root growth.
🌿 Step 2: Plant Seeds and Provide Warmth
Sow 2-3 seeds per pot at a depth of ¼ inch—about the width of a pencil tip. Kale seeds germinate best in 70-75°F soil, so place pots on a seedling heat mat or in a warm spot like the top of the fridge. Cover the pots with a clear plastic dome or wrap them in plastic wrap to trap moisture and warmth. This creates a mini greenhouse effect that speeds up germination.
Check daily but resist watering until you see tiny white sprouts (usually 5-7 days). Overwatering now causes damping-off, a fungal disease that collapses seedlings overnight. If condensation forms on the plastic, lift it briefly to air out the soil. Once 50% of seeds sprout, remove the dome completely—kale seedlings need airflow to strengthen stems.
☀️ Step 3: Set Up LED Lights for Optimal Growth
Kale needs 14-16 hours of light daily, and a south-facing window rarely delivers enough intensity. Install a full-spectrum LED grow light (2700-6500K) 4 inches above the seedlings. I use a timed smart bulb set to 15 hours on, 9 hours off to mimic natural daylight. Kale grown under weak light turns leggy and pale—stems stretch toward the light while leaves stay small and weak.
Raise the light 1 inch weekly as plants grow to maintain the 4-inch gap. You’ll notice stronger stems and dark green, compact leaves when the light is positioned correctly. If leaves yellow between veins, it’s a sign of too much light intensity—move the light up another inch. Kale thrives under moderate to bright light, not scorching heat.
💧 Step 4: Water and Fertilize for Lush Growth
Water when the top inch of soil feels dry—stick your finger in the pot to check. Kale prefers consistent moisture but hates soggy soil. I water from the bottom by placing pots in a tray of ½ inch of water for 10 minutes, then drain excess. This encourages roots to grow downward instead of sitting in wet soil. Yellowing leaves often mean overwatering, while crispy edges signal underwatering—both are fixable with better moisture balance.
Start fertilizing when true leaves appear (about 3-4 weeks). Use a balanced liquid fertilizer (10-10-10) diluted to half strength every 2 weeks. Kale is a heavy feeder, so don’t skimp—pale leaves mean it’s hungry. I also sprinkle ½ teaspoon of fish emulsion around the base monthly for extra nutrients. Avoid high-nitrogen fertilizers; they promote leaf growth at the expense of flavor.
✂️ Step 5: Harvest and Maintain for Continuous Yields
Harvest outer leaves first when they reach 4-6 inches tall, leaving the inner leaves to grow. Use clean scissors to snip just above a leaf node—this encourages new growth. Kale grows bolting-resistant varieties like 'Winterbor' or 'Lacinato' indoors, so you’ll get harvests every 2-3 weeks if you keep plants healthy. If flowers form, pinch them off immediately—they signal the plant to bolt and go to seed.
Rotate pots a quarter turn weekly so all sides get even light. This prevents lopsided growth and ensures uniform leaf development. After 8-10 weeks, you may need to repot into 6-inch containers if roots outgrow the original space. Kale is cold-hardy but thrives indoors at 60-65°F—just keep it away from drafts or heat vents. With the right light and care, you’ll enjoy year-round harvests without ever stepping outside.
Tips & tricks for growing kale indoors
Here's what I've learned after years of growing kale indoors—these tricks make all the difference between struggling seedlings and thriving plants.
Soil Prep Secret: In Step 1, when mixing your 2 cups of sterile potting mix with compost, add a pinch of perlite or vermiculite (about 1 tablespoon) to improve aeration. Kale roots need oxygen as much as nutrients—this prevents that suffocating feeling that causes root rot. I also recommend sifting the mix through a fine-mesh screen to eliminate large clumps that can block water flow and create air pockets. The goal is soil that feels like a damp sponge, not concrete.
Germination Hack: For Step 2, if you don't have a seedling heat mat, place your pots on top of your refrigerator (not inside) where it stays consistently warm. The key is maintaining that 70-75°F soil temperature—kale seeds need warmth to germinate quickly. Once you see those tiny white sprouts after 5-7 days, resist the urge to water immediately. Let the soil dry slightly between checks to prevent damping-off, that silent killer of seedlings.
Light Positioning: When setting up your LED lights in Step 3, position the fixture so the light is parallel to the floor, not hanging directly above. This creates a more natural light angle that prevents leggy growth. Kale plants will grow toward the light source, so rotate your pots quarter-turn weekly (as mentioned in Step 5) to ensure even development. The 14-16 hours of light should be spread evenly—don't cluster all light exposure in morning hours only.
Fertilizer Timing: In Step 4, when you start fertilizing at 3-4 weeks, begin with quarter-strength fertilizer instead of half-strength. Kale seedlings are sensitive to salt buildup from concentrated fertilizers. Gradually increase to half-strength over two feedings. For the monthly fish emulsion, apply it in the evening when temperatures are cooler—this prevents nutrient burn that can occur when plants are actively photosynthesizing under bright light.
Pro Tips for Growing Kale Indoors
- Here's what I've learned after years of growing kale indoors—these tricks make all the difference between struggling ...
- Soil Prep Secret: In Step 1, when mixing your 2 cups of sterile potting mix with compost, add a pinch of perlite or v...
- Germination Hack: For Step 2, if you don't have a seedling heat mat, place your pots on top of your refrigerator (not...
Frequently asked questions
Got questions about growing kale indoors? You’re not alone—this leafy green is a favorite, but it does need some TLC! Here are answers to the most common queries to help you cultivate a thriving indoor kale garden.
How much light does kale need indoors?
Kale thrives with 12–16 hours of light daily. Use a full-spectrum LED grow light (like a 20W–40W bulb) 6–12 inches above the plants. If using natural light, place it near a south-facing window—but supplement with artificial light in winter when days are shorter. Pro tip: Rotate trays weekly for even growth!
How long does it take for indoor kale to grow?
Baby leaves (ready for harvest) appear in 3–4 weeks, while mature kale takes 6–8 weeks. For continuous harvests, trim outer leaves every 2–3 weeks—this encourages regrowth! Patience pays off, but you’ll get edible greens faster than you think.
Can I grow kale indoors without grow lights?
Yes, but with limitations. Place your kale near the brightest window (south or west-facing) and rotate pots daily. Expect slower growth and smaller leaves. If possible, pair natural light with a low-cost LED bulb (even a 10W clip-on light helps!) to boost yields.
Why is my indoor kale turning yellow or bolted?
Yellowing leaves often signal overwatering or nutrient deficiency. Let soil dry slightly between waterings, and fertilize every 2–3 weeks with a balanced liquid feed (like fish emulsion). Bolting (premature flowering) happens from heat stress—keep temps 60–70°F and avoid drafts.
What’s the best way to harvest indoor kale?
Harvest by snipping outer leaves with clean scissors, leaving the center intact. For baby kale, cut entire stems 1–2 inches above the soil. Pro tip: Harvest in the morning for peak flavor and nutrients! Store trimmed leaves in the fridge for up to 5 days or freeze for later.
Wrapping up and next steps
Growing kale indoors isn’t just possible—it’s rewarding! 🌱 With the right LED lights, containers, and care, you’ll enjoy fresh, nutrient-packed greens year-round. Whether you’re a beginner or a seasoned gardener, this method proves that homegrown goodness is always within reach.
Ready to take the next step? Start by planting your first seeds or repotting a young kale plant today—your taste buds (and wallet) will thank you! 💚