
Orchid Care
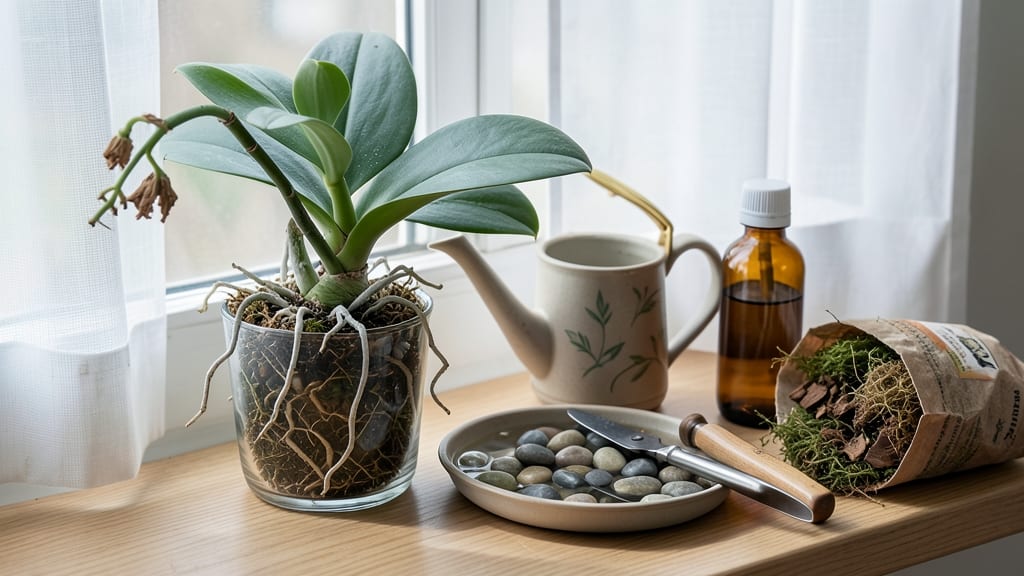
Caring for indoor orchids after they bloom is where most growers get it wrong—and that's why your plant might never flower again. 💚 I’ve seen stunning orchids turn into sad, spindly stems because of one simple mistake: not knowing when and how to prune.
The key isn’t just cutting back the old flower spike but understanding what your orchid really needs to rebound and prepare for its next spectacular show.
Here’s the thing—orchids store energy in their roots and leaves, not just the stem. After flowering, you’ll need to adjust watering (less is more), give them bright, indirect light, and avoid fertilizing until new growth appears.
Most people overdo it with water or prune too aggressively, which stresses the plant. The goal is to help it focus on building strength for next season’s blooms, not just survive.
By following the right pruning technique—cutting just above a node or leaving the spike if it’s still green—you’ll see fresh shoots emerge within 4-6 weeks. The leaves will stay plump, the roots will stay active, and you’ll avoid the common pitfall of stunted growth.
This is how you turn a post-bloom orchid into a thriving, repeat-flowering beauty.
Works for Phalaenopsis, Cattleyas, and Dendrobiums alike, and adapts to winter dormancy needs. Let’s get those orchids ready for their next grand performance—because with the right care, they’ll bloom again and again.
📚 In This Guide
- What you need
- Instructions
- Tips and common mistakes
- Wrapping up and next steps
What you need
- ● Sterilized pruning shears or scissors – Choose sharp, clean tools (alcohol-wiped or new) to avoid disease. 1 pair
- ● Cinnamon powder or antifungal dust – A natural antiseptic to prevent infection. Small container
- ● Well-draining orchid potting mix – Use a blend designed for orchids (bark, sphagnum moss, perlite). 1-2 bags (5-10 quarts)
- ○ New orchid pot (optional but recommended) – Terracotta or plastic with drainage holes. Size: 1-2 inches larger than current pot
- ● Misting bottle or spray nozzle – For gentle hydration. Small spray bottle (8-16 oz)
- ● Balanced orchid fertilizer (20-20-20 or 10-10-10) – Diluted to half-strength. 1 bottle (8-16 oz)
- ○ Household gloves (optional) – Protects hands from sharp edges or sap. 1 pair
- ● Rooting hormone gel – Speeds up regrowth of cuttings. Small tube
- ● Humidity tray or pebble tray – Mimics tropical conditions. 1 tray + pebbles
- ● Grow lights (LED or fluorescent) – If natural light is limited. 1-2 bulbs or a small fixture
- ● Orchid-specific repotting kit – Includes tweezers, wire, and ties for secure repotting. 1 kit
Step-by-Step instructions for reviving indoor orchids after flowering
Here's the simple routine I follow to keep my orchids blooming year after year—no fancy tools, just smart care.
✂️ Step 1: Prune the Spent Flower Spike Correctly
Wait until the flower spike turns completely brown and papery before cutting. This ensures the plant has redirected all its energy to the roots. Use clean, sharp scissors to trim about 1 inch above the lowest node where leaves or roots emerge.
I know it looks drastic, but cutting too close risks damaging the plant's energy reserves. If you see a new growth bud at the base, leave it and trim above that instead. This encourages a new flower spike to form from that node next season.
☀️ Step 2: Adjust Light for Recovery and Growth
Orchids need bright, indirect light but hate direct sun after flowering. Move yours to a spot with 10-15 hours of filtered light daily. East-facing windows or a few feet from a south window work perfectly. You'll see the leaves stay vibrant and develop a slight sheen.
If leaves turn yellow, you're giving too much light. If they stretch and look pale, move it closer. The goal is to avoid stress—orchids grow best when they feel safe and comfortable during recovery.
💧 Step 3: Water with Precision During the Rest Period
After flowering, reduce watering to every 7-10 days instead of weekly. Stick your finger 1 inch into the soil—if it feels dry, water thoroughly until it drains from the bottom. Let excess water run out completely to prevent rot.
I use room-temperature water and avoid getting leaves wet. The roots need time to recover, and soggy soil stresses them. This rest period builds strength for next year's blooms—don't skip it, even if the plant looks fine.
🌿 Step 4: Fertilize Lightly to Encourage New Growth
Start fertilizing again after 4-6 weeks of recovery with a balanced, water-soluble fertilizer diluted to half strength. I use it every 4th watering during the growing season. The goal is to feed without overwhelming the plant.
Watch for new growth at the base—it looks like a small, tight bud. This is your cue that the plant is ready for more energy. If you see no growth after 8 weeks, reduce fertilizer to quarter strength for a few weeks.
⏰ Step 5: Monitor for New Flower Spike Formation
Around 8-12 weeks after pruning, check for new flower spikes emerging from the base. These look like small, tight buds that will eventually grow into next year's blooms. Keep light bright but indirect and maintain consistent watering.
If no spike appears by 12 weeks, increase light slightly or move to a warmer spot (around 70-75°F). Sometimes orchids need a little encouragement to start their cycle again. Patience is key—don't rush the process.
Tips & tricks for perfect orchid recovery after flowering
Took me years to figure out these little details that make all the difference between an orchid that just survives and one that thrives for next season.
Pruning Precision: When you're ready to cut that spent flower spike in Step 1, I can't emphasize enough how important it is to wait until it's completely brown and papery. I've made the mistake of cutting too early when it was still green, and the plant never recovered properly. The key is to look for that dry, crisp texture—it should crumble easily between your fingers. If you see any green at the base, wait another week. This ensures all the plant's energy goes to root recovery rather than maintaining dead tissue.
Light Adjustment Secrets: In Step 2, those 10-15 hours of filtered light are non-negotiable for recovery. I've learned to use sheer curtains to diffuse harsh sunlight, especially on south-facing windows. The goal is to mimic the dappled light orchids love in their natural habitat. Pro tip: Rotate your orchid a quarter turn every few days so all sides get even light exposure. This prevents the plant from leaning toward the light source, which can stress the stem.
Watering Wisdom: The 7-10 day watering schedule in Step 3 might seem long, but trust me—it's crucial. I've seen orchids develop root rot from overzealous watering, and it's heartbreaking to watch. Always water in the morning so any excess can drain completely by evening. One trick I use is to place my orchid on a tray of pebbles with just enough water to touch the bottom—this gives the roots the moisture they need without sitting in water. The pebbles also help maintain humidity around the plant.
Fertilizer Timing: When you start fertilizing again after 4-6 weeks, remember that orchids are light feeders. I've found that using a specialized orchid fertilizer with higher phosphorus content (the middle number) encourages root growth and flower bud formation. The quarter-strength dilution mentioned in Step 4 is perfect—any stronger and you risk burning those delicate roots. I also fertilize only during watering days to avoid salt buildup in the soil.
Pro Tips for Care For Indoor Orchids After Flowering
- Took me years to figure out these little details that make all the difference between an orchid that just survives an...
- Pruning Precision: When you're ready to cut that spent flower spike in Step 1, I can't emphasize enough how important...
- Light Adjustment Secrets: In Step 2, those 10-15 hours of filtered light are non-negotiable for recovery. I've learne...
Frequently asked questions
Got questions about post-flowering orchid care?
You’re not alone! Here are answers to the most common concerns—so you can keep your orchids thriving and ready for their next stunning show.
How do I know when my orchid is done flowering?
Your orchid is finished flowering when the blooms turn yellow, brown, or wilt completely. Some varieties (like Phalaenopsis) may also produce a spike that dries out or shrinks. Wait until all flowers are dead before pruning—cutting too soon can stress the plant.
Should I cut the flower spike after blooming?
Yes! For leafless spikes (like Phalaenopsis), trim just above the second or third node from the bottom. If the spike is green and healthy, wait a few weeks—it might rebloom! For woody spikes (like Cattleyas), cut at the base. Always sterilize scissors with rubbing alcohol first!
Do I need to change my watering routine after flowering?
Not necessarily! Orchids still need 1–2 waterings per week (depending on humidity), but reduce frequency slightly if the plant is dormant (common in cooler months). Always use room-temperature water and avoid soggy roots—let them dry between waterings to prevent rot.
Will my orchid bloom again if I don’t prune the spike?
Maybe! Some orchids (like Phalaenopsis) can rebloom from the same spike if it’s still green and healthy. Others (like Dendrobium) need a resting period after flowering. If you’re unsure, prune partially—leave 2–3 nodes—and monitor for new growth.
Why are my orchid leaves turning yellow after flowering?
Yellow leaves are often a sign of overwatering or nutrient deficiency. Check the roots—if they’re mushy or black, reduce watering. If roots look healthy but leaves yellow, flush the soil with water to remove salt buildup and repot if needed. A balanced orchid fertilizer (20-20-20) every 4–6 weeks can also help!
How can I encourage my orchid to bloom again?
Orchids need a temperature drop (10–15°F at night) and consistent light (1,000–2,000 foot-candles). If your home lacks natural light, use a grow light 12–14 hours/day. Also, reduce water slightly in winter to mimic dormancy—this often triggers new spikes!
Wrapping up and next steps
Caring for your orchids after they bloom is all about patience, consistency, and a little extra love—and you’ve got this! 🌱 By pruning wisely, adjusting light exposure, and keeping an eye on hydration, you’re setting the stage for stunning future blooms.
Remember, every orchid has its own rhythm, so trust the process and celebrate small victories, like new growth or bud formation.
Ready to take your orchid care to the next level? Start a care journal to track your plant’s progress, or explore advanced techniques like remounting or fertilizing schedules. Your green thumb is growing—keep nurturing it!