
Propagation
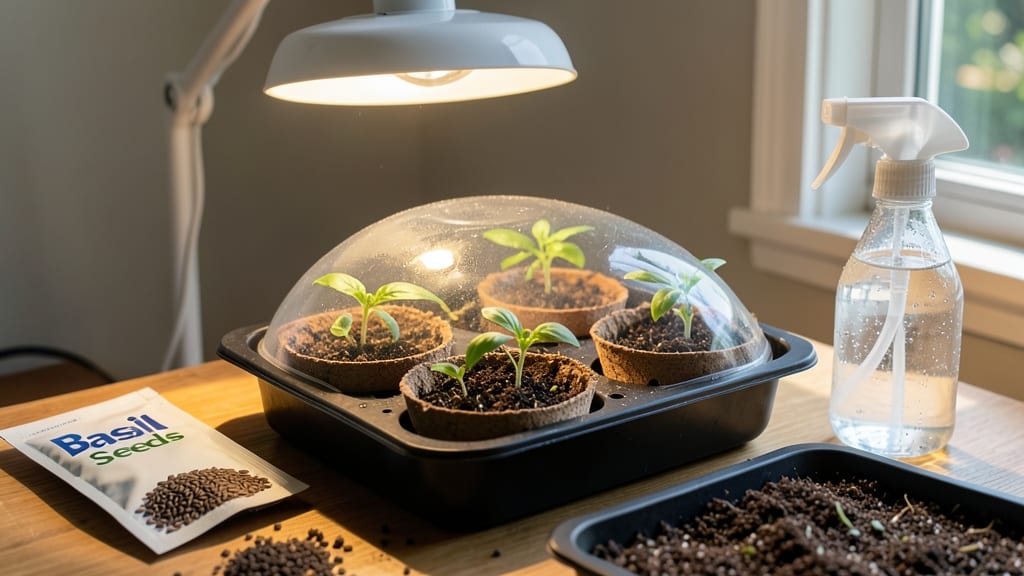
Growing basil from seed indoors turns your kitchen into a fragrant herb factory—no sunny windowsill required. 🌱 Last winter, I grew enough basil in my basement to supply pesto all year, and the secret isn't complicated: a warm spot, a little patience, and the right setup.
Most people assume basil needs bright light, but with the right grow lights, you can start seeds strong indoors before transplanting outside later.
The magic happens in just 4 weeks, though germination takes about 7-14 days if you keep the soil warm. You'll need a shallow container, seed-starting mix, and a grow light (or a very sunny window).
The key is keeping the soil consistently moist—not soggy—and giving seedlings enough air circulation to prevent mold. I use a spray bottle for watering because it keeps the soil evenly damp without disturbing the tiny seeds.
By week 4, you'll be pinching off the top leaves to encourage bushier growth, and the scent alone will make your kitchen smell like a Mediterranean summer. The plants stay productive for months, and you'll never buy wilted basil from the grocery store again.
Plus, you can grow varieties like Genovese or Thai basil that disappear from stores after spring.
This method works for any indoor space—basements, bathrooms with a window, or even a sunny closet. The only real challenge is keeping the seedlings from getting leggy, but a simple grow light fix solves that. Let's get those seeds started!
📚 In This Guide
- What you need
- Instructions
- Tips and common mistakes
- Wrapping up and next steps
What you need
- ● Basil seeds: 1 packet (50-100 seeds) (look for Genovese or Sweet Basil for best flavor).
- ● Seed-starting trays or small pots: 4-6 (2-3" deep, with drainage holes).
- ● Seed-starting mix: 1 small bag (1-2 quarts) (sterile, lightweight, and peat-based or coco-coir blend).
- ● Grow lights or LED bulbs: 1-2 (full-spectrum, 12-16 watts per tray, or a 1000-lumen LED bulb for small setups).
- ● Spray bottle: 1 (for gentle watering).
- ● Plastic wrap or humidity dome: 1 (to retain moisture).
- ○ Small fan (optional but helpful): 1 (for circulation, prevents damping-off).
- ● Fertilizer (balanced or organic): 1 small bottle (5-10-5 or fish emulsion, diluted to half-strength).
- ● A warm spot (70-75°F) for germination (a sunny windowsill or heated mat works).
- ● Access to water (room-temperature, filtered if possible).
- ● Patience! Basil seeds take 7-14 days to sprout.
Step-by-Step instructions for growing basil from seed indoors
Grow lush, flavorful basil indoors in just four weeks—no sunny windowsill required.
🌱 Step 1: Prepare Containers and Seed Starting Mix
Fill 4-inch diameter pots with a sterile seed-starting mix (not garden soil). Basil seeds are tiny, so I use a shallow tray or small pots to keep them contained. Moisten the mix with warm water until damp but not soggy—think of a wrung-out sponge. Press the soil down lightly so it's firm but not compacted.
Here's the thing—basil seeds need light to germinate, so don't bury them deep. Sprinkle them on the surface, spacing them about ¼ inch apart. A gentle mist with a spray bottle keeps them in place without burying them. Cover the tray with plastic wrap or a humidity dome to trap warmth and moisture.
💧 Step 2: Provide Warmth and Moisture for Germination
Place the tray in a warm spot, ideally 70-75°F. A seedling heat mat works wonders if you have one, but a sunny windowsill or even the top of your fridge will do in a pinch. Basil seeds typically sprout in 7-14 days, but don't be surprised if it takes longer—patience is key.
Check daily for moisture. The plastic wrap keeps humidity high, but condensation can drown seeds if left unchecked. Remove the cover for 10 minutes every other day to prevent mold. Once you see green sprouts, remove the cover completely and move the seedlings to a bright spot.
☀️ Step 3: Move to Grow Lights for Strong Growth
Basil needs 12-14 hours of light daily, and natural light won't cut it. Set up a grow light (LED or fluorescent) about 2-3 inches above the seedlings. Raise it as they grow to keep the light just above the leaves. You'll notice leggy seedlings if the light is too far away—thin, stretched stems with pale leaves.
Water gently at the base when the top inch of soil feels dry. Avoid wetting the leaves to prevent fungal diseases. I like to use a spray bottle for this step—it gives me control and keeps the soil evenly moist without overwatering.
✂️ Step 4: Thin and Prune for Bushier Plants
Once seedlings have 2-3 sets of true leaves (not the initial seed leaves), thin them to the strongest one per pot. Use scissors to snip the weaker stems at the base—this prevents competition for nutrients. Basil grows best when pruned, so pinch off the top set of leaves when the plant reaches 6 inches tall.
This encourages bushier growth and more flavorful leaves. Real talk: Don't skip pruning. Unpruned basil grows tall and leggy with fewer leaves, and the flavor suffers. After pruning, water deeply to help the plant recover.
🪴 Step 5: Transplant and Maintain for a Continuous Harvest
When seedlings are 4-6 inches tall and have 4-5 sets of leaves, transplant them into larger pots (at least 6 inches deep) if needed. Use the same potting mix and ensure the pots have drainage holes. Water thoroughly after transplanting to help the roots settle.
Keep the basil in bright light and water when the top inch of soil is dry. Harvest leaves regularly by pinching off the top sets—this keeps the plant producing new growth. With proper care, you'll have fresh basil in just four weeks, ready to use in your favorite recipes.
Tips & tricks for perfect indoor basil growth
Took me a while to figure these out, so here goes—these tricks will help you avoid the most common pitfalls when growing basil indoors.
Light Positioning: In Step 3, when setting up your grow lights, position them just above the seedlings—not directly touching the leaves. Basil grows toward light, so if you notice seedlings stretching upward with pale stems, they're reaching for more light. Adjust the height every few days as they grow to keep the light source just above the top leaves.
Germination Boost: For Step 2, if your kitchen stays cooler than 70-75°F, place the seed tray on top of your fridge or near a warm appliance (like a microwave) to maintain consistent warmth. Basil seeds need this warmth to germinate reliably. I've seen germination times double when the environment was too cool—don't let that happen to you!
Pruning Timing: In Step 4, when pinching off the top leaves at 6 inches tall, make sure to cut just above a leaf node (where leaves grow out). This encourages new growth from that node, creating a bushier plant. I used to cut too high and end up with bare stems—now I always look for that little bump where new leaves can grow.
Transplanting Hack: For Step 5, if you're transplanting to larger pots, water the seedlings thoroughly the day before transplanting. This helps reduce transplant shock by keeping roots hydrated during the move. Also, handle the seedlings by their leaves rather than the stems to avoid damaging the delicate roots.
Pro Tips for Grow Basil From Seed Indoors
- Took me a while to figure these out, so here goes—these tricks will help you avoid the most common pitfalls when grow...
- Light Positioning: In Step 3, when setting up your grow lights, position them just above the seedlings—not directly t...
- Germination Boost: For Step 2, if your kitchen stays cooler than 70-75°F, place the seed tray on top of your fridge o...
Frequently asked questions
Got questions about growing basil from seed indoors? You’re not alone—here are answers to the most common ones to help you succeed!
How long does it take for basil seeds to germinate indoors?
Basil seeds typically germinate in 7–14 days indoors, depending on warmth (70–80°F) and moisture. Keep the soil consistently damp (not soggy) and cover the tray with plastic wrap or a humidity dome to speed things up. Patience is key—don’t disturb the soil until sprouts appear!
Can I grow basil indoors without a grow light?
Yes, but expect slower growth and smaller leaves. Place your basil near a south-facing window (6+ hours of sunlight daily) or supplement with a full-spectrum LED grow light 12–16 hours/day. Without light, seedlings may stretch (leggy) or fail to thrive. A sunny windowsill works temporarily, but a grow light ensures robust plants.
Why are my basil seedlings dying or turning yellow?
Yellowing leaves or wilting often signal overwatering, underwatering, or poor drainage. Check the soil—it should feel like a damp sponge, not muddy. Ensure pots have drainage holes and avoid cold drafts (basil hates temps below 50°F). If pests like aphids appear, spray with soapy water or neem oil. Prevention tip: Use sterile soil and avoid overcrowding seedlings.
How do I harvest basil without killing the plant?
Pinch off the top sets of leaves (just above a pair of leaves) to encourage bushier growth. Avoid cutting more than 1/3 of the plant at once. For continuous harvests, trim stems regularly—this promotes new growth and keeps basil flavorful. Pro tip: Harvest in the morning for the strongest flavor!
Can I reuse basil soil for another batch of seeds?
Not ideal! Soil can harbor diseases or pests after one use. For best results, sterilize soil by baking it at 200°F for 30 minutes or replace it entirely. If reusing, mix in fresh potting soil and compost to refresh nutrients. Safety first: Never reuse soil from sickly or pest-ridden plants.
Wrapping up and next steps
Growing basil from seed indoors is a rewarding adventure—even without sunlight! With the right setup, patience, and a little love, you’ll enjoy fresh, fragrant basil in just 4 weeks. Whether you’re a beginner or a seasoned plant parent, this herby harvest is well within reach.
Ready to take the next step? Try experimenting with flavors—add your homegrown basil to pesto, salads, or even cocktails. And if you loved this process, why not explore other indoor herbs like mint or cilantro? Your kitchen (and taste buds) will thank you! 🌱✨