
Container Gardens
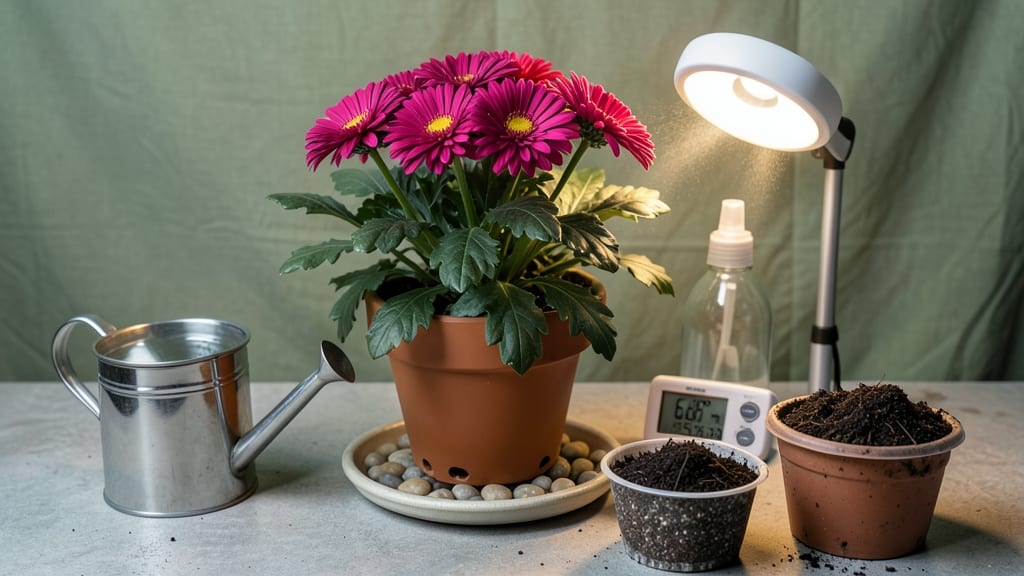
Keeping mums alive indoors isn’t as tricky as it seems—it’s all about light, water, and a little patience. 🌿 I’ve nursed dozens of these fall favorites through winter, and the secret isn’t fancy equipment but understanding what they really need: bright indirect light, well-draining soil, and a watering routine that mimics their outdoor home.
Most people overwater or underlight them, which is why they droop or lose color so fast.
Start with a 6-inch pot and a soil mix that drains fast—mums hate soggy roots. Place them near a south- or west-facing window where they get 4-6 hours of light daily, or use a grow light for 12-14 hours if natural light is weak.
Water only when the top inch of soil feels dry, and always use room-temperature water to avoid shocking the roots. Overwatering is the #1 killer, so let excess water drain completely.
You’ll see the difference in 2-3 weeks: vibrant blooms that last for months, not just a few weeks. The key is consistency—mums are tough once you get their care routine right.
They’ll even rebloom if you deadhead spent flowers and give them a balanced fertilizer every 4-6 weeks. No more sad, wilted mums in January!
Works for any indoor space, from sunrooms to bedrooms. The same rules apply whether you’re growing one pot or a whole windowsill display. Here’s how to troubleshoot common issues like yellowing leaves or leggy stems—so you never lose another mum to indoor neglect.
📚 In This Guide
- What you need
- Instructions
- Tips and common mistakes
- Wrapping up and next steps
What you need
- ● Healthy potted mum – Choose a plant with fresh, vibrant blooms and no signs of pests or disease.
- ● Well-draining potting mix – A blend of peat moss, perlite, and compost (e.g., 60% peat, 20% perlite, 20% compost). Pro tip: Avoid heavy garden soil! 🌡️
- ● 6- to 8-inch container – Ensure it has drainage holes to prevent root rot.
- ● Balanced liquid fertilizer – A 10-10-10 or 20-20-20 NPK ratio (diluted to half-strength).
- ● Grow lights or a sunny windowsill – Mums need 6–8 hours of bright, indirect light daily (south- or west-facing windows are ideal).
- ● Spray bottle – For light misting to maintain humidity (especially in dry indoor air).
- ● Pruning shears – Sharp, clean scissors to trim dead blooms and leggy stems.
- ● Humidity tray – A shallow tray with pebbles and water to boost moisture around the plant.
- ● Thermometer/hygrometer – To monitor ideal temps (60–70°F) and humidity (40–60%).
- ● Slow-release fertilizer pellets – Mix into soil for 3–4 months of nourishment.
- ● Decorative pebbles or moss – For a pretty, functional mulch layer to retain moisture.
Step-by-Step instructions for keeping mums alive indoors
Here's how I've kept my mums thriving through winter—no green thumb required.
🪴 Step 1: Select the Right Containers and Drainage
Choose pots with drainage holes—mums hate soggy roots. I use 6-8 inch pots for each plant since they need room to grow. If your mums came in plastic nursery pots, transfer them immediately to prevent root rot. Add a layer of pebbles or broken pottery at the bottom to improve drainage and prevent clogging.
Here's the thing—mums need good airflow around their roots. If your pot doesn't have holes, drill a few yourself. I always test drainage by filling the pot with water and watching it drain completely within 10-15 minutes. If it takes longer, your pot is too dense or clogged.
☀️ Step 2: Position for Maximum Light
Mums need 6-8 hours of bright, indirect light daily. Place them near a south-facing window or under grow lights if natural light is limited. I notice my mums start to stretch and lose color when they're not getting enough light—this is called "etiolation," and it's a sure sign they need more brightness.
Rotate the pots quarter-turn weekly so all sides get even light exposure. You'll see the leaves grow more evenly, and the stems stay sturdy. If you only have a north-facing window, supplement with a full-spectrum LED grow light kept 6-12 inches above the plants for 12-14 hours daily.
💧 Step 3: Water with Precision
Water when the top inch of soil feels dry to the touch. I use the finger test—stick my index finger into the soil up to the second knuckle. If it's dry, it's time to water. Overwatering is the #1 killer of indoor mums, so I always let excess water drain completely before placing the pot back in its saucer.
Use room-temperature water to avoid shocking the roots. I like to water deeply until it runs out the drainage holes, then dump any collected water from the saucer after 10 minutes. This prevents root rot while keeping the soil consistently moist but never waterlogged.
✂️ Step 4: Prune and Fertilize for Longevity
After the first flush of blooms fades, cut back the spent stems to just above a set of leaves using clean, sharp scissors. This encourages new growth and prevents the plant from wasting energy on dying flowers. I also remove any yellow or brown leaves immediately—they drain the plant and attract pests.
Feed your mums with a balanced liquid fertilizer (10-10-10 or 20-20-20) every 4-6 weeks during the growing season. I dilute it to half-strength to avoid burning the roots. In winter, cut back to once every 8-12 weeks since growth slows naturally. Real talk: I learned the hard way that over-fertilizing in winter leads to leggy, weak stems.
🌱 Step 5: Adjust Care for Seasonal Changes
In summer, mums love humidity—mist them lightly 2-3 times weekly or place the pots on a tray of pebbles filled with water. I also move them outside for acclimation if temperatures stay above 50°F at night. Start with 2-3 hours daily and gradually increase to full sun exposure over 1-2 weeks. This prevents shock and encourages stronger growth.
In winter, reduce watering slightly since growth slows. Keep them in a cool room (60-65°F) if possible—heat vents dry out the air and stress the plants. If you see buds forming, it's a good sign! Just avoid sudden temperature swings, which can cause buds to drop before opening.
Tips & tricks for perfect indoor mum care
These simple yet game-changing strategies will help you maintain vibrant, blooming mums all year long without the guesswork.
The Drainage Test: After adding your pebbles or broken pottery layer in Step 1, I recommend doing a quick test before planting. Fill the pot with water and time how long it takes to drain completely—it should be within those 10-15 minutes we talked about. If it drains too slowly, your pot material might be too dense. Terracotta pots are ideal because they're porous and allow for better airflow to the roots.
Light Positioning Pro Tip: When placing your mums near a window in Step 2, notice how the light shifts throughout the day. Mums need that 6-8 hours of bright, indirect light, but too much direct sunlight can scorch their leaves. I like to position them about 12-18 inches away from the glass—close enough for good light but not so close they get sunburned. Rotate them weekly as instructed, but also check for any shadows cast by nearby objects that might block light.
Fertilizer Timing Strategy: The 4-6 week feeding schedule in Step 4 works perfectly, but here's what I've learned about the timing: always fertilize in the morning. This gives the roots time to absorb nutrients before the plant goes into its nighttime rest cycle. I also avoid fertilizing when the soil is dry—always water first, then feed. This prevents root burn, especially when using concentrated fertilizers.
Seasonal Transition Hack: When moving your mums outside for acclimation in summer (Step 5), I suggest starting with the 2-3 hours daily in the morning rather than afternoon. Morning light is gentler and helps prevent heat stress. Gradually increase their time outside by 1 hour increments every 2-3 days—this slower pace gives their foliage time to adjust to the stronger sunlight without shocking the plant.
Pro Tips for Keep Mums Alive Indoors
- These simple yet game-changing strategies will help you maintain vibrant, blooming mums all year long without the gue...
- The Drainage Test: After adding your pebbles or broken pottery layer in Step 1, I recommend doing a quick test before...
- Light Positioning Pro Tip: When placing your mums near a window in Step 2, notice how the light shifts throughout the...
Frequently asked questions
How often should I water indoor mums?
Water your mums when the top inch of soil feels dry—usually every 5-7 days, but adjust for humidity. Overwatering is the #1 killer! Use well-draining pots and saucers to prevent soggy roots. Pro tip: Stick your finger in the soil to check moisture levels—it’s the foolproof way!
Can I keep mums alive indoors all winter?
Yes! Mums thrive indoors year-round with bright, indirect light (like a south-facing window) and cooler temps (60-65°F). They’ll go dormant in winter—reduce watering and fertilizing, but don’t let soil dry out completely. Bonus: A grow light can save them if natural light is lacking.
Why are my mums drooping or losing leaves?
Drooping often means overwatering or underwatering. Check soil moisture first! Yellow leaves = too much water; crispy edges = too little. Brown spots? That’s likely fluoride sensitivity—use filtered water or rainwater. Move them away from heat sources (like vents) too!
What’s the best alternative if mums die indoors?
Try gerbera daisies, calibrachoa, or dusty miller—they’re low-maintenance and love indoor conditions! For long-lasting blooms, African violets or orchids are great picks. Just ensure good drainage and moderate light. Fun fact: Some herbs (like basil) even thrive indoors with similar care!
How long can mums live as houseplants?
With proper care, mums can live 2-5 years indoors! Prune dead blooms, rotate pots for even light, and fertilize lightly (every 4-6 weeks in spring/summer). Revitalize them by trimming leggy stems in early spring. Patience pays off!
Wrapping up and next steps
Keeping mums alive indoors is totally doable with the right care—light, water, and a cozy spot are your best friends! 🌱 By mimicking their outdoor habitat, you’ll enjoy vibrant blooms all year long. Start small, stay consistent, and don’t hesitate to troubleshoot if needed.
Ready to give it a try? Pick a pot, grab your mums, and follow the steps above. Your indoor garden adventure begins now—happy growing! 🌸