
Propagation
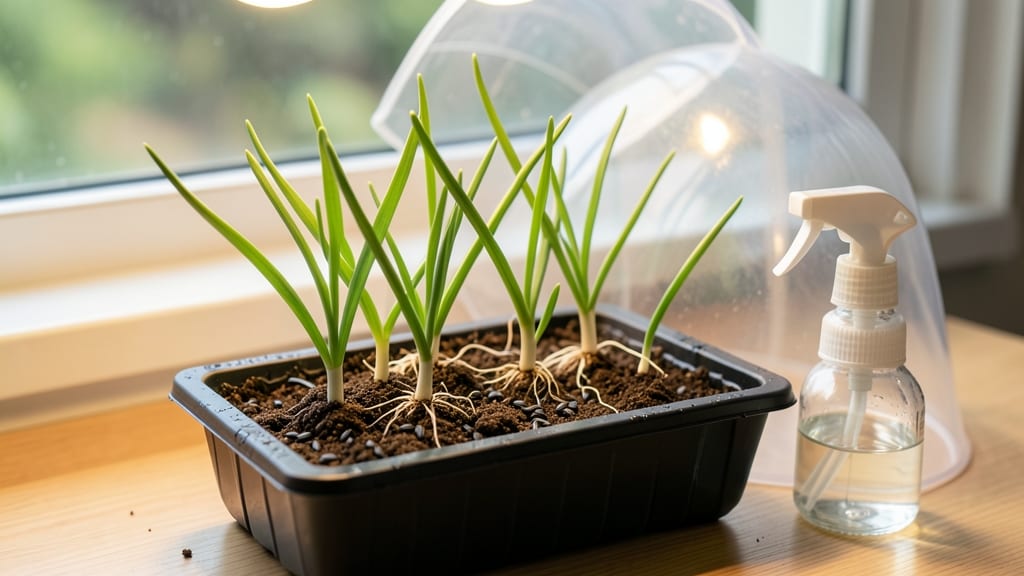
Growing onions from seeds indoors lets you start harvests months before store-bought sets arrive—and my first batch last winter produced sweeter, sturdier bulbs than anything I'd ever bought. 🌱 The secret is patience: onions take time, but the payoff is worth it when you're snipping fresh green onions or harvesting full bulbs in early summer.
You'll need just a few basics: a sunny windowsill or grow light, small seed-starting trays, well-draining seed-starting mix, and a spray bottle for gentle watering. Onion seeds are tiny, so don't worry if germination feels slow—it can take 10-20 days.
The key is keeping soil consistently moist (not soggy) and seedlings warm, around 60-70°F, until they're ready to transplant.
By the time you're ready to move them outdoors, you'll have strong, 6-inch-tall seedlings with thick green stems. These transplants establish faster and resist pests better than store-bought sets. Even in small spaces, you can grow enough onions for a family's needs—no green thumb required, just consistency.
Whether you're growing for green onions or full bulbs, indoor starts give you control over the growing conditions. The first harvests will be ready in just 8-12 weeks after transplanting, and you'll learn how to time your plantings for continuous harvests all season long. Let's get those seeds going!
📚 In This Guide
- What you need
- Instructions
- Tips and common mistakes
- Wrapping up and next steps
What you need
- ● Onion seeds: Choose a variety suited for indoor growing (e.g., Allium cepa or Allium fistulosum). A small packet (around 100-200 seeds) is plenty for a starter batch.
- ● Seed-starting trays or pots: Use 2-3 inch deep containers with drainage holes (4-6 cells per tray or small pots). Biodegradable pots work too!
- ● Seed-starting mix: A lightweight, sterile mix (like a 50/50 blend of peat moss and perlite or a commercial seed-starting soil). Avoid garden soil—it’s too dense!
- ● Grow lights or a sunny windowsill: Onions need 12-16 hours of light daily. A full-spectrum LED grow light (or a south-facing window) works best.
- ● Misting bottle or spray nozzle: For gentle watering to keep seeds moist without disturbing them.
- ● Plastic wrap or humidity dome: Helps retain moisture until germination (usually 7-14 days).
- ○ Fertilizer (optional but helpful): A balanced, water-soluble fertilizer (5-10-5 or 10-10-10) diluted to half-strength for seedlings.
- ● Heating mat: Speeds up germination if your space is cool (ideal temp: 65-75°F).
- ● pH testing kit: Onions prefer slightly acidic soil (pH 6.0-7.0). Adjust with lime or sulfur if needed.
- ● Labels & markers: Track varieties and planting dates—especially useful if growing multiple types!
- ● Small fans: Encourages stronger stems by simulating airflow (prevents leggy seedlings).
- ● Transplanting tools: Tweezers or a small spoon for delicate seedling transfers later on.
Step-by-step instructions for growing onions from seeds indoors
Here’s how to turn tiny onion seeds into sturdy starts ready for transplanting—no green thumb required.
🌱 Step 1: Prepare Your Containers and Soil
Fill small seed-starting trays or individual pots with a sterile seed-starting mix—never garden soil, which can harbor diseases. Onion seeds need loose, well-draining soil to prevent rot. I like to mix in a little perlite (about 10% of the total volume) to improve aeration. Moisten the mix until it feels like a damp sponge—squeeze it gently, and a few droplets should form, but it shouldn’t drip.
Press the soil down lightly to remove air pockets, then use a pencil or your finger to make ¼-inch-deep holes, spaced about ½ inch apart. Onion seeds are tiny, so I tap the seed packet gently to release just one seed at a time into each hole. Planting too many seeds in a single hole leads to weak, crowded seedlings later.
💧 Step 2: Sow Seeds and Create Ideal Germination Conditions
Cover the seeds with a thin layer of soil—just enough to hide them, but don’t bury them too deep. Onion seeds need light to germinate, so a light covering (about ⅛ inch) is all they need. Mist the soil with a spray bottle until it’s evenly damp, but avoid soaking it. I place a clear plastic dome or wrap a plastic bag loosely over the tray to trap moisture and warmth.
Onion seeds germinate best in warmth (70-75°F). If your home runs cooler, place the tray on a seedling heat mat or in a warm spot like the top of the fridge. Germination takes 10-21 days—be patient, especially if your home is cooler. Once you see green shoots, remove the dome immediately to prevent mold and leggy growth.
☀️ Step 3: Provide Light and Thin Seedlings
Onion seedlings need bright light (14-16 hours daily) to grow strong. A south-facing window works, but most homes don’t have enough natural light, so I use a grow light (LED or fluorescent) placed 2-3 inches above the seedlings. Keep the light on a timer to mimic daylight. If seedlings stretch toward the light or look pale, they’re not getting enough intensity—move the light closer.
When seedlings have 2-3 true leaves (ignore the first tiny leaves—they’re not true leaves), it’s time to thin. Use scissors to snip the weakest seedlings at soil level, leaving the strongest one in each cell. This prevents overcrowding and gives remaining plants room to grow. Water gently after thinning to settle the soil.
🌿 Step 4: Harden Off and Transplant Outdoors
About 4-6 weeks after germination, when seedlings are 4-5 inches tall and have 4-5 true leaves, they’re ready for the great outdoors. Start hardening off by placing them outside in a sheltered spot for 1-2 hours the first day, gradually increasing time over 7-10 days. This helps them adjust to wind, sun, and temperature swings.
Transplant on a cool, overcast day to reduce stress. Space seedlings 4-6 inches apart in well-draining soil. Water deeply after planting to help roots establish. If you’re growing in containers, use pots that are at least 6 inches deep—onions need room to develop bulbs. Mulch around the base to retain moisture and suppress weeds.
⏰ Step 5: Maintain and Harvest Your Onions
Keep the soil evenly moist but not soggy—onions are drought-tolerant once established, but they need consistent water during bulb formation. Fertilize lightly with a balanced organic fertilizer every 4-6 weeks to encourage strong growth. If leaves start yellowing, it’s often a sign of too much nitrogen—switch to a low-nitrogen feed.
Harvest when tops yellow and flop over, usually 100-120 days after transplanting. Pull onions gently, then let them dry in a shady, well-ventilated spot for 1-2 weeks. Once dry, trim the tops and store in a cool, dark place for long-term use. You’ll have fresh onions year-round, straight from your tiny indoor starts!
Tips & tricks for growing onions from seeds indoors
Here's what nobody tells you about nurturing those fragile onion seedlings into robust plants.
Soil Mix Secrets: I've found that mixing in 10% perlite to your sterile seed-starting mix makes all the difference. This improves drainage and prevents that dreaded seed rot. Another trick: press the soil down lightly after planting to eliminate air pockets—this creates better seed-to-soil contact for consistent germination. The ¼-inch depth for planting is crucial, but don't pack the soil too tightly around the seeds.
Germination Game-Changer: Onion seeds need that perfect balance of moisture and warmth. After sowing, I place a clear plastic dome over my trays but leave it slightly ajar to allow for airflow. The 70-75°F temperature range is non-negotiable—if your home runs cooler, try the top of your fridge or a seedling heat mat. And here's the kicker: once those first green shoots appear, remove the dome immediately to prevent mold and leggy growth. I've seen seedlings go from perfect to pitiful in just 24 hours if left under the dome too long.
Lighting Strategy: That 14-16 hours daily of bright light requirement is where most beginners struggle. I've learned to position my grow light just 2-3 inches above the seedlings—closer than most guides suggest. Watch for seedlings stretching toward the light (a sign of insufficient intensity) and adjust accordingly. Pro tip: use a timer for your grow light to mimic natural daylight cycles automatically. This consistency is what transforms weak, spindly seedlings into sturdy plants.
Thinning Technique: When it's time to thin to 2-3 true leaves, I use clean scissors to snip at soil level rather than pulling. This prevents disturbing the roots of the remaining seedlings. After thinning, I give the soil a gentle watering to help settle it around the remaining plants. The key is patience—don't rush this step, as crowded seedlings compete for nutrients and light, leading to weaker plants overall.
Pro Tips for Grow Onions From Seeds Indoors
- Here's what nobody tells you about nurturing those fragile onion seedlings into robust plants.
- Soil Mix Secrets: I've found that mixing in 10% perlite to your sterile seed-starting mix makes all the difference. T...
- Germination Game-Changer: Onion seeds need that perfect balance of moisture and warmth. After sowing, I place a clear...
Frequently asked questions
Got questions about growing onions from seeds indoors?
You’re not alone! Here are answers to the most common ones to help you grow confidently—no green thumb required.
How long does it take for onion seeds to germinate indoors?
Onion seeds typically sprout in 10–21 days indoors, depending on warmth and moisture. Keep soil consistently moist (not soggy) and maintain temperatures between 60–75°F (15–24°C). Patience is key—some varieties, like shallots, may take longer. Pro tip: Use a heat mat if your home runs cool!
Can I grow onions from seeds indoors year-round?
Yes! Onions thrive indoors under grow lights (12–16 hours/day) or sunny windowsills. However, they need 120–150 days to mature, so start seeds in early spring or late summer for best results. For faster harvests, opt for green onions (scallions), which mature in 60–80 days.
What’s the best soil mix for indoor onion seeds?
Use a light, well-draining potting mix (like a 50/50 blend of peat moss and perlite) to prevent rot. Avoid garden soil—it’s too dense and may harbor pests. Add a slow-release fertilizer (like 5-10-10) at planting for steady nutrition.
Why are my onion seedlings turning yellow or falling over?
Yellowing or leggy seedlings often signal overcrowding, weak light, or nutrient deficiency. Thin seedlings to 1 inch apart, move them closer to a bright light source, and fertilize lightly with a balanced liquid fertilizer. If stems flop, add a small stake for support.
Can I transplant indoor-grown onions outside later?
Once seedlings have 4–6 true leaves (after 6–8 weeks indoors), they’re ready for outdoor transplanting. Harden them off by placing them outside for 2–3 hours daily before moving permanently. Choose a spot with full sun (6+ hours/day) and well-drained soil for best growth.
What’s the difference between growing onions from seeds vs. sets?
Seeds take longer (120–150 days) but offer more variety (including heirlooms). Onion sets (small bulbs) mature faster (60–90 days) and are easier for beginners. If space is tight, sets win; if you love experimenting, try seeds!
Still stumped? Drop your question in the comments—we’re happy to help!
Wrapping up and next steps
Growing onions from seeds indoors is a rewarding journey that lets you enjoy fresh, homegrown produce year-round—no matter your space or climate! 🌱 With the right setup, patience, and care, you’ll transform tiny seeds into thriving green onions or robust bulbs.
Whether you’re a beginner or a seasoned gardener, this method opens doors to flavorful, pesticide-free harvests straight from your windowsill or balcony.
Ready to take the next step? Start by experimenting with just one tray of seeds—track your progress, tweak conditions as needed, and soon, you’ll be confident enough to scale up. Share your green thumb victories with fellow gardeners, and don’t forget to save your seeds for future plantings. Happy growing—your kitchen (and taste buds) will thank you!