
Container Gardens
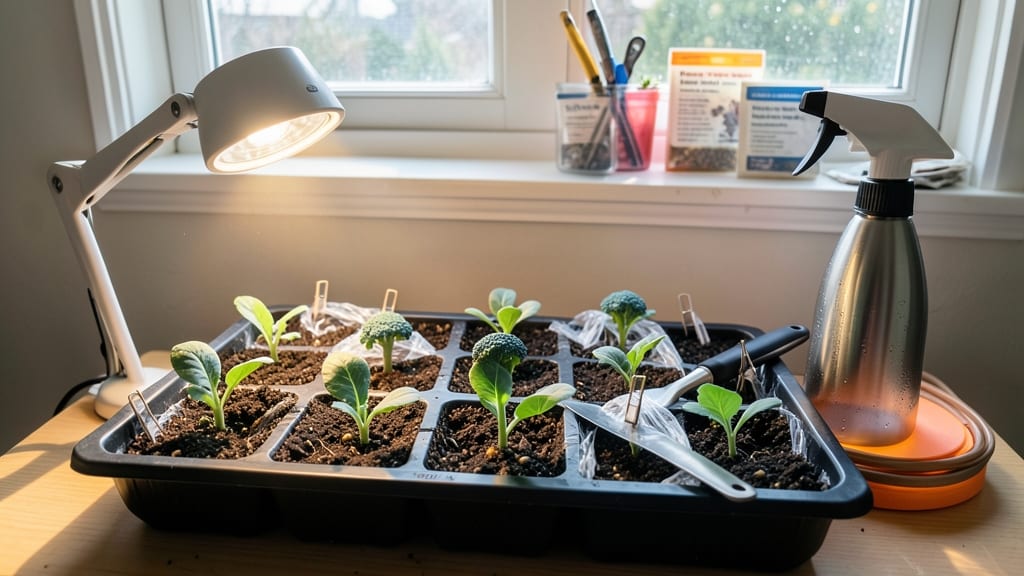
Starting broccoli indoors lets you cheat the season and harvest compact, flavor-packed heads before your neighbors even think about planting. 🌱 I’ve grown broccoli this way for three years now, and the difference in size and taste—compared to store-bought or late-season plants—is night and day.
The key? Timing, light, and a little patience with those finicky seedlings.
You’ll need just three supplies: seed-starting mix (not garden soil), small pots (2-3 inches deep), and a grow light or sunny windowsill. Plant seeds ¼ inch deep, two per pot, and keep the soil damp but never soggy.
Broccoli hates damp feet—it’s the #1 reason seedlings fail. Within 7-10 days, you’ll see those first tiny leaves, and that’s when the real work begins: giving them 12-16 hours of light daily to prevent leggy, weak stems.
By transplanting outdoors 4-6 weeks after germination (when soil warms to 50°F+), your plants will be stocky and ready to bolt into full heads. The payoff? Harvests in half the time of direct-sown broccoli, with heads that stay tight and sweet instead of bitter.
Plus, you dodge cabbage worms before they even show up—because your plants are already too big for them to bother.
This method works for any broccoli variety, from classic Calabrese to purple sprouting types. The only rule? Start seeds 8-10 weeks before your last frost date, or you’ll miss the sweet spot.
Trust me, your first harvest will make you a convert—especially when you’re snipping those dark green, tree-like heads while others are still waiting for theirs to mature.
📚 In This Guide
- What you need
- Instructions
- Tips and common mistakes
- Wrapping up and next steps
What you need
- ● Seeds: 3–5 broccoli seeds (choose compact varieties like ‘Calabrese’ or ‘De Cicco’ for indoor growing).
- ● Seed trays or small pots: 4–6 (3–4 inches deep) with drainage holes.
- ● Seed-starting mix: 1 bag (sterilized, lightweight potting soil blend).
- ● Grow lights: 1–2 LED or fluorescent lights (12–16 inches above seedlings).
- ● Watering can or spray bottle: With a fine mist nozzle.
- ○ Humidity dome or plastic wrap: (Optional but helpful for moisture retention).
- ● Fertilizer: Balanced liquid fertilizer (5-5-5 or 10-10-10, diluted to half-strength).
- ● Heating mat (for faster germination, especially in cooler climates).
- ● pH test kit (ideal soil pH: 6.0–7.0).
- ● Growing medium like coconut coir (for moisture control).
- ● Plant labels (to track varieties and dates).
Step-by-Step instructions for starting broccoli indoors
Here's how I grow sturdy, early broccoli plants that stay compact and productive—no floppy stems or weak heads.
🌱 Step 1: Prepare Seed Trays and Soil Mix
Use 4-inch deep seed trays with drainage holes and fill them with a sterile seed-starting mix—never garden soil, which compacts and smothers roots. I mix my own blend of 50% peat moss, 30% perlite, and 20% vermiculite for perfect drainage and aeration. Moisten the mix until it holds together when squeezed but doesn’t drip water.
Press the soil down lightly to remove air pockets, then smooth the surface with your fingers. This ensures even contact between seeds and soil, which broccoli seeds need to germinate reliably. I like to tap the tray gently on the table to settle everything without compacting it—think fluffy, not packed.
🌱 Step 2: Sow Seeds at the Right Depth
Broccoli seeds are tiny, so I use a toothpick to make small holes ¼ inch deep—about the diameter of the seed itself. Place 2-3 seeds per cell since germination rates vary, and you’ll need to thin later. Cover them lightly with a sprinkle of additional soil mix, just enough to hide them without burying.
Mist the surface with a spray bottle until evenly moist, but avoid soaking the soil. Overwatering now can cause seeds to rot before they sprout. I label each tray with the variety and date—after a week of identical green sprouts, you’ll forget which is which!
💧 Step 3: Provide Warmth and Humidity for Germination
Broccoli seeds germinate best at 70-75°F, so I place the trays on a seedling heat mat set to 75°F. Without one, germination can take 10-14 days instead of 5-7 days. Cover the trays with a clear plastic dome or plastic wrap to retain moisture and warmth—just don’t let condensation drip onto the seeds.
Check daily for moisture, but resist the urge to water. The dome traps enough humidity that the soil stays consistently damp. Once 50% of seeds have sprouted, remove the dome immediately—trapped moisture invites damping-off, a fungal disease that collapses seedlings overnight.
☀️ Step 4: Move to Bright, Indirect Light
The instant seedlings emerge, they need 14-16 hours of light daily. A south-facing window rarely provides enough intensity, so I use a full-spectrum LED grow light positioned 2-4 inches above the plants. Raise it as they grow to maintain that gap—you’ll see leggy growth if it’s too far away.
Strong seedlings have thick stems and deep green leaves spaced closely together. If they stretch toward the light with pale, sparse leaves, your light is too weak or distant. Rotate trays a quarter turn daily so plants grow straight instead of leaning.
✂️ Step 5: Thin and Harden Off for Transplanting
When seedlings show 2-3 true leaves (the second set after the initial cotyledons), thin to one per cell using scissors to snip weak stems at soil level. This prevents competition and gives remaining plants room to grow. Water gently after thinning to settle the soil around the roots.
Two weeks before your last frost date, start hardening off by placing trays outside in a sheltered spot for 1-2 hours the first day. Gradually increase outdoor time by 1 hour daily over 10-14 days, exposing them to more sun and wind. This prepares them for the garden and prevents transplant shock.
Tips & tricks for perfect indoor broccoli starts
Here's what nobody tells you about growing broccoli that actually thrives indoors.
Soil Texture Matters: In Step 1, that "fluffy, not packed" soil mix isn't just preference—it mimics the loose, well-drained conditions broccoli roots crave. I take it a step further by sifting the mix through a fine-mesh screen before filling trays. This removes any remaining clumps that could block root growth. For even better aeration, I sprinkle a thin layer of perlite on top after planting—it helps prevent soil-borne diseases while keeping moisture levels consistent.
Light Intensity Secret: When you're setting up that 14-16 hour light cycle in Step 4, don't just rely on the distance measurement. Test your light's intensity by holding a piece of paper under it—if you can read text through it, your light is too strong. For LED grow lights, I recommend the "two-finger rule": hold your hand between the light and plants. If you can't see your fingers clearly, the light is too close. Adjust until you can see your fingers but not the details of your hand.
Germination Troubleshooting: If you're not seeing sprouts within 7 days at 75°F (Step 3), don't assume they're dead. Broccoli seeds sometimes need a "wake-up call"—try gently pressing them into the soil with a toothpick to break their seed coat. Another trick: place the tray in a warm, dark cabinet for 24 hours before moving to light. The darkness helps trigger germination hormones. And if you see mold instead of sprouts, that's your sign to remove the dome immediately and let the soil dry out slightly before covering again.
Harden Off Like a Pro: The gradual 1-2 hour to 14-day hardening process in Step 5 works wonders, but here's the pro move: start with the shade. Place trays in dappled sunlight or under a sheer curtain for the first 3 days. This prevents sunburn on tender seedlings. I also mist the leaves lightly before each outdoor session—it helps them acclimate to humidity changes. And if you notice leaves curling, that's a sign they're getting too much direct sun too soon.
Pro Tips for Starting Broccoli Indoors
- Here's what nobody tells you about growing broccoli that actually thrives indoors.
- Soil Texture Matters: In Step 1, that "fluffy, not packed" soil mix isn't just preference—it mimics the loose, well-d...
- Light Intensity Secret: When you're setting up that 14-16 hour light cycle in Step 4, don't just rely on the distance...
Frequently asked questions
Got questions about growing broccoli indoors?
You’re not alone! Here are answers to the most common queries to help you ace your indoor broccoli harvest.
When is the best time to start broccoli indoors?
Start broccoli seeds 6–8 weeks before your last frost date for outdoor transplanting. If you’re growing it purely indoors, begin 4–6 weeks before you want to harvest the first heads. Broccoli thrives in cooler weather, so timing is key—avoid starting too early or late in the season.
Can I grow broccoli indoors year-round?
Yes, but with adjustments! Broccoli prefers cool temperatures (50–75°F). Use grow lights (12–16 hours/day) and maintain humidity. In hot climates, opt for fast-maturing varieties like ‘De Cicco’ or ‘Calabrese,’ and harvest quickly to avoid bolting (flowering prematurely).
What’s the best container size for indoor broccoli?
Broccoli needs depth and space. Use containers at least 12–18 inches deep and 12+ inches in diameter per plant (or 18 inches for larger varieties). Shallow pots or crowded setups stunt root growth, leading to smaller heads. Pro tip: Add compost for nutrients and drainage holes to prevent soggy roots!
Why are my indoor broccoli seedlings turning yellow or leggy?
Yellowing leaves often signal overwatering or nutrient deficiency. Leggy seedlings mean lack of light. Fix it by:
- Water only when topsoil is dry (1 inch/week).
- Move seedlings closer to light (grow lights or sunny windowsill).
- Fertilize lightly with a balanced 10-10-10 mix every 2–3 weeks.
How do I know when indoor broccoli is ready to harvest?
Harvest when the main head is 4–6 inches wide and tightly packed florets form a dense cluster. Cut the head 1 inch below the base with a sharp knife. Side shoots (baby broccoli) will form—harvest these 2–3 inches long for continuous yields. Warning: Wait for side shoots to mature; don’t pick them too early!
Wrapping up and next steps
Starting broccoli indoors is a game-changer for gardeners with limited space or cooler climates—it gives you a head start on a nutritious, compact harvest! 🌱 With the right setup, patience, and a little care, you’ll soon be enjoying homegrown broccoli that’s sweeter, fresher, and packed with flavor.
The key is consistency: monitor light, temperature, and moisture while staying flexible as your seedlings grow.
Now that you’re armed with the know-how, take the next step! Grab your supplies, set up your indoor station, and plant those seeds. Before you know it, you’ll be transplanting sturdy seedlings into your garden or containers—ready to thrive under the open sky. Happy growing! 🌟