
Vegetables
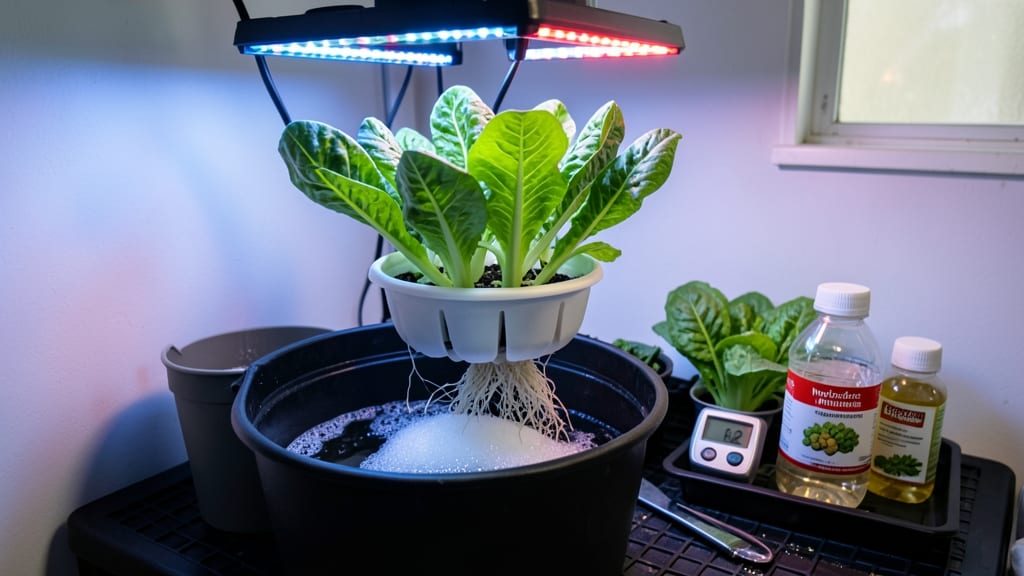
Growing vegetables indoors using indoor hydroponic vegetable gardening used to sound like science fiction—until I turned my basement into a year-round salad bar using hydroponics. 🌱 The secret? No dirt, no weeds, and no waiting for spring.
My first harvest of crisp lettuce and fragrant basil came just 4 weeks after setup, and the system uses 90% less water than soil gardening.
You don’t need fancy equipment to start—just a 5-gallon bucket, some net pots, and a basic nutrient solution. I began with the Kratky method (the simplest system), where plants grow in water with nutrients until they’re ready to harvest.
Herbs like basil and mint thrive in this setup, while leafy greens like spinach and kale grow faster than in soil.
Lighting is the only tricky part, but a basic LED grow light (around $30) does the job—just hang it 6-12 inches above the plants. The biggest mistake beginners make?
Overwatering or ignoring pH levels. Keep the pH between 5.5 and 6.5, and you’ll avoid root rot and nutrient lockout.
This method works in any space—kitchens, closets, or garages—so long as you control temperature (ideal: 65-75°F). By summer, you’ll be harvesting fresh greens, herbs, and even cherry tomatoes without stepping outside. Ready to grow?
📚 In This Guide
- What you need
- Instructions
- Tips and common mistakes
- Wrapping up and next steps
What you need
- ● Hydroponic System: Deep Water Culture (DWC) kit or Kratky method setup (budget-friendly)
- ● Nutrient Film Technique (NFT) system (for advanced growers)
- ● Growing Medium: 5–10 lbs of hydroponic clay pebbles (1–3 mm size, pH-neutral)
- ● Coco coir or rockwool cubes (for seed starting)
- ● Nutrients: Balanced hydroponic nutrient solution (e.g., General Hydroponics Flora Series)
- ● pH testing kit (liquid or digital, 5.5–6.5 range)
- ● pH Up/Down adjusters (citric acid or potassium hydroxide)
- ● Lighting: Full-spectrum LED grow light (e.g., Samsung LM301B or Spider Farmer SF-2000)
- ● Adjustable light stand (12–18 inches above plants)
- ● Water Pump & Air Stone: Submersible water pump (100–200 GPH for small systems)
- ● Air stone + air pump (for oxygenation in DWC systems)
- ● Seeds or Seedlings: Fast-growing hydroponic-friendly veggies (e.g., lettuce, spinach, kale, herbs, cherry tomatoes)
- ● Containers: 5-gallon buckets (for DWC) or net pots (1–3 inch size)
- ● Humidity dome or tray (for seedlings)
- ● Timer for lights (12–16 hours/day)
- ● EC/TDS meter (to monitor nutrient strength)
- ● Grow tent (if space is limited)
- ● Pruning shears + gloves (for maintenance)
Step-by-step instructions for indoor hydroponic vegetable gardening
Here's the foolproof method I use to grow crisp lettuce and peppery greens indoors without sunlight.
🪴 Step 1: Assemble Your Hydroponic System
Start with a 4-plant deep water culture (DWC) system—the simplest hydroponic setup for beginners. Fill the reservoir with 2 gallons of distilled water (tap water contains chlorine that can harm roots). Add 2 tablespoons of hydroponic nutrient solution per gallon, stirring until fully dissolved. The solution should be slightly yellow—this indicates proper concentration.
Place the net pots into their floating raft, ensuring they sit level and don't wobble. I always label each pot with the plant type and date—once you're growing multiple varieties, you'll forget which is which. Position the grow lights 12-18 inches above the plants and plug them in for 14-16 hours daily. This mimics natural daylight cycles and prevents leggy growth.
🌱 Step 2: Prepare and Plant Your Seedlings
Use 4-week-old seedlings (like lettuce, spinach, or microgreens) with 2-3 true leaves—they've already developed strong root systems. Gently remove each seedling from its nursery pot, holding the base of the stem between your thumb and forefinger. Place the roots into the net pots, ensuring they're fully submerged in the water but the stem remains above the surface.
If you're starting from seed, plant them in rockwool cubes and keep them moist until germination. Once sprouts appear, transfer them to the net pots when they reach 1-2 inches tall. The key here is patience—rushing the transplant can break delicate roots. I always check the water level daily and top off with distilled water as needed.
☀️ Step 3: Monitor Light, Nutrients, and pH
Your grow lights should provide 5,000-6,500 Kelvin output—this cool white spectrum is ideal for leafy greens. Adjust the light height as plants grow: 12 inches for seedlings, 18 inches for mature plants. Watch for yellowing leaves—this usually means the pH is off. Test it weekly with a hydroponic pH test kit and adjust to 5.5-6.5 using pH up or down solutions.
Every 7-10 days, drain the reservoir and refill with fresh distilled water and nutrient solution. I like to do this on the same day each week so it becomes a habit. Over time, you'll notice the water turning cloudy—this is normal, but if it gets foul-smelling, flush the system immediately. Keep the room temperature between 65-75°F—hydroponic plants are sensitive to heat fluctuations.
💧 Step 4: Harvest and Maintain Your System
Leafy greens like lettuce and spinach are ready to harvest in 4-6 weeks. Use clean scissors to snip leaves just above a leaf node—this encourages regrowth. For microgreens, harvest when they reach 1-2 inches tall, cutting the entire top. Rinse the plants under cool water to remove any nutrient residue before storing in the fridge.
After harvesting, clean the system thoroughly: empty the reservoir, rinse the net pots, and wipe down the raft with a 10% bleach solution (1 part bleach to 9 parts water). Let everything air dry completely before replanting. I always keep a small bucket nearby to catch any excess water—hydroponic systems are efficient, but spills happen. With proper maintenance, your system will last for years and produce fresh greens year-round.
Tips & tricks for perfect indoor hydroponic vegetable gardening
These game-changing strategies will help you avoid common pitfalls and maximize your indoor harvest—no sunlight required.
Light Spectrum Matters: While the instructions specify 5,000-6,500 Kelvin for leafy greens, I recommend investing in a full-spectrum LED grow light if possible. The extra blue wavelengths (around 400-450nm) promote compact growth and prevent that leggy, stretched look you sometimes see. Position your lights exactly 12 inches from seedlings and adjust as they grow—this 12-18 inch range is your sweet spot for optimal photosynthesis.
Nutrient Solution Precision: That slightly yellow color in your 2 gallons of nutrient solution is your visual cue for proper concentration, but don't eyeball it—use a hydroponic nutrient meter if you have one. Over time, you'll notice the solution turning cloudy, which is normal, but if it smells foul after the 7-10 day refresh cycle, you've got a bacterial issue. Flush the system immediately with plain distilled water to prevent root rot.
Seedling Transplant Timing: When transferring those 1-2 inch seedlings from rockwool cubes, do it during the coolest part of your day (usually early morning) to reduce transplant shock. Gently squeeze the rockwool to release the roots—this helps them slide into the net pots without damage. The key is getting them fully submerged in the nutrient solution while keeping the stem above water, just like the instructions say.
pH Monitoring Hack: Yellowing leaves often signal pH issues, but here's what nobody tells you—test your pH first thing in the morning when the water is coolest. Hydroponic pH solutions are temperature-sensitive, and warm water can throw off your readings. Aim for that 5.5-6.5 range consistently, and always test after adjusting—some pH up/down solutions take 15-20 minutes to fully stabilize.
Pro Tips for Indoor Hydroponic Vegetable Gardening
- These game-changing strategies will help you avoid common pitfalls and maximize your indoor harvest—no sunlight requi...
- Light Spectrum Matters: While the instructions specify 5,000-6,500 Kelvin for leafy greens, I recommend investing in ...
- Nutrient Solution Precision: That slightly yellow color in your 2 gallons of nutrient solution is your visual cue for...
Frequently asked questions
Got questions about indoor hydroponic vegetable gardening? You’re not alone! Here are some of the most common queries—plus straightforward answers to help you grow like a pro.
What vegetables grow best in indoor hydroponic systems?
Leafy greens like lettuce, spinach, and kale thrive in hydroponics, as do herbs (basil, mint, parsley) and compact veggies like cherry tomatoes or peppers. Avoid root crops like carrots or potatoes—they need soil! Start with fast-growing, nutrient-dense options for quick wins.
How long does it take to harvest vegetables in a hydroponic setup?
Timelines vary by plant, but most leafy greens (e.g., lettuce) mature in 3–6 weeks, while herbs like basil take 4–8 weeks. Tomatoes or peppers may need 8–12 weeks. Hydroponics speeds up growth by delivering direct nutrients—no waiting for soil to warm up!
What’s the biggest mistake beginners make with hydroponics?
Overwatering or poor nutrient balance! Hydroponics requires precise water-to-nutrient ratios. Check pH levels (aim for 5.5–6.5) and avoid tap water with chlorine/fluoride. Start with pre-mixed hydroponic nutrients and monitor daily for cloudy water or algae—red flags!
Are hydroponic systems worth the cost for beginners?
Yes—if you factor in savings! While initial setup costs $50–$300 (DIY vs. kits), hydroponics uses 90% less water and grows 2–5x faster than soil. Plus, no pesticides mean fresher, healthier produce. Start small (e.g., a Kratky system) to test the waters!
How do I keep pests and diseases out of my indoor hydroponic garden?
Prevention is key! Use sterile water, clean tools, and avoid overcrowding plants. Introduce beneficial insects (like ladybugs) if pests appear. For mold/mildew, increase airflow with a small fan. Quarantine new plants for a week to catch issues early.
Wrapping up and next steps
Indoor hydroponic vegetable gardening isn’t just a trend—it’s a game-changer for fresh, homegrown produce anytime, anywhere. Whether you’re a busy urbanite, a space-conscious gardener, or someone craving pesticide-free greens, this method delivers fast results with minimal effort. 🌱
Ready to dive in? Start small with a single easy-to-grow plant like lettuce or herbs, then expand as you gain confidence. Your future self—and your taste buds—will thank you!